crwdns2933423:0crwdne2933423:0

Remplacement de l'écran complet du MacBook Pro 13" Touch Bar fin 2016

crwdns2931529:0crwdnd2931529:0crwdnd2931529:0crwdnd2931529:02crwdnd2931529:0crwdne2931529:0

crwdns2935425:06crwdne2935425:0

crwdns2936315:0crwdne2936315:0
crwdns2936317:0crwdne2936317:0
crwdns2931653:06crwdne2931653:0
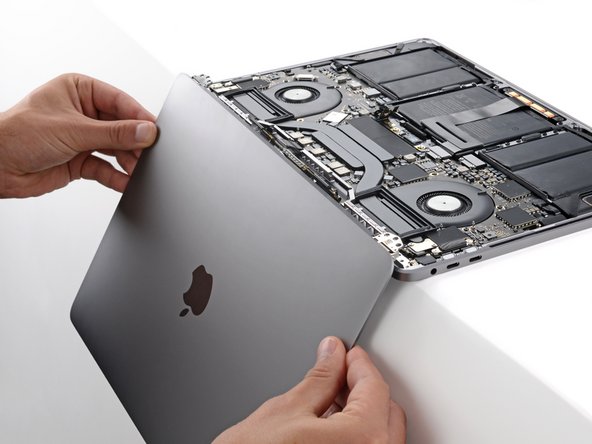
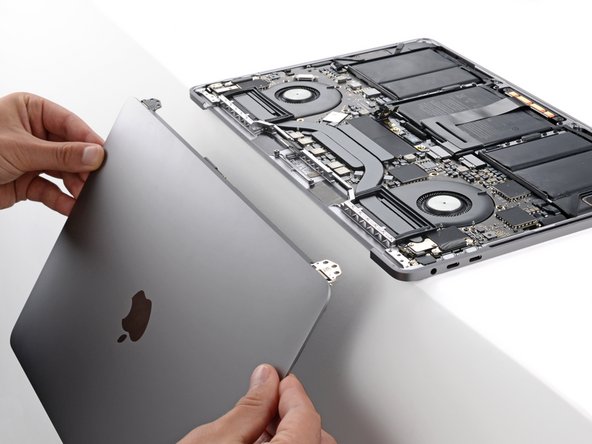
MacBook Pro 13" Touch Bar Late 2016 Display Assembly Replacement, Remove the screen: crwdns2935265:00crwdnd2935265:01crwdnd2935265:03crwdne2935265:0 MacBook Pro 13" Touch Bar Late 2016 Display Assembly Replacement, Remove the screen: crwdns2935265:00crwdnd2935265:02crwdnd2935265:03crwdne2935265:0 MacBook Pro 13" Touch Bar Late 2016 Display Assembly Replacement, Remove the screen: crwdns2935265:00crwdnd2935265:03crwdnd2935265:03crwdne2935265:0
Remove the screen
  • Free the right hinge and remove the screen.

  • During reassembly:

  • Make sure the screen hinges are fully open and guide them into their recesses in the frame.

  • Be very careful not to damage the Touch Bar connector when inserting the left hinge.

  • Partially tighten the six hinge screws.

  • Close your laptop and make sure the screen is properly aligned. If it clicks or snaps, readjust the alignment.

  • Fully tighten the hinge screws.

Dégagez la charnière droite et retirez l'écran.

Pendant le ré-assemblage :

Assurez-vous que les charnières de l'écran soient complètement ouvertes et guidez-les dans leurs emplacements dans le châssis.

Faites très attention à ne pas endommager le connecteur de la Touch Bar lorsque vous insérez la charnière gauche.

Serrez partiellement les six vis des charnières.

Fermez votre ordinateur et assurez-vous que l'écran soit correctement aligné. S'il clique ou bouge, réajustez l'alignement.

Serrez complètement les vis des charnières.

crwdns2944171:0crwdnd2944171:0crwdnd2944171:0crwdnd2944171:0crwdne2944171:0