crwdns2933423:0crwdne2933423:0

Motorola Moto Z Play ディスプレイのインストール方法

crwdns2931529:0crwdnd2931529:0crwdnd2931529:0crwdnd2931529:02crwdnd2931529:0crwdne2931529:0

crwdns2936315:0crwdne2936315:0
crwdns2936323:0crwdne2936323:0
crwdns2931653:07crwdne2931653:0
Motorola Moto Z Play Display Installation: crwdns2935265:00crwdnd2935265:01crwdnd2935265:02crwdne2935265:0 Motorola Moto Z Play Display Installation: crwdns2935265:00crwdnd2935265:02crwdnd2935265:02crwdne2935265:0
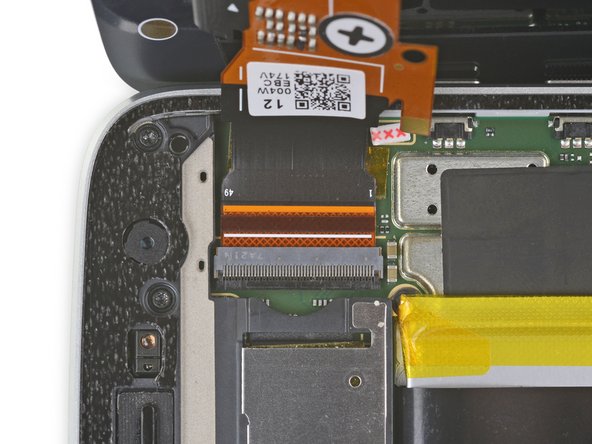
  • Before sealing the display in place, connect the flex cables for the display and fingerprint sensor, and then power your phone on.

  • Test all functions to make sure your repair was successful before sealing up the display.

  • When fully inserted, the white line across each flex cable should be even with the markings on the motherboard on each side of the cable.

  • Do not remove, insert, or adjust the cables while the phone is powered on.

  • The cables can be tricky to align and install. Be sure not to touch the gold contacts on the back, or your finger oils may cause a malfunction. If you do accidentally touch them, wipe them gently with isopropyl alcohol.

ディスプレイを固定する前に、ディスプレイと指紋センサー用のフレックスケーブルを接続させて、デバイスの電源を入れてください。

修理が上手くいったか全ての機能を確認してから、ディスプレイを密封します。

シートを完全に挿入すると、各フレックスケーブル上にできる白いラインは、ケーブル両側上に付けられたマザーボード上の印と合わさるはずです。

デバイスの電源が入っている間は、ケーブルを取り外したり、挿入したり、調整しないでください。

ケーブルのインストールが難しい場合があります。 背面に留められたゴールドの接触部に触れないでください。油脂が付いてしまうと誤作動を引き起こすことがあります。 触れてしまった場合、イソプロピルアルコールで軽く拭いてください。

crwdns2944171:0crwdnd2944171:0crwdnd2944171:0crwdnd2944171:0crwdne2944171:0