crwdns2931529:0crwdnd2931529:0crwdnd2931529:0crwdnd2931529:02crwdnd2931529:0crwdne2931529:0
crwdns2935425:06crwdne2935425:0
crwdns2931653:06crwdne2931653:0


-
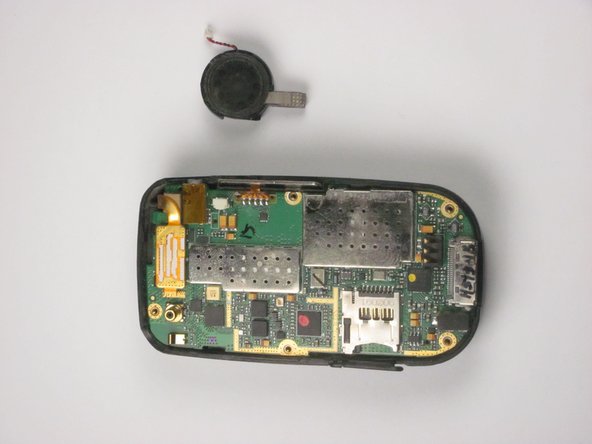
Remove the wire attached to the speaker from the motherboard using tweezers.
| - | [* black] Remove the wire attached to the speaker from the logic board using tweezers. |
|---|---|
| + | [* red] Remove the wire attached to the speaker from the motherboard using [product|IF145-020|tweezers]. |
| + | [* icon_caution] Apply a small amount of force when removing the wire from the motherboard. If you apply a large amount of force, you may rip out the wires and damage the motherboard. |
crwdns2944171:0crwdnd2944171:0crwdnd2944171:0crwdnd2944171:0crwdne2944171:0