crwdns2933423:0crwdne2933423:0

Sostituzione gruppo schermo LCD e digitizer Moto G4

crwdns2931527:0crwdnd2931527:0crwdnd2931527:0crwdnd2931527:0crwdne2931527:0

crwdns2936315:0crwdne2936315:0
crwdns2936321:0crwdne2936321:0
crwdns2931653:011crwdne2931653:0
Moto G4 LCD Screen and Digitizer Assembly Replacement: crwdns2935265:00crwdnd2935265:01crwdnd2935265:02crwdne2935265:0 Moto G4 LCD Screen and Digitizer Assembly Replacement: crwdns2935265:00crwdnd2935265:02crwdnd2935265:02crwdne2935265:0
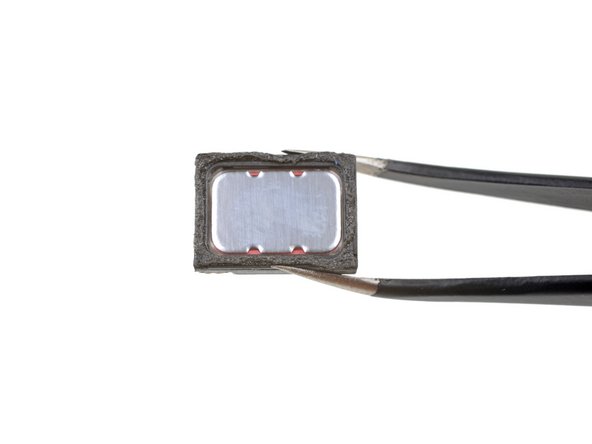
  • Remove the earpiece speaker.

  • Check the condition of the adhesive around the bottom of the earpiece speaker when you reinstall it. A little heat from a hair dryer or iOpener can help soften the adhesive and make it sticky again. Be careful not to touch or damage the surface of the speaker.

  • In some of the previous photos in this guide, the speaker is shown installed incorrectly. During installation, make sure the speaker's two spring contacts are located at the bottom corners, as shown in the first image in this step. Images showing the speaker rotated 180° (with the spring contacts near the top edge of the phone) are incorrect.

Rimuovi l'altoparlante voce.

Controlla le condizioni dell'adesivo attorno al fondo dell'altoparlante voce quando lo rimetterai al suo posto. Un po' di calore da un asciugacapelli o un iOpener può ammorbidire la colla e renderla nuovamente adesiva. Stai attento a non toccare o danneggiare la superficie dell'altoparlante.

In alcune foto precedenti di questa guida, l'altoparlante è installato non correttamente. In fase di installazione, accertati che i due contatti a molla siano negli angoli inferiori, come mostrato nella prima immagine di questo passo. Le immagini con l'altoparlante ruotato di 180° (con i contatti a molla verso il bordo superiore) non sono corrette.

crwdns2944171:0crwdnd2944171:0crwdnd2944171:0crwdnd2944171:0crwdne2944171:0