crwdns2933423:0crwdne2933423:0

Remplacement de l'ensemble écran LCD et vitre tactile du Motorola Moto G4

crwdns2931527:0crwdnd2931527:0crwdnd2931527:0crwdnd2931527:0crwdne2931527:0

crwdns2936315:0crwdne2936315:0
crwdns2936317:0crwdne2936317:0
crwdns2931653:011crwdne2931653:0
Moto G4 LCD Screen and Digitizer Assembly Replacement: crwdns2935265:00crwdnd2935265:01crwdnd2935265:02crwdne2935265:0 Moto G4 LCD Screen and Digitizer Assembly Replacement: crwdns2935265:00crwdnd2935265:02crwdnd2935265:02crwdne2935265:0
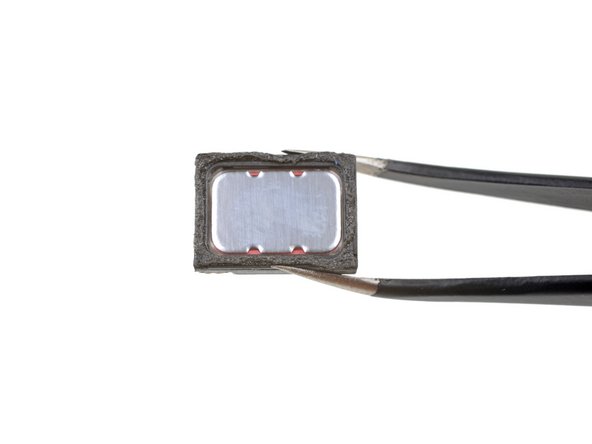
  • Remove the earpiece speaker.

  • Check the condition of the adhesive around the bottom of the earpiece speaker when you reinstall it. A little heat from a hair dryer or iOpener can help soften the adhesive and make it sticky again. Be careful not to touch or damage the surface of the speaker.

  • In some of the previous photos in this guide, the speaker is shown installed incorrectly. During installation, make sure the speaker's two spring contacts are located at the bottom corners, as shown in the first image in this step. Images showing the speaker rotated 180° (with the spring contacts near the top edge of the phone) are incorrect.

Ôtez le haut-parleur interne.

Vérifiez l'état de l'adhésif autour de la zone du haut-parleur interne quand vous le remontez. Vous pouvez le faire un peu chauffer avec un sèche-cheveux ou un iOpener pour qu'il ramollisse et adhère mieux. Veillez à ni toucher ni endommager la surface du haut-parleur.

Quelques-unes des photos précédentes du tutoriel montrent un haut-parleur mal monté. Lors du remontage, assurez-vous que les deux contacts à ressort se trouvent sur les coins inférieurs, comme illustré sur la première image de cette étape. Les photos qui représentent un haut-parleur à l'envers (avec les contacts à ressort en haut) sont incorrectes.

crwdns2944171:0crwdnd2944171:0crwdnd2944171:0crwdnd2944171:0crwdne2944171:0