crwdns2933423:0crwdne2933423:0

Reemplazo del ensamblaje de digitalizador y pantalla LCD de Moto G4

crwdns2931527:0crwdnd2931527:0crwdnd2931527:0crwdnd2931527:0crwdne2931527:0

crwdns2936315:0crwdne2936315:0
crwdns2936331:0crwdne2936331:0
crwdns2931653:011crwdne2931653:0
Moto G4 LCD Screen and Digitizer Assembly Replacement: crwdns2935265:00crwdnd2935265:01crwdnd2935265:02crwdne2935265:0 Moto G4 LCD Screen and Digitizer Assembly Replacement: crwdns2935265:00crwdnd2935265:02crwdnd2935265:02crwdne2935265:0
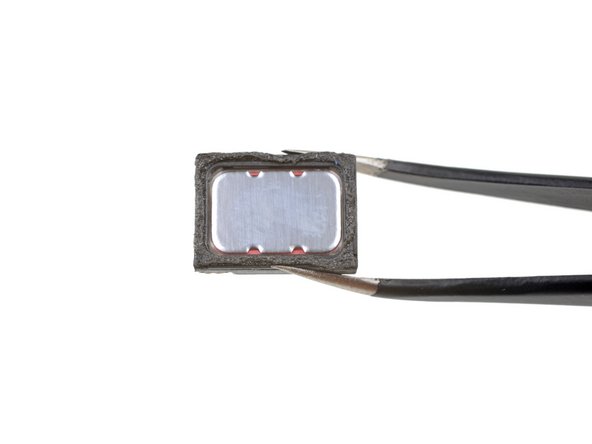
  • Remove the earpiece speaker.

  • Check the condition of the adhesive around the bottom of the earpiece speaker when you reinstall it. A little heat from a hair dryer or iOpener can help soften the adhesive and make it sticky again. Be careful not to touch or damage the surface of the speaker.

  • In some of the previous photos in this guide, the speaker is shown installed incorrectly. During installation, make sure the speaker's two spring contacts are located at the bottom corners, as shown in the first image in this step. Images showing the speaker rotated 180° (with the spring contacts near the top edge of the phone) are incorrect.

Remueve el altavoz auricular.

Verifica la condición del adhesivo alrededor de la parte inferior del altavoz auricular cuando lo vuelvas a instalar. Un poco de calor de un secador de pelo o de un iOpener pueden ayudar a ablandar el adhesivo y hacerlo más pegajoso. Ten cuidado de no tocar o dañar la superficie del altavoz.

En algunas de las fotos anteriores de esta guía, el altavoz se muestra instalado incorrectamente. Durante la instalación, asegúrate de que los dos contactos de muelle del altavoz estén ubicados en las esquinas inferiores, como se muestra en la primera imagen de este paso.

Las imágenes que muestran el altavoz girado 180° (con los contactos del muelle cerca del borde superior del teléfono) son incorrectas.

crwdns2944171:0crwdnd2944171:0crwdnd2944171:0crwdnd2944171:0crwdne2944171:0