crwdns2933423:0crwdne2933423:0

iPhone 8 Lightningコネクタアセンブリの交換

crwdns2931527:0crwdnd2931527:0crwdnd2931527:0crwdnd2931527:0crwdne2931527:0

crwdns2935425:019crwdne2935425:0

crwdns2936315:0crwdne2936315:0
crwdns2936323:0crwdne2936323:0
crwdns2931653:019crwdne2931653:0
iPhone 8 Lightning Connector Assembly Replacement: crwdns2935265:00crwdnd2935265:01crwdnd2935265:03crwdne2935265:0 iPhone 8 Lightning Connector Assembly Replacement: crwdns2935265:00crwdnd2935265:02crwdnd2935265:03crwdne2935265:0 iPhone 8 Lightning Connector Assembly Replacement: crwdns2935265:00crwdnd2935265:03crwdnd2935265:03crwdne2935265:0
  • A rubber gasket on the bottom of the Lightning connector protects your iPhone from liquid and dust intrusion. If you are installing a new Lightning connector assembly, you may need to carefully remove and transfer the gasket to the new part.

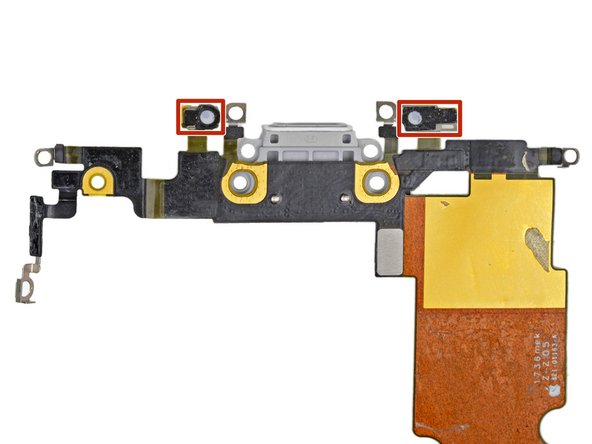
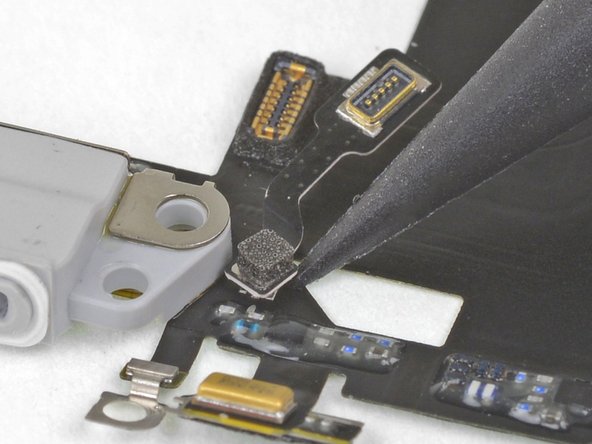
  • The small adhesive patch on the bottom of each microphone also protects your iPhone from liquid and dust intrusion. For best results, replace the two adhesive patches before installing your Lightning connector assembly.

  • Check to see if your new part comes with an antenna converter cable. If it doesn't, use the point of your spudger to pry up and transfer the cable from your old Lightning assembly to the new one.

Lightningコネクター底面上にあるゴム製ガスケットはiPhoneを液体や埃から保護してくれます。 新しいLightningコネクタアセンブリを取り付ける際はガスケットを慎重に取り外して新しいパーツに移植してください。

各マイクの底に付けられた小さな接着剤シールもiPhoneを液体や粉塵の侵入から保護してくれます。 最善の方法としてLightningコネクタアセンブリを取り付ける前に、2つの接着剤パッチを交換してください。

新しい交換用パーツにアンテナ変換ケーブルが付いているかどうか確認してください。もし付いていない場合はスパッジャーの先端を使って、Lightningアセンブリからケーブルを外して新しいパーツに移植してください。

crwdns2944171:0crwdnd2944171:0crwdnd2944171:0crwdnd2944171:0crwdne2944171:0