crwdns2933423:0crwdne2933423:0

Remplacement de l'ensemble connecteur de charge Lightning de l'iPhone 8

crwdns2931527:0crwdnd2931527:0crwdnd2931527:0crwdnd2931527:0crwdne2931527:0

crwdns2936315:0crwdne2936315:0
crwdns2936317:0crwdne2936317:0
crwdns2931653:018crwdne2931653:0
iPhone 8 Lightning Connector Assembly Replacement: crwdns2935265:00crwdnd2935265:01crwdnd2935265:03crwdne2935265:0 iPhone 8 Lightning Connector Assembly Replacement: crwdns2935265:00crwdnd2935265:02crwdnd2935265:03crwdne2935265:0 iPhone 8 Lightning Connector Assembly Replacement: crwdns2935265:00crwdnd2935265:03crwdnd2935265:03crwdne2935265:0
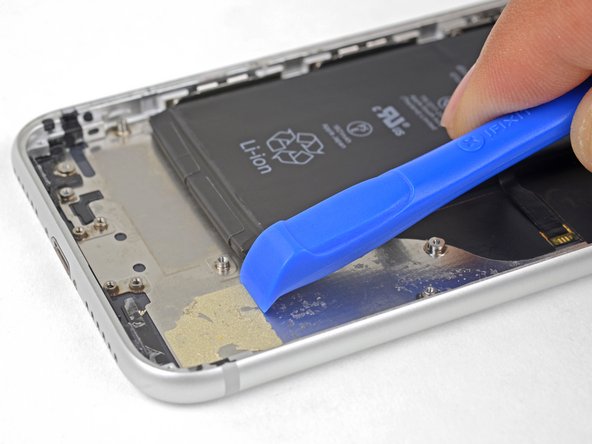
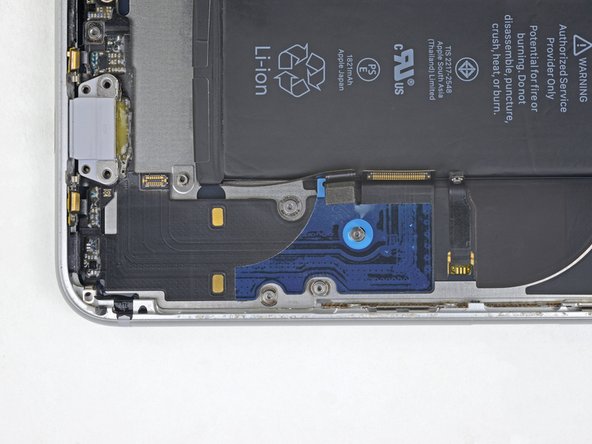
  • Remove the Lightning connector assembly.

  • Before installing or replacing the Lightning connector assembly:

  • Use a plastic tool to scour any bits of adhesive residue from the rear case. You can use some high concentration isopropyl alcohol to help clean the surface.

  • Before removing the adhesive backing, make sure the Lightning connector assembly is correctly positioned by aligning the hole in the flex cable with the screw post. If the cable is misaligned, you won't be able to reconnect it to the logic board.

Ôtez l'ensemble connecteur de charge Lightning.

Avant d'installer ou de remplacer l'ensemble connecteur de charge Lightning :

Grattez pour enlever tous les résidus d'adhésif de la coque arrière avec un outil en plastique. Vous pouvez prendre de l'alcool isopropylique à haute concentration pour nettoyer la surface.

Avant de retirer le film adhésif de protection, vérifiez que l'ensemble connecteur de charge Lightning est posé correctement. Il faut que le trou dans la nappe soit aligné avec la tige de la vis. Si ce n'est pas le cas, vous ne pourrez pas reconnecter la nappe à la carte mère.

crwdns2944171:0crwdnd2944171:0crwdnd2944171:0crwdnd2944171:0crwdne2944171:0