crwdns2933423:0crwdne2933423:0

Reemplazo del ensamblaje de conector lightning del iPhone 8.

crwdns2931527:0crwdnd2931527:0crwdnd2931527:0crwdnd2931527:0crwdne2931527:0

crwdns2936315:0crwdne2936315:0
crwdns2936331:0crwdne2936331:0
crwdns2931653:018crwdne2931653:0
iPhone 8 Lightning Connector Assembly Replacement: crwdns2935265:00crwdnd2935265:01crwdnd2935265:03crwdne2935265:0 iPhone 8 Lightning Connector Assembly Replacement: crwdns2935265:00crwdnd2935265:02crwdnd2935265:03crwdne2935265:0 iPhone 8 Lightning Connector Assembly Replacement: crwdns2935265:00crwdnd2935265:03crwdnd2935265:03crwdne2935265:0
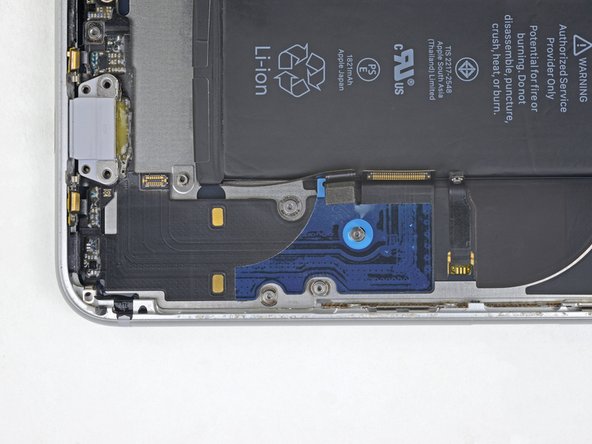
  • Remove the Lightning connector assembly.

  • Before installing or replacing the Lightning connector assembly:

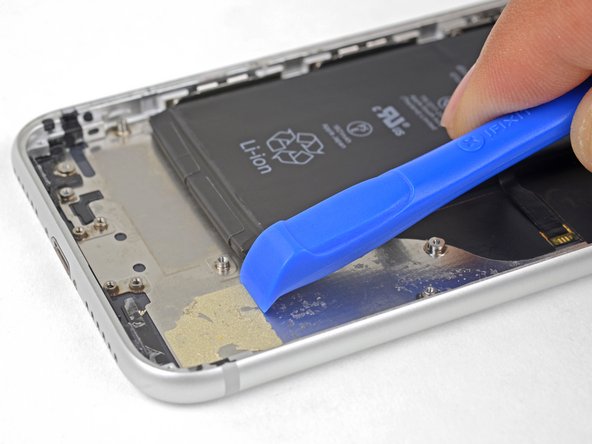
  • Use a plastic tool to scour any bits of adhesive residue from the rear case. You can use some high concentration isopropyl alcohol to help clean the surface.

  • Before removing the adhesive backing, make sure the Lightning connector assembly is correctly positioned by aligning the hole in the flex cable with the screw post. If the cable is misaligned, you won't be able to reconnect it to the logic board.

Remueve el ensamblaje del conector Lightning.

Antes de instalar o reemplazar el ensamblaje del conector Lightning:

Usa una herramienta plástica para sacar cualquier trocito de residuo de adhesivo de la caja trasera. Puedes utilizar alcohol isopropílico de concentración alta para ayudarte a limpiar la superficie.

Antes de remover la plancha de adhesivo, asegúrate de que el ensamblaje de conector Lightning esté correctamente posicionado alineando el orificio en el cable flexible con el poste de tornillo. Si el cable no está alineado bien, no podrás volver a conectarlo a la placa lógica.

crwdns2944171:0crwdnd2944171:0crwdnd2944171:0crwdnd2944171:0crwdne2944171:0