crwdns2933423:0crwdne2933423:0

Remplacement de la carte mère du Mad Catz Street Fighter IV FightPad

crwdns2931529:0crwdnd2931529:0crwdnd2931529:0crwdnd2931529:04crwdnd2931529:0crwdne2931529:0

crwdns2935425:02crwdne2935425:0

crwdns2936315:0crwdne2936315:0
crwdns2936317:0crwdne2936317:0
crwdns2931653:02crwdne2931653:0
Mad Catz Street Fighter IV FightPad Circuit Board Replacement: crwdns2935265:00crwdnd2935265:01crwdnd2935265:03crwdne2935265:0 Mad Catz Street Fighter IV FightPad Circuit Board Replacement: crwdns2935265:00crwdnd2935265:02crwdnd2935265:03crwdne2935265:0 Mad Catz Street Fighter IV FightPad Circuit Board Replacement: crwdns2935265:00crwdnd2935265:03crwdnd2935265:03crwdne2935265:0
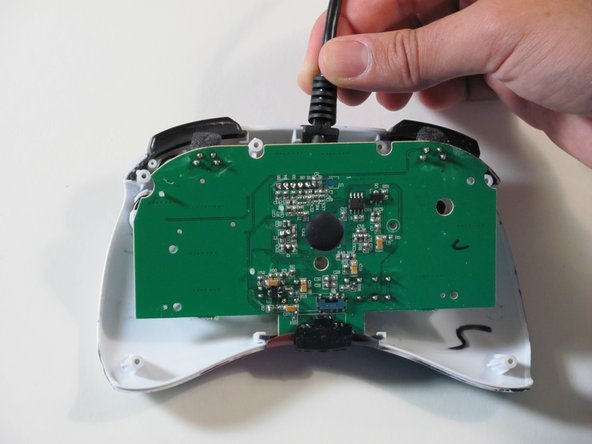
  • Hold the controller cable at the area just before it meets the controller and slowly lift upwards to slide it out of its plastic slot and remove the circuit board.

  • Be careful with the wires connected to the circuit board itself as they are thin and delicate.

  • When reassembling the controller, make sure that the bottom plastic piece is fully inserted into its slot before replacing the circuit board.

Tenez le câble du contrôleur dans la zone juste avant qu'il ne rencontre le contrôleur et soulevez lentement vers le haut pour le faire glisser hors de sa fente en plastique et retirer le circuit imprimé.

Soyez prudent avec les fils connectés au circuit imprimé lui-même car ils sont fins et délicats.

Lors du remontage du contrôleur, assurez-vous que la pièce en plastique inférieure est complètement insérée dans son emplacement avant de remplacer le circuit imprimé.

crwdns2944171:0crwdnd2944171:0crwdnd2944171:0crwdnd2944171:0crwdne2944171:0