crwdns2933423:0crwdne2933423:0

Desarme de Panasonic Lumix DMC-GH3

crwdns2936315:0crwdne2936315:0
crwdns2936331:0crwdne2936331:0
crwdns2931653:014crwdne2931653:0
Panasonic Lumix DMC-GH3 Disassembly: crwdns2935265:00crwdnd2935265:01crwdnd2935265:03crwdne2935265:0 Panasonic Lumix DMC-GH3 Disassembly: crwdns2935265:00crwdnd2935265:02crwdnd2935265:03crwdne2935265:0 Panasonic Lumix DMC-GH3 Disassembly: crwdns2935265:00crwdnd2935265:03crwdnd2935265:03crwdne2935265:0
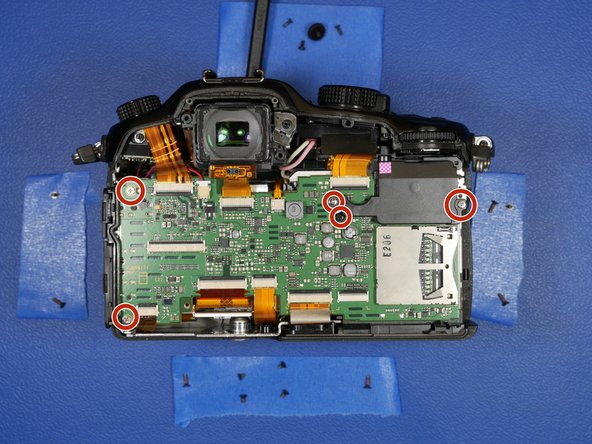
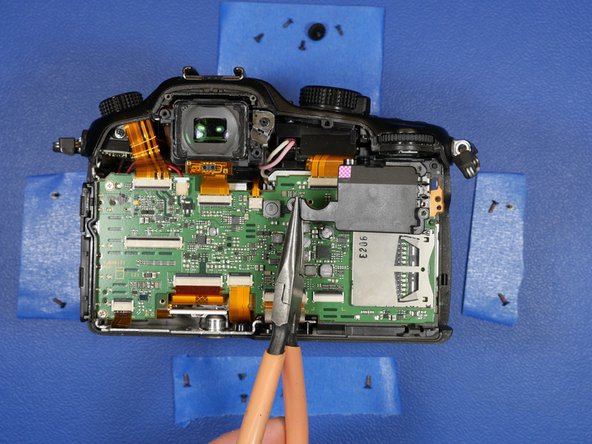
  • Back to the rest of the camera. With the back LCD shell assembly removed from the body of the camera, It's time to remove the main PCB.

  • Remove the 5 circled screws. There is a back plastic cover that protects the battery PCB terminals. That should come free once these screws are removed.

De vuelta al resto de la cámara. Una vez retirado el conjunto de la carcasa de la pantalla LCD trasera del cuerpo de la cámara, es hora de retirar la placa de circuito impreso principal.

Retira los 5 tornillos marcados con un círculo. Hay una cubierta de plástico trasera que protege los terminales PCB de la batería. Que debe salir libre una vez que estos tornillos se quitan.

crwdns2944171:0crwdnd2944171:0crwdnd2944171:0crwdnd2944171:0crwdne2944171:0