crwdns2933423:0crwdne2933423:0

Reemplazo del panel frontal iPad 4G

crwdns2931529:0crwdnd2931529:0crwdnd2931529:0crwdnd2931529:0153crwdnd2931529:0crwdne2931529:0

crwdns2936315:0crwdne2936315:0
crwdns2936331:0crwdne2936331:0
crwdns2931653:018crwdne2931653:0
Removing iPad 3 4G Front Panel: crwdns2935265:00crwdnd2935265:01crwdnd2935265:03crwdne2935265:0 Removing iPad 3 4G Front Panel: crwdns2935265:00crwdnd2935265:02crwdnd2935265:03crwdne2935265:0 Removing iPad 3 4G Front Panel: crwdns2935265:00crwdnd2935265:03crwdnd2935265:03crwdne2935265:0
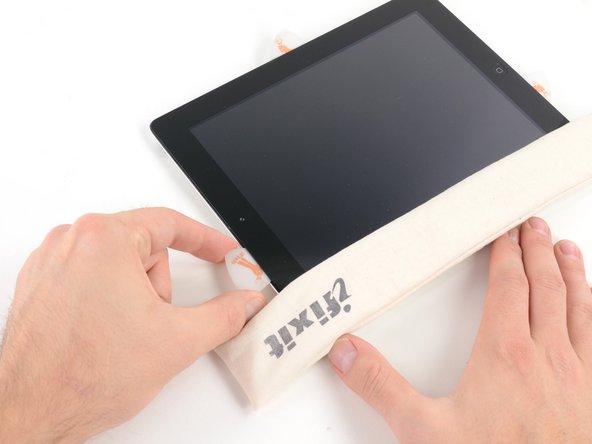
  • Slide the opening pick along the top edge of the iPad, pulling it out slightly to go around the front-facing camera bracket.

  • The adhesive along this section is very thick, and a fair amount of force may be required. Work carefully and slowly, making sure to not slip and damage yourself or your iPad.

  • If the adhesive has cooled too much, replace the iOpener along the top edge and continue working. If the iOpener has cooled too much, reheat it.

  • If the opening pick is getting stuck in the adhesive, "roll" the pick as shown in step 9.

Desliza la púa de apertura a lo largo del borde superior del iPad, tirando ligeramente hacia fuera para rodear el soporte frontal de la cámara.

El adhesivo a lo largo de esta sección es muy grueso, y puede requerirse una cantidad justa de fuerza. Trabaja con cuidado y lentamente, asegurándose de no resbalar y dañarse a sí mismo o a tu iPad.

Si el adhesivo se ha enfriado demasiado, reemplace el iOpener a lo largo del borde superior y continúa trabajando. Si el iOpener se ha enfriado demasiado, vuelva a calentarlo.

Si la picadura de apertura está pegada en el adhesivo, "ruede" la selección como se muestra en el paso 9.

crwdns2944171:0crwdnd2944171:0crwdnd2944171:0crwdnd2944171:0crwdne2944171:0