crwdns2933423:0crwdne2933423:0

iPad 3 4G フロントパネルの取り外し

crwdns2931529:0crwdnd2931529:0crwdnd2931529:0crwdnd2931529:0153crwdnd2931529:0crwdne2931529:0

crwdns2936315:0crwdne2936315:0
crwdns2936323:0crwdne2936323:0
crwdns2931653:09crwdne2931653:0
Removing iPad 3 4G Front Panel: crwdns2935265:00crwdnd2935265:01crwdnd2935265:03crwdne2935265:0 Removing iPad 3 4G Front Panel: crwdns2935265:00crwdnd2935265:02crwdnd2935265:03crwdne2935265:0 Removing iPad 3 4G Front Panel: crwdns2935265:00crwdnd2935265:03crwdnd2935265:03crwdne2935265:0
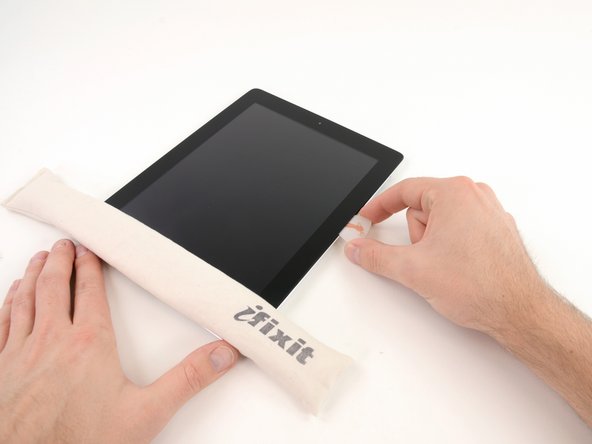
  • It may be necessary to move the heated iOpener back onto the right edge of the iPad as you release the adhesive. This depends on how long the iPad has been able to cool while you were working on it.

  • If the opening pick gets stuck in the adhesive, "roll" the pick along the side of the iPad, continuing to release the adhesive.

接着剤を剥がすには、iPadの右側端に温めたiOpener戻す必要があるかもしれません。これは作業中、温めたiPadがどれだけ冷めてくるかによります。

開口ピックが接着剤で動かなくなった場合、iPadの端に沿って開口ピックを”回転/捻る”ように動かして、接着剤を切開して移動させます。

crwdns2944171:0crwdnd2944171:0crwdnd2944171:0crwdnd2944171:0crwdne2944171:0