crwdns2933423:0crwdne2933423:0

Dell Studio 1745 Hard Drive Replacement

crwdns2935425:01crwdne2935425:0

crwdns2936315:0crwdne2936315:0
crwdns2936323:0crwdne2936323:0
crwdns2931653:01crwdne2931653:0
Dell Studio 1745 Hard Drive Replacement: crwdns2935265:00crwdnd2935265:01crwdnd2935265:03crwdne2935265:0 Dell Studio 1745 Hard Drive Replacement: crwdns2935265:00crwdnd2935265:02crwdnd2935265:03crwdne2935265:0 Dell Studio 1745 Hard Drive Replacement: crwdns2935265:00crwdnd2935265:03crwdnd2935265:03crwdne2935265:0
  • Remove the four screws that secure the hard drive assembly to the computer base.

  • Using the pull-tab, slide the hard drive towards the left to disconnect the hard drive assembly from the connector on the system board.

  • Lift the hard drive assembly out of the computer base.

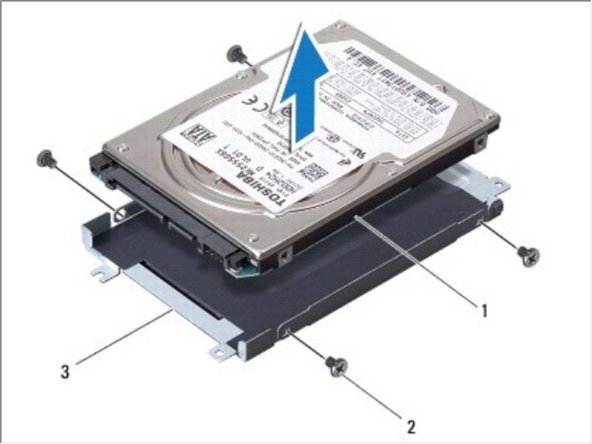
  • Remove the four screws that secure the hard drive cage to the hard drive.

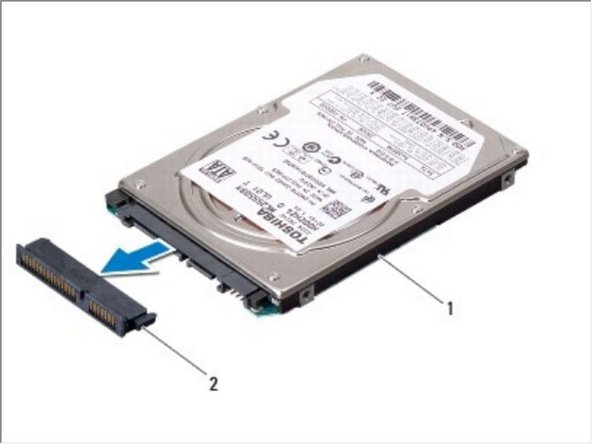
  • Pull the interposer to disconnect it from the hard drive.

  • Lift the hard drive off the hard drive cage.

crwdns2935429:0crwdne2935429:0

crwdns2935429:0crwdne2935429:0

crwdns2935429:0crwdne2935429:0

crwdns2935429:0crwdne2935429:0

crwdns2935429:0crwdne2935429:0

crwdns2935429:0crwdne2935429:0

crwdns2944171:0crwdnd2944171:0crwdnd2944171:0crwdnd2944171:0crwdne2944171:0