crwdns2933423:0crwdne2933423:0

Remplacement de l'écran LCD du Gateway NE51006u

crwdns2936315:0crwdne2936315:0
crwdns2936317:0crwdne2936317:0
crwdns2931653:04crwdne2931653:0
Gateway NE51006u LCD Screen Replacement: crwdns2935265:00crwdnd2935265:01crwdnd2935265:03crwdne2935265:0 Gateway NE51006u LCD Screen Replacement: crwdns2935265:00crwdnd2935265:02crwdnd2935265:03crwdne2935265:0 Gateway NE51006u LCD Screen Replacement: crwdns2935265:00crwdnd2935265:03crwdnd2935265:03crwdne2935265:0
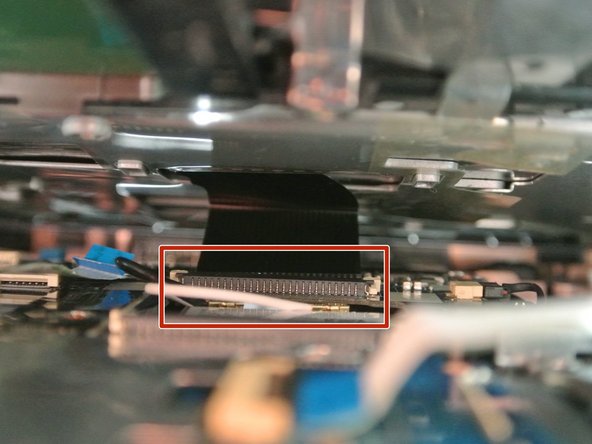
  • After prying the keyboard unit off of the base, Lift the white, hinged covers connected to the three ribbons shown and pull gently to disconnect.

  • When putting the laptop back together, lift the hinged covers and connect the ribbons before dropping the hinged covers back down.

Après avoir soulevé le clavier de sa base, soulevez les clapets blancs qui maintiennent les trois câbles plats indiqués et débranchez-les doucement.

Lorsque vous remonterez l’ordinateur, soulevez les clapets et rebranchez les câbles plats avant de remettre le clavier en place.

crwdns2944171:0crwdnd2944171:0crwdnd2944171:0crwdnd2944171:0crwdne2944171:0