crwdns2933423:0crwdne2933423:0

Remplacement de l'écran LCD du Gateway NE51006u

crwdns2936315:0crwdne2936315:0
crwdns2936317:0crwdne2936317:0
crwdns2931653:02crwdne2931653:0
Gateway NE51006u LCD Screen Replacement: crwdns2935265:00crwdnd2935265:01crwdnd2935265:02crwdne2935265:0 Gateway NE51006u LCD Screen Replacement: crwdns2935265:00crwdnd2935265:02crwdnd2935265:02crwdne2935265:0
  • Prior to completing the steps laid out in this guide, it is imperative that the user remove the battery and hard drive via the battery and hard drive replacement guide steps available.

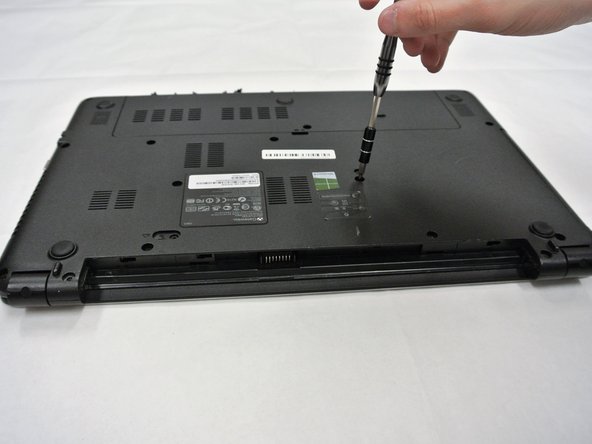
  • Use a PH0 Philips head screwdriver to remove the remaining 9.0 mm screws on the back of the device which should be sixteen screw in total.

Avant d’effectuer les étapes qui vont suivre dans ce tutoriel, il est impératif de retirer la batterie et le disque dur en suivant les étapes du tutoriel de remplacement de la batterie et du disque dur.

Utilisez un tournevis cruciforme n° 0 pour retirer les vis de 9,0 mm sous l’appareil. Il devrait y avoir seize vis au total.

crwdns2944171:0crwdnd2944171:0crwdnd2944171:0crwdnd2944171:0crwdne2944171:0