crwdns2933423:0crwdne2933423:0

Panasonic Lumix DMC-FX37の解体

crwdns2931529:0crwdnd2931529:0crwdnd2931529:0crwdnd2931529:03crwdnd2931529:0crwdne2931529:0

crwdns2936315:0crwdne2936315:0
crwdns2936323:0crwdne2936323:0
crwdns2931653:04crwdne2931653:0
Panasonic Lumix DMC-FX37 Disassembly: crwdns2935265:00crwdnd2935265:01crwdnd2935265:03crwdne2935265:0 Panasonic Lumix DMC-FX37 Disassembly: crwdns2935265:00crwdnd2935265:02crwdnd2935265:03crwdne2935265:0 Panasonic Lumix DMC-FX37 Disassembly: crwdns2935265:00crwdnd2935265:03crwdnd2935265:03crwdne2935265:0
  • Remove the front panel (the panel around the lens casing) from the camera.

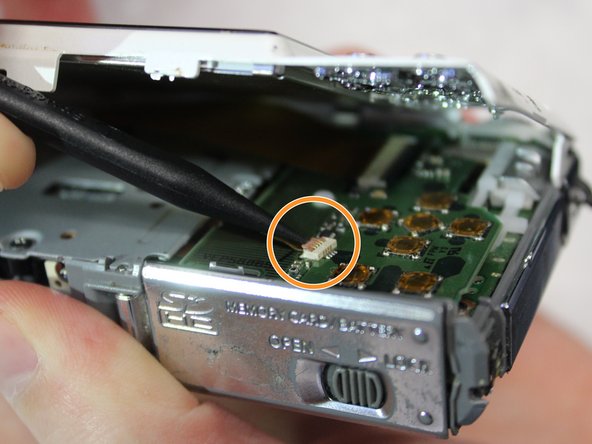
  • Remove the two ribbon cables connected to the back panel (the panel this the LCD screen) by lifting up on their respective tabs and gently pulling out the cord.

  • Caution: When removing the back panel, the two ribbon cables are relatively delicate and must both be disconnected before the panel can be entirely removed.

  • Remove the back panel from the camera.

カメラから(レンズケース周辺のパネル)フロントパネルを外します。

バックパネル(液晶画面のあるパネル)に接続されている2本のリボンケーブルは、各タブを持ち上げてコードを静かに引き抜きながら取り外します。

注意:バックパネルを取り外す際、2本のリボンケーブルは比較的デリケートなため、パネルを完全に取り外す前に2本とも外す必要があります。

カメラからバックパネルを外します。

crwdns2944171:0crwdnd2944171:0crwdnd2944171:0crwdnd2944171:0crwdne2944171:0