crwdns2935425:08crwdne2935425:0
crwdns2931653:08crwdne2931653:0


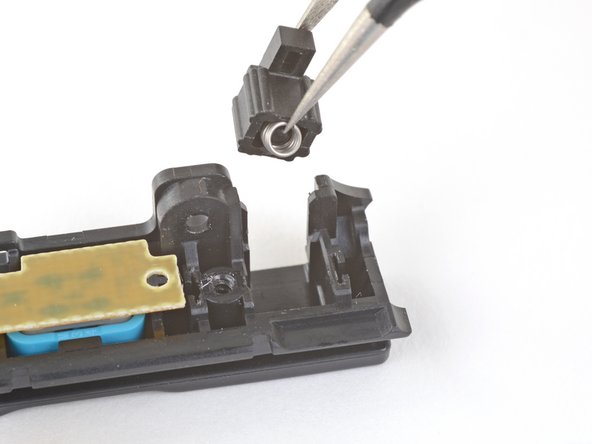


Remove the buckle lock
-
Lift the buckle lock slightly out of its slot in the charging rail, just until the spring is exposed enough that you can grab it with tweezers.
-
Grab the buckle lock such that the tweezers are around both sides of the lock and holding the spring inside the lock.
-
Pull the buckle lock out of its slot in the charging rail.
crwdns2944171:0crwdnd2944171:0crwdnd2944171:0crwdnd2944171:0crwdne2944171:0