crwdns2933423:0crwdne2933423:0

Smart UF75 DLP Projector Disassembly

crwdns2936315:0crwdne2936315:0
crwdns2936321:0crwdne2936321:0
crwdns2931653:09crwdne2931653:0
Smart UF75 DLP Projector Disassembly, Separate the front lens section: crwdns2935265:00crwdnd2935265:01crwdnd2935265:03crwdne2935265:0 Smart UF75 DLP Projector Disassembly, Separate the front lens section: crwdns2935265:00crwdnd2935265:02crwdnd2935265:03crwdne2935265:0 Smart UF75 DLP Projector Disassembly, Separate the front lens section: crwdns2935265:00crwdnd2935265:03crwdnd2935265:03crwdne2935265:0
Separate the front lens section
  • This step opens up the optical parts that were probably originally assembled in a clean room. Take care to minimise any dust of you need to separate the front lens section.

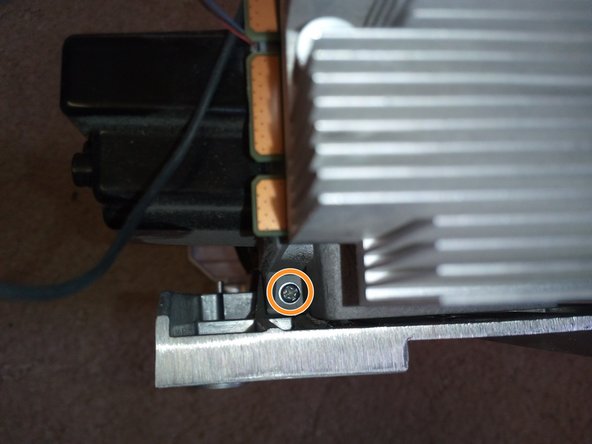
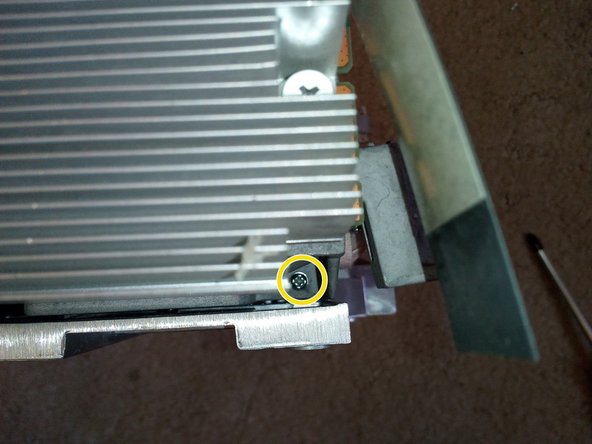
  • Remove 3 silver 12mm Philips #2 screws joining the DMD optical section to the front lens. The three screws cannot be seen in one picture, so three pictures are attached.

  • The top screw is visible as you look down on the unit.

  • The left hand screw is seen as you look along the left hand underside of the DMD heat sink

  • The right hand screw is visible as you look along the right hand underside of the DMD heat sink.

crwdns2935429:0crwdne2935429:0

crwdns2935429:0crwdne2935429:0

crwdns2935429:0crwdne2935429:0

crwdns2935429:0crwdne2935429:0

crwdns2935429:0crwdne2935429:0

crwdns2944171:0crwdnd2944171:0crwdnd2944171:0crwdnd2944171:0crwdne2944171:0