crwdns2933423:0crwdne2933423:0

Remplacement de l'écran HP Officejet Pro 8620

crwdns2936315:0crwdne2936315:0
crwdns2936317:0crwdne2936317:0
crwdns2931653:03crwdne2931653:0
HP Officejet Pro 8620 Display Replacement: crwdns2935265:00crwdnd2935265:01crwdnd2935265:03crwdne2935265:0 HP Officejet Pro 8620 Display Replacement: crwdns2935265:00crwdnd2935265:02crwdnd2935265:03crwdne2935265:0 HP Officejet Pro 8620 Display Replacement: crwdns2935265:00crwdnd2935265:03crwdnd2935265:03crwdne2935265:0
  • Remove the four 11mm T9-Torx screws on the underside of the display unit by rotating the screwdriver counter clockwise.

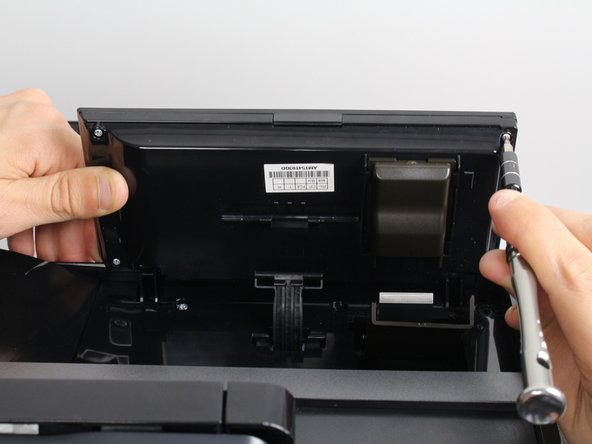
  • Open the display unit to expose the circuit board by separating the back and front panels.

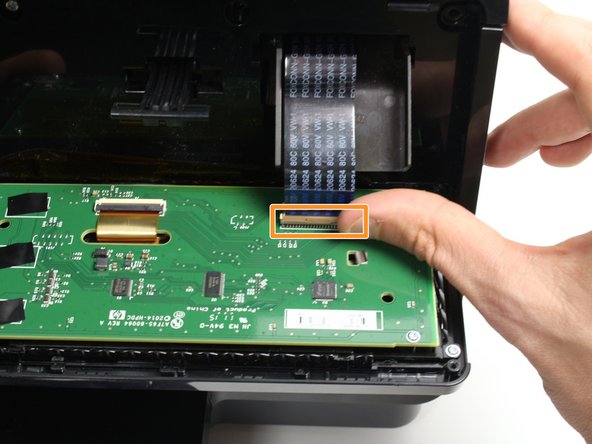
  • Remove the ribbon cable by gently releasing the plastic locking mechanism and pulling the cable away from the circuit board.

Retirez les quatre vis T9-Torx de 11 mm situées sous l'unité d'affichage en tournant le tournevis dans le sens inverse des aiguilles d'une montre.

Ouvrez l'unité d'affichage pour exposer le circuit imprimé en séparant les panneaux arrière et avant.

Retirez le câble ruban en relâchant doucement le mécanisme de verrouillage en plastique et en tirant le câble hors de la carte de circuit imprimé.

crwdns2944171:0crwdnd2944171:0crwdnd2944171:0crwdnd2944171:0crwdne2944171:0