crwdns2933423:0crwdne2933423:0

Motorola Moto Z2 Force Vervanging van het scherm en de vingerafdruksensor

crwdns2931529:0crwdnd2931529:0crwdnd2931529:0crwdnd2931529:06crwdnd2931529:0crwdne2931529:0

crwdns2936315:0crwdne2936315:0
crwdns2936313:0crwdne2936313:0
crwdns2931653:012crwdne2931653:0
Motorola Moto Z2 Force Display and Fingerprint Sensor Replacement, Pry Up the Screen Assembly: crwdns2935265:00crwdnd2935265:01crwdnd2935265:03crwdne2935265:0 Motorola Moto Z2 Force Display and Fingerprint Sensor Replacement, Pry Up the Screen Assembly: crwdns2935265:00crwdnd2935265:02crwdnd2935265:03crwdne2935265:0 Motorola Moto Z2 Force Display and Fingerprint Sensor Replacement, Pry Up the Screen Assembly: crwdns2935265:00crwdnd2935265:03crwdnd2935265:03crwdne2935265:0
Pry Up the Screen Assembly
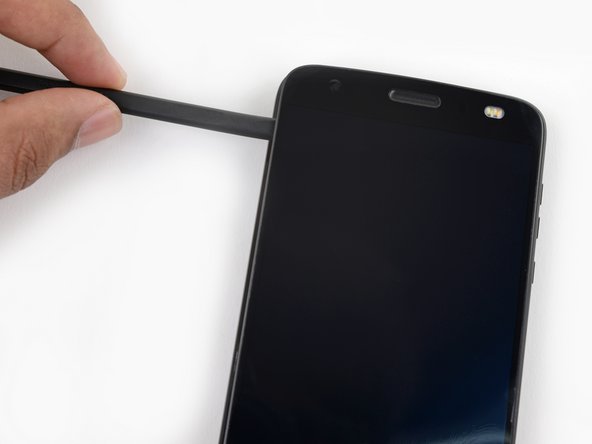
  • Slowly and carefully slide the flat end of a spudger under the left edge of the screen assembly. Gradually insert it deeper to pry up the top edge of the assembly and release the right patch of adhesive.

  • Add more isopropyl alcohol as needed, but take care to not use too much, as this may dissolve other adhesives in the device that would preferably remain sticky. Give any additional alcohol some time to penetrate the adhesive before continuing.

  • Only pry up the assembly enough to slide the spudger underneath and release the adhesive. The assembly is still attached via the display cable, and prying the left side too far upward may damage it.

Schuif het platte einde van je spudger langzaam en voorzichtig onder de linkerzijde van de schermmodule. Duw je tool iets dieper om de bovenkant van de module omhoog te duwen en het rechter stuk lijm los te maken.

Dien meer isopropyl alcohol toe als dat nodig is, maar gebruik niet te veel aangezien je daarmee ook andere stukken lijm zou kunnen verzwakken. Geef de toegevoegde alcohol wat tijd om in te trekken voordat je verder gaat.

Wrik de schermmodule zo ver omhoog dat je er een spudger onder kunt steken. Maak het stuk lijm vervolgens los met je spudger. De module is nog steeds verbonden met de schermkabel, dus zorg dat je de linkerkant niet te ver omhoog duwt, aangezien je hiermee iets kunt beschadigen.

crwdns2944171:0crwdnd2944171:0crwdnd2944171:0crwdnd2944171:0crwdne2944171:0