crwdns2931527:0crwdnd2931527:0crwdnd2931527:0crwdnd2931527:0crwdne2931527:0
crwdns2935425:01crwdne2935425:0


-
Your replacement display may not come with pre-installed speaker grilles or a front-facing camera gasket. If that is the case, use tweezers to carefully remove these parts from your old display and follow the rest of the guide to install them on a new display.
-
Clean any adhesive residue off of the parts before reinstalling them.
-
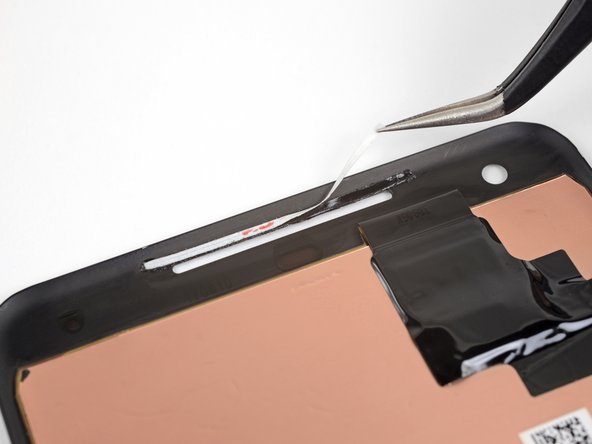
Cut a strip of 1 mm wide double-sided tape to be about 3 cm (1.25 inches) long.
-
Lay the adhesive strip along the upper edge of the earpiece speaker slot in your new display so that it's centered over the slot and touching the upper edge.
-
Gently press the adhesive strip into place on the display with your finger or a spudger.
-
Peel the white backing away from the adhesive strip.
| - | [* black] Your replacement display may not come with pre-installed speaker grilles or a front-facing camera gasket. If that is the case, use tweezers to carefully remove these parts from your old display and follow the rest of the guide to install them on a new display. |
|---|---|
| + | [* black] Your replacement display may not come with pre-installed speaker grilles or a front-facing camera gasket. If that is the case, use [product|IF145-020|tweezers] to carefully remove these parts from your old display and follow the rest of the guide to install them on a new display. |
| [* black] Clean any adhesive residue off of the parts before reinstalling them. | |
| [* icon_note] Make sure to install the grilles and gasket before applying display adhesive. | |
| [* black] Cut a strip of 1 mm wide double-sided tape to be about 3 cm (1.25 inches) long. | |
| [* black] Lay the adhesive strip along the upper edge of the earpiece speaker slot in your new display so that it's centered over the slot and touching the upper edge. | |
| [* icon_note] The adhesive strip needs to be as close as possible to the edge of the slot without overlapping. Otherwise, it can interfere with the display adhesive. | |
| [* black] Gently press the adhesive strip into place on the display with your finger or a spudger. | |
| [* black] Peel the white backing away from the adhesive strip. |
crwdns2944171:0crwdnd2944171:0crwdnd2944171:0crwdnd2944171:0crwdne2944171:0