crwdns2933423:0crwdne2933423:0

Cómo desmontar para limpiar

crwdns2936315:0crwdne2936315:0
crwdns2936331:0crwdne2936331:0
crwdns2931653:07crwdne2931653:0
How to disassemble for cleaning, Separating the front plate: crwdns2935265:00crwdnd2935265:01crwdnd2935265:03crwdne2935265:0 How to disassemble for cleaning, Separating the front plate: crwdns2935265:00crwdnd2935265:02crwdnd2935265:03crwdne2935265:0 How to disassemble for cleaning, Separating the front plate: crwdns2935265:00crwdnd2935265:03crwdnd2935265:03crwdne2935265:0
Separating the front plate
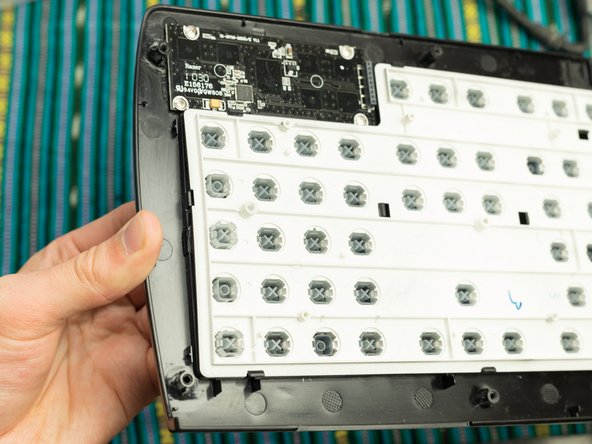
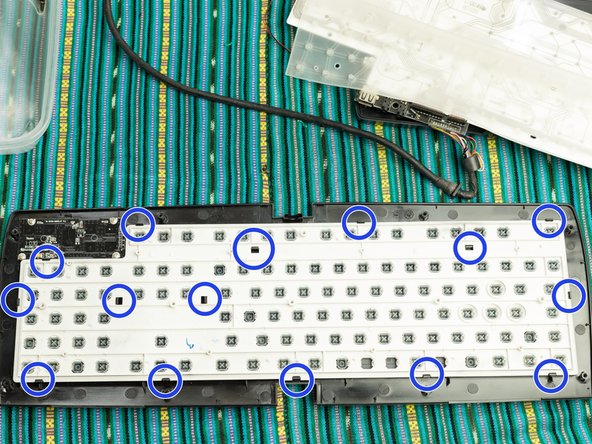
  • Push with moderate force to separate the keyframe (beige) from the front plate (black).

  • You should apply pressure at each hook (marked in blue).

  • Optional: prior to completing this step, remove all keycaps from the frame (Step 9). This may make it easier for you to apply pressure to the board, with less fear of breakage from undue force.

Empuja con fuerza moderada para separar el fotograma clave (beige) de la placa frontal (negro).

Debe aplicar presión en cada gancho (marcado en azul).

Opcional: antes de completar este paso, retira todas las teclas del marco (Paso 9). Esto puede hacer que le resulte más fácil aplicar presión a la tabla, con menos temor a que se rompa por una fuerza indebida.

crwdns2944171:0crwdnd2944171:0crwdnd2944171:0crwdnd2944171:0crwdne2944171:0