crwdns2933423:0crwdne2933423:0

Oral-B Vitality Akku tauschen

crwdns2936315:0crwdne2936315:0
crwdns2936319:0crwdne2936319:0
crwdns2931653:02crwdne2931653:0
Oral-B Vitality Battery Replacement, Remove toothbrush head and inspect board, battery, and motor: crwdns2935265:00crwdnd2935265:01crwdnd2935265:03crwdne2935265:0 Oral-B Vitality Battery Replacement, Remove toothbrush head and inspect board, battery, and motor: crwdns2935265:00crwdnd2935265:02crwdnd2935265:03crwdne2935265:0 Oral-B Vitality Battery Replacement, Remove toothbrush head and inspect board, battery, and motor: crwdns2935265:00crwdnd2935265:03crwdnd2935265:03crwdne2935265:0
Remove toothbrush head and inspect board, battery, and motor
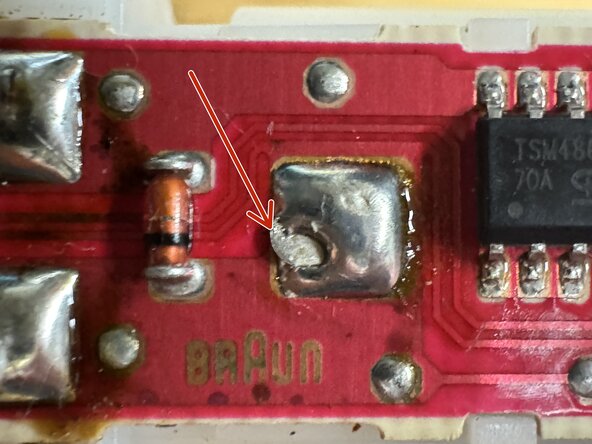
  • Inspect four pads with green circles (Picture #1), they should be fully covered in solder.

  • Picture #2 shows the center pad missing some solder and not making a good connection.

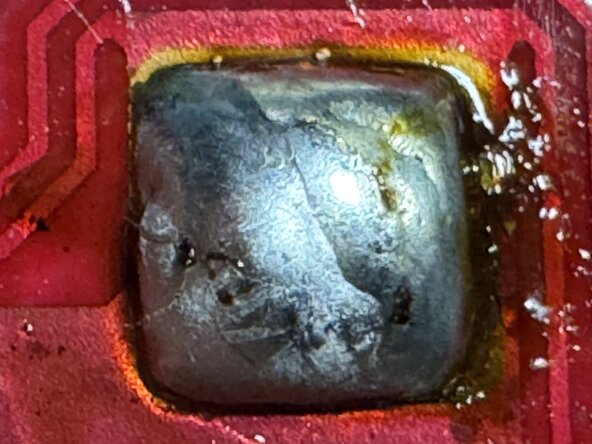
  • Picture #3 shows repaired solder pad. Test toothbrush battery and motor operation without toothbrush head. If toothbrush is now working, there may be no need to replace the battery - if battery is providing between 1.2 and 1.5 volts and motor is actuated by button presses, stop here and reassemble the toothbrush.

  • If battery voltage is less than 1.2 volts, consider testing motor operation and button presses with two tests; using a AA battery and a pair of wire leads touch one end of leads to battery ends and the other wire ends to: A) left board pads (to test motor leads) and then B) to right board pads (to test battery leads, center pin is positive).

  • If motor doesn't start after Step 2 troubleshooting, continue to Step 3.

Inspiziere die vier Pads mit grünen Kreisen (Bild 1), sie sollten vollständig mit Lötzinn bedeckt sein.

Bild 2 zeigt, dass sich auf dem mittleren Pad zu wenig Lötzinn befindet und keine gute Verbindung macht.

Bild 3 zeigt ein repariertes Pad. Teste die Batterie und Operation des Motors ohne den Bürstenkopf. Wenn die Zahnbürste jetzt funktioniert, muss die Batterie nicht ersetzt werden - Wenn die Batterie 1,2 und 1,5 Volt ausgibt und der Motor sich bewegt, wenn der Knopf gedrückt wird, kannst du hier aufhören und die Zahnbürste wieder zusammenbauen.

Wenn die Batterie weniger als 1,2 Volt ausgibt, prüfe den Motor und die Taster mit zwei Tests.

Berühre dazu mit einer AA-Batterie und einem Paar Kabel ein Ende der Kabel mit den Batterieenden und die anderen Kabelenden mit:

A) den Pads der linken Platine (um die Motorleitungen zu testen)

B) den Pads der rechten Platine (um die Batterieleitungen zu testen, der mittlere Pin ist positiv).

Wenn der Motor nicht nach Schritt 2 startet, fahre mit Schritt 3 fort.

crwdns2944171:0crwdnd2944171:0crwdnd2944171:0crwdnd2944171:0crwdne2944171:0