crwdns2931529:0crwdnd2931529:0crwdnd2931529:0crwdnd2931529:02crwdnd2931529:0crwdne2931529:0
crwdns2935425:08crwdne2935425:0
crwdns2931653:08crwdne2931653:0


-
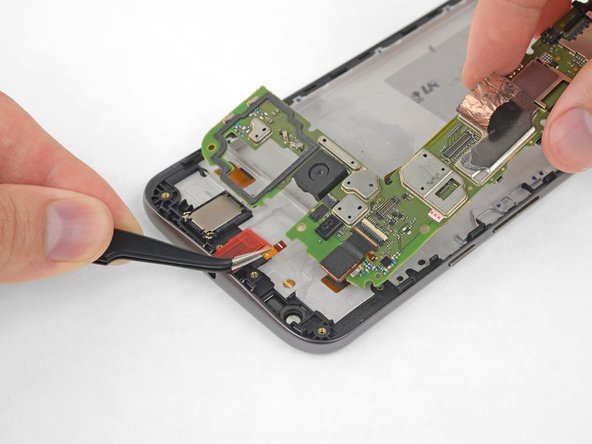
Grasping the motherboard by its edges, left the bottom end up at an angle, while keeping the top edge close to the phone.
-
Use your spudger to pry up the front-facing camera and make sure it separates safely from the frame. The camera can remain attached to the motherboard.
-
Using your tweezers, grasp the headphone jack flex cable and carefully pull it out of its socket as you remove the motherboard.
-
Remove the motherboard.
| [* black] Grasping the motherboard by its edges, left the bottom end up at an angle, while keeping the top edge close to the phone. | |
| [* black] Use your spudger to pry up the front-facing camera and make sure it separates safely from the frame. The camera can remain attached to the motherboard. | |
| - | [* black] Using your tweezers, grasp the headphone jack flex cable and carefully pull it out of its socket as you remove the motherboard. |
| + | [* black] Using your [product|IF145-020|tweezers], grasp the headphone jack flex cable and carefully pull it out of its socket as you remove the motherboard. |
| [* black] Remove the motherboard. | |
| [* icon_caution] If you feel any resistance, ***stop***. Make sure there are no components still holding the frame to the motherboard. |
crwdns2944171:0crwdnd2944171:0crwdnd2944171:0crwdnd2944171:0crwdne2944171:0