crwdns2933423:0crwdne2933423:0

iVIEW-754TPC Camera Assembly Replacement

crwdns2942213:0crwdne2942213:0

  1. iVIEW-754TPC Camera Assembly Replacement, Rear Panel: crwdns2935265:01crwdnd2935265:01crwdnd2935265:03crwdne2935265:0 iVIEW-754TPC Camera Assembly Replacement, Rear Panel: crwdns2935265:01crwdnd2935265:02crwdnd2935265:03crwdne2935265:0 iVIEW-754TPC Camera Assembly Replacement, Rear Panel: crwdns2935265:01crwdnd2935265:03crwdnd2935265:03crwdne2935265:0
    • Before disassembling your tablet, make sure it is powered off.

    • Use plastic opening tool to release the clips holding the device together. The clips will take a small amount of pressure to release. Once you have the plastic opening tool inserted, use a twisting action to release the clips. Start from bottom of device and work all the way around.

  2. iVIEW-754TPC Camera Assembly Replacement, Camera Assembly: crwdns2935265:02crwdnd2935265:01crwdnd2935265:03crwdne2935265:0 iVIEW-754TPC Camera Assembly Replacement, Camera Assembly: crwdns2935265:02crwdnd2935265:02crwdnd2935265:03crwdne2935265:0 iVIEW-754TPC Camera Assembly Replacement, Camera Assembly: crwdns2935265:02crwdnd2935265:03crwdnd2935265:03crwdne2935265:0
    crwdns2935267:0crwdne2935267:0
    Tweezers
    $4.99
    crwdns2942207:0crwdne2942207:0
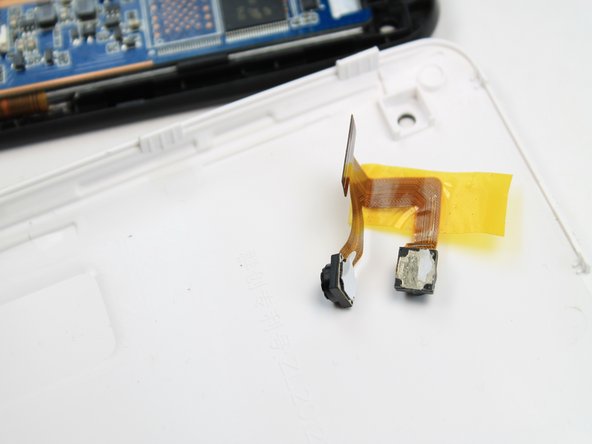
    • The camera module is located directly under the top right corner of the back cover.

    • Peel back the tape holding down the camera ribbon connector using a pair of tweezers.

    • As you peel the tape backward, the front facing camera may come out, this is not an issue.

    • If the front facing camera does not come out, gently lift it out with a pair of tweezers

  3. iVIEW-754TPC Camera Assembly Replacement, Remove Camera: crwdns2935265:03crwdnd2935265:01crwdnd2935265:02crwdne2935265:0 iVIEW-754TPC Camera Assembly Replacement, Remove Camera: crwdns2935265:03crwdnd2935265:02crwdnd2935265:02crwdne2935265:0
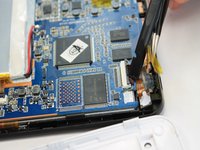
    • Use a spudger to lift flap on top of the camera ZIF adapter.

    • At this point the camera module can be easily removed with a pair of tweezers.

    • During reassembly, make sure you put the ZIF adapter snugly back into its socket and secure the flap.

crwdns2915888:0crwdne2915888:0

To reassemble your device, follow these instructions in reverse order.

crwdns2935227:0crwdne2935227:0

Robert Clark

crwdns2935283:001/21/15crwdne2935283:0

1,065 crwdns2915208:0crwdne2915208:0

crwdns2935297:07crwdne2935297:0

crwdns2915084:0crwdne2915084:0

USF Tampa, Team 5-4, Brown Winter 2015 crwdns2935289:0USF Tampa, Team 5-4, Brown Winter 2015crwdne2935289:0

USFT-BROWN-W15S5G4

crwdns2931471:04crwdne2931471:0

crwdns2935297:016crwdne2935297:0

crwdns2944067:00crwdne2944067:0

crwdns2917038:0crwdne2917038:0

crwdns2936625:0crwdne2936625:0:

crwdns2936751:024crwdne2936751:0 1

crwdns2936753:07crwdne2936753:0 2

crwdns2936753:030crwdne2936753:0 10

crwdns2942667:0crwdne2942667:0 203