crwdns2915892:0crwdne2915892:0
If your iPod Nano 7th Generation is no longer charging, it might be time to replace the battery. This guide will walk you through the steps to remove and replace the old battery with a new one, restoring your device to its former glory. The procedure involves disassembling the device, removing the old battery, and soldering a new one in place. Before you begin, ensure you have all the necessary tools and follow the instructions carefully to avoid damaging your iPod.
crwdns2942213:0crwdne2942213:0
-
-
Lay the iOpener over the plastic tab to loosen the adhesive. Let the bag sit on the device for approximately 90 seconds before attempting to open the panel.
-
-
-
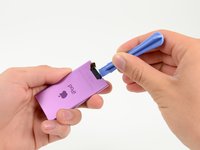
Use a plastic opening tool to pull the rear plastic cover away from the device until there is enough room to insert a spudger.
-
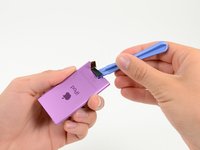
Insert a spudger under the cover, then pry it up and away from the device.
-
Remove the rear plastic cover from the iPod.
Too bad there is not a warning for bluetooth antenna damage... This guide led me to tearing my antenna.
still broke the antenna its very easy too
-
-
-
Remove the single 1.4 mm Phillips #000 screw from the black plastic spacer.
-
-
-
Use a plastic opening tool to remove the black plastic spacer from the Nano.
-
-
-
Remove the two 2 mm Phillips #000 screws from the bottom of the case.
-
-
-
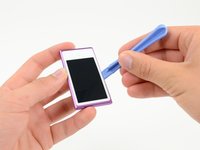
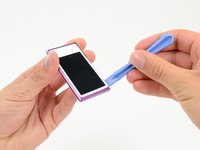
Insert a plastic opening tool into the seam between the white plastic front panel and the rear case.
-
Slide the opening tool along the edge of the front panel to free it from clips and adhesive.
-
-
-
Use a spudger to press the midframe screw tab up and out of the rear case.
-
-
-
-
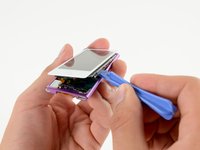
Use a metal spudger to carefully pry near the Lightning connector and under all parts of the front panel assembly: the front glass/digitizer, the LCD display and the metal midframe.
This step is extremely difficult to do... How am I supposed to manage to lift the frame with the LCD screen without potentially causing damage to the LCD screen?
Yeah, I did run into a roadblock with that too, so I’ll have to find a heat gun (or iOpener) and see if I can use that to loosen the frame.
Hello, My name is Michael , in this moment I destroyed one of the lines of the screen, because in this point every connector it is the right side , so I advice start for the another side , left up through right down side i think is the better way.
it is the shame for me.
This is quite bad way to separate the display from the housing. Many people will destroy the touch panel ribbon or the LCD. It is far better way that you insert very thin(~0.5mm) plastic card (do not use metal tool) to the gap between the housing and the iron LCD mounter, and the do as written.
-
-
-
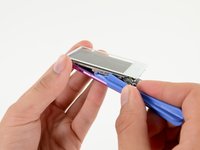
Continue prying along the edges under the front panel assembly, releasing the clips and adhesive along the sides of the device.
-
-
-
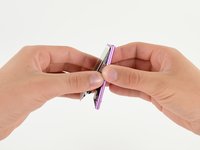
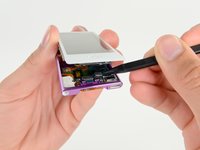
Pull the front panel assembly slightly down and partially out of the device.
STOP! DO NOT ATTEMPT THIS UNTIL AFTER STEP 14 IF YOU VALUE NOT SEVERING THE LCD CABLE! Just please, please be aware that the battery cable CANNOT be disconnected, be careful!
-
-
-
Use a spudger to release the digitizer cable and display data cable connectors.
-
-
-
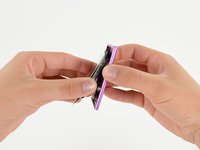
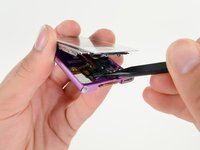
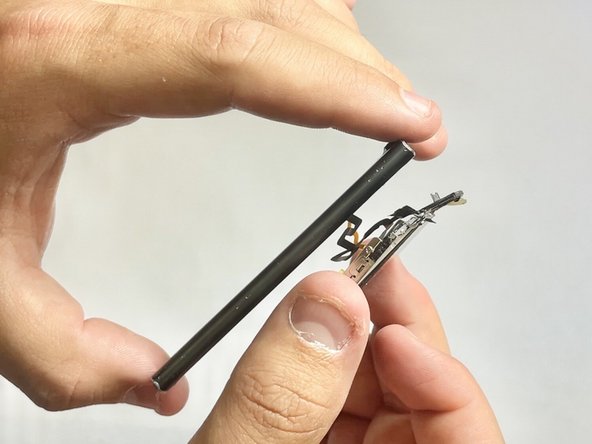
Gently unfold the two halves of the device to access the internal components.
-
-
-
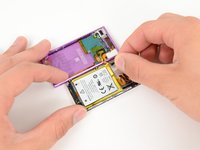
Pull up on the battery pull tab to free the battery from its adhesive.
Disconnecting the battery from the lcd screen can ruin the battery,
so why do that if you are just replacing the digitizer?
rather just open the six screws and disconnect the digitizer.
-
-
-
Completely separate the front panel assembly from the rest of the device.
-
-
-
Use a cotton swab or Q-tip to remove any dust or lint on both sides of the iPod.
-
-
-
Scrape the rubber adhesive off of the solder joints using a spudger.
-
-
-
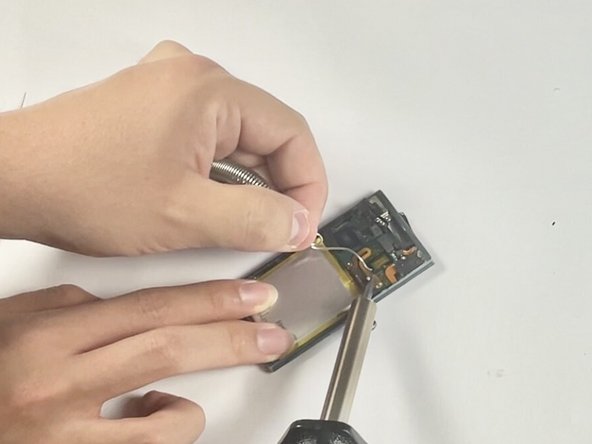
Heat your soldering iron. Place the soldering iron on the solder joints of the battery connections to melt the solder.
-
Carefully pull the old battery away from the motherboard as the solder melts.
-
-
-
Using the iFixit opening pick, carefully pry open the device. Start from the edges and work your way around to separate the screen from the back cover.
-
Gently lift the screen to reveal the internal components.
-
Use the iFixit opening pick to disconnect the screen cable from the motherboard gently.
-
-
-
Place the new battery on the back of the screen and apply fresh solder.
-
-
-
Reconnect the screen cable to the motherboard.
-
Carefully place the screen back into the casing.
-
Press the screen and back cover together until they click into place.
-


To reassemble your device, follow these instructions in reverse order.
To reassemble your device, follow these instructions in reverse order.
crwdns2935221:0crwdne2935221:0
crwdns2935229:06crwdne2935229:0

crwdns2915084:0crwdne2915084:0

UC Davis, Team 2-2, Whithaus Spring 2024 crwdns2935289:0UC Davis, Team 2-2, Whithaus Spring 2024crwdne2935289:0
UCD-WHITHAUS-S24S2G2
crwdns2931471:03crwdne2931471:0
crwdns2935297:04crwdne2935297:0
crwdns2947412:04crwdne2947412:0
i tried this and screwed up my ipod
but was it a small accident or is it just too hard/risky to do?
CUHD -
Que tipo de batería usa el ipod nano 7a.generacion??☝️ Cómo comprar??
I also tried this and almost immediately destroyed the screen. I removed the first three screws and heated the adhesive around the screen, but whilst prying it away from the body it cracked very easily. BEWARE - unless you are very experienced with phone screen removal/replacement, I WOULD NOT recommend trying this. Better to leave this one to the professionals. :-(