crwdns2933423:0crwdne2933423:0
crwdns2947577:0crwdnd2947577:0crwdne2947577:0

iPhone X Disassembly

crwdns2942213:0crwdne2942213:0

crwdns2936621:0crwdne2936621:0

    1. iPhone X Disassembly, Turn off the phone and remove SIM Card: crwdns2935265:01crwdnd2935265:01crwdnd2935265:02crwdne2935265:0 iPhone X Disassembly, Turn off the phone and remove SIM Card: crwdns2935265:01crwdnd2935265:02crwdnd2935265:02crwdne2935265:0
      • Press the wake button and volume down button to turn off the phone.

      crwdns2952109:0crwdne2952109:0

      crwdns2917038:0crwdne2917038:0

    2. iPhone X Disassembly, Open the phone: crwdns2935265:02crwdnd2935265:01crwdnd2935265:03crwdne2935265:0 iPhone X Disassembly, Open the phone: crwdns2935265:02crwdnd2935265:02crwdnd2935265:03crwdne2935265:0 iPhone X Disassembly, Open the phone: crwdns2935265:02crwdnd2935265:03crwdnd2935265:03crwdne2935265:0
      • Use the Pentaloble screwdriver to remove the charging port screws. Heating the phone with a heat gun will allow the phone to be opened more easily.

      crwdns2952109:0crwdne2952109:0

      crwdns2917038:0crwdne2917038:0

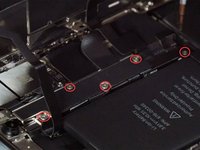
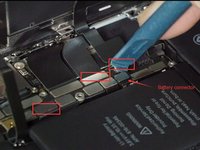
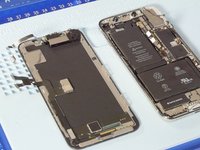
    3. iPhone X Disassembly, Remove the iPhone X OLED screen: crwdns2935265:03crwdnd2935265:01crwdnd2935265:03crwdne2935265:0 iPhone X Disassembly, Remove the iPhone X OLED screen: crwdns2935265:03crwdnd2935265:02crwdnd2935265:03crwdne2935265:0 iPhone X Disassembly, Remove the iPhone X OLED screen: crwdns2935265:03crwdnd2935265:03crwdnd2935265:03crwdne2935265:0
      • Undo 5 screws shown in the picture below with a tripoint #Y000 screwdriver

      • These screws are all different sized so keep track of where they go

      • Release the battery/LCD screen/digitizer/ear speaker connectors with a spudger.

      crwdns2952109:0crwdne2952109:0

      crwdns2917038:0crwdne2917038:0

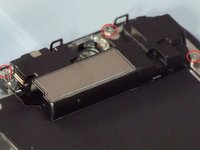
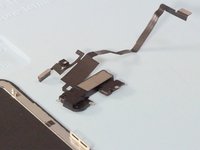
    4. iPhone X Disassembly, Remove the ear speaker: crwdns2935265:04crwdnd2935265:01crwdnd2935265:02crwdne2935265:0 iPhone X Disassembly, Remove the ear speaker: crwdns2935265:04crwdnd2935265:02crwdnd2935265:02crwdne2935265:0
      • Undo 3 Y000 screws and heating the flex cable with a heat gun, we can remove the ear speaker easily

      crwdns2952109:0crwdne2952109:0

      crwdns2917038:0crwdne2917038:0

    5. iPhone X Disassembly, Remove rear-facing cameras.: crwdns2935265:05crwdnd2935265:01crwdnd2935265:01crwdne2935265:0
      • Remove the 2 Phillips #PH00 screws and remove the metal plate, release the rear cameras connectors.

      • These screws are also different sizes

      crwdns2952109:0crwdne2952109:0

      crwdns2917038:0crwdne2917038:0

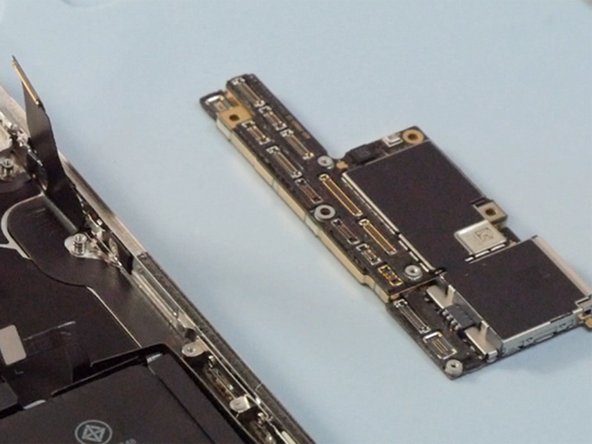
    6. iPhone X Disassembly, Remove motherboard.: crwdns2935265:06crwdnd2935265:01crwdnd2935265:02crwdne2935265:0 iPhone X Disassembly, Remove motherboard.: crwdns2935265:06crwdnd2935265:02crwdnd2935265:02crwdne2935265:0
      • Release all connectors on the motherboard with a spudger

      • Undo 3 Phillips #PH00 screws on the mother board then we can take out the mother board.

      crwdns2952109:0crwdne2952109:0

      crwdns2917038:0crwdne2917038:0

    7. iPhone X Disassembly, Remove Loudspeaker and Taptic engine: crwdns2935265:07crwdnd2935265:01crwdnd2935265:03crwdne2935265:0 iPhone X Disassembly, Remove Loudspeaker and Taptic engine: crwdns2935265:07crwdnd2935265:02crwdnd2935265:03crwdne2935265:0 iPhone X Disassembly, Remove Loudspeaker and Taptic engine: crwdns2935265:07crwdnd2935265:03crwdnd2935265:03crwdne2935265:0
      • Undo 8 screws on the retaining plate then remove the plate taking care to not break the small connector on the plate that connects just under the taptic engine

      • Remove the loud speaker and the taptic engine.

      crwdns2952109:0crwdne2952109:0

      crwdns2917038:0crwdne2917038:0

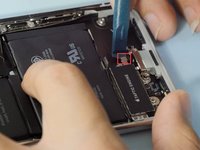
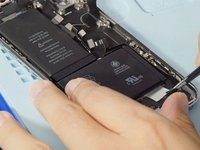
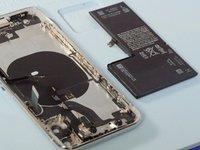
    8. iPhone X Disassembly, Remove battery: crwdns2935265:08crwdnd2935265:01crwdnd2935265:02crwdne2935265:0 iPhone X Disassembly, Remove battery: crwdns2935265:08crwdnd2935265:02crwdnd2935265:02crwdne2935265:0
      crwdns2935267:0crwdne2935267:0
      Tweezers
      $4.99
      • Pulling out 4 battery adhesives with a tweezers then we can remove the battery.

      crwdns2952109:0crwdne2952109:0

      crwdns2917038:0crwdne2917038:0

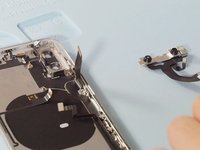
    9. iPhone X Disassembly, Remove front-facing camera: crwdns2935265:09crwdnd2935265:01crwdnd2935265:02crwdne2935265:0 iPhone X Disassembly, Remove front-facing camera: crwdns2935265:09crwdnd2935265:02crwdnd2935265:02crwdne2935265:0
      • Heating the front facing camera with a heat gun will make it easily to be removed

      crwdns2952109:0crwdne2952109:0

      crwdns2917038:0crwdne2917038:0

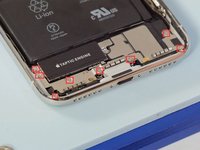
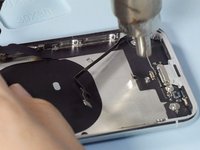
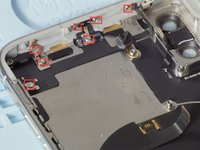
    10. iPhone X Disassembly, Remove the charging port and antenna: crwdns2935265:010crwdnd2935265:01crwdnd2935265:03crwdne2935265:0 iPhone X Disassembly, Remove the charging port and antenna: crwdns2935265:010crwdnd2935265:02crwdnd2935265:03crwdne2935265:0 iPhone X Disassembly, Remove the charging port and antenna: crwdns2935265:010crwdnd2935265:03crwdnd2935265:03crwdne2935265:0
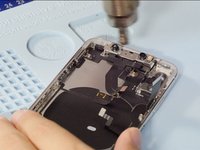
      • Release 4 screws on the frame shown in the picture

      • Heating the charging port flex cable then we can remove it easily

      crwdns2952109:0crwdne2952109:0

      crwdns2917038:0crwdne2917038:0

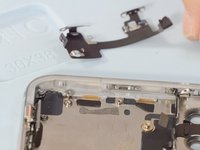
    11. iPhone X Disassembly, Remove Wi-Fi antenna: crwdns2935265:011crwdnd2935265:01crwdnd2935265:03crwdne2935265:0 iPhone X Disassembly, Remove Wi-Fi antenna: crwdns2935265:011crwdnd2935265:02crwdnd2935265:03crwdne2935265:0 iPhone X Disassembly, Remove Wi-Fi antenna: crwdns2935265:011crwdnd2935265:03crwdnd2935265:03crwdne2935265:0
      • Release 7 screws on the Wi-Fi flex cable

      • Heating the flex cable with a heat gun make it easier to be removed

      crwdns2952109:0crwdne2952109:0

      crwdns2917038:0crwdne2917038:0

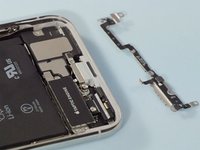
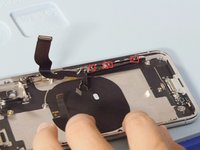
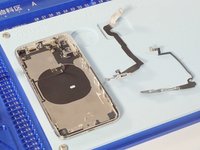
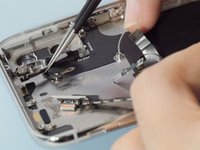
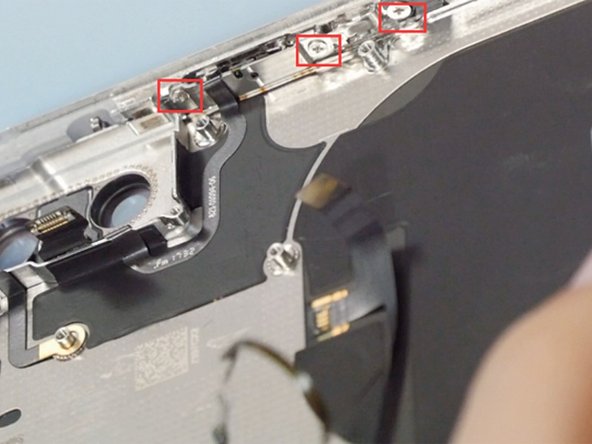
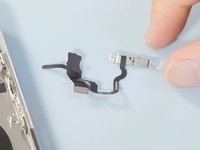
    12. iPhone X Disassembly, Remove power button flex cable: crwdns2935265:012crwdnd2935265:01crwdnd2935265:03crwdne2935265:0 iPhone X Disassembly, Remove power button flex cable: crwdns2935265:012crwdnd2935265:02crwdnd2935265:03crwdne2935265:0 iPhone X Disassembly, Remove power button flex cable: crwdns2935265:012crwdnd2935265:03crwdnd2935265:03crwdne2935265:0
      • Release 3 screws on the power button

      • Heating the flex cable with a heat gun then it can be removed easily

      crwdns2952109:0crwdne2952109:0

      crwdns2917038:0crwdne2917038:0

crwdns2915888:0crwdne2915888:0

To reassemble your device, follow these instructions in reverse order.

crwdns2935221:0crwdne2935221:0

crwdns2935229:0135crwdne2935229:0

Mandy

crwdns2935283:012/05/14crwdne2935283:0

9.612 crwdns2915208:0crwdne2915208:0

crwdns2935297:09crwdne2935297:0

crwdns2947412:026crwdne2947412:0

What About the backside ? I heard that when the backside is shattered, it’s almost impossible to repair, because of the glue that holds the backside and parts together ?

Arnoud - crwdns2934203:0crwdne2934203:0 crwdns2950251:0crwdne2950251:0

Hi avdk, we don’t tear down the back glass but we will pay attention to this question. If there is a definite answer, I will reply to you .Thank you.

Mandy - crwdns2934203:0crwdne2934203:0 crwdns2950251:0crwdne2950251:0
crwdns2917038:0crwdne2917038:0

crwdns2936625:0crwdne2936625:0:

crwdns2936751:024crwdne2936751:0 21

crwdns2936753:07crwdne2936753:0 146

crwdns2936753:030crwdne2936753:0 645

crwdns2942667:0crwdne2942667:0 235,372