crwdns2915892:0crwdne2915892:0
Use this guide to replace your iPhone's screen, which will give you a new front glass panel, digitizer, and LCD. The LCD is adhered to the glass at the factory and the two parts are not separable without damage.
After successfully replacing the screen, protect your new display from scratches by installing a screen protector.
crwdns2942213:0crwdne2942213:0
crwdns2936621:0crwdne2936621:0
-
-
Power off your iPhone before beginning disassembly.
-
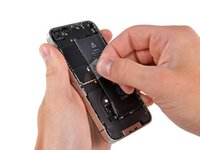
Your iPhone 4 rear cover may have either two #000 Phillips screws or Apple's 5-Point "Pentalobe" screws (second image). Check which screws you have, and ensure you also have the correct screwdriver in order to remove them.
-
Remove the two 3.6 mm Pentalobe or Phillips #000 screws next to the dock connector.
-
-
-
Push the rear panel toward the top edge of the iPhone.
-
-
-
Pinch the rear panel with your fingers and lift it away from the iPhone. Alternatively, use a Small Suction Cup .
-
-
-
Remove the single 2.5 mm Phillips screw securing the battery connector to the logic board.
-
-
-
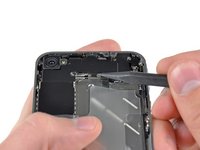
Use a plastic opening tool to gently pry the battery connector up from its socket on the logic board.
-
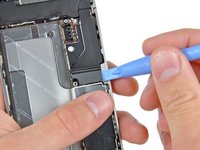
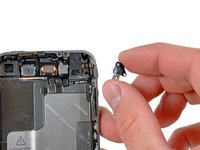
Remove the metal clip covering the antenna connector.
-
-
-
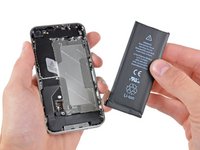
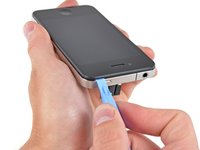
Use the clear plastic pull tab to gently lift the battery out of the iPhone.
-
If there's any alcohol solution remaining in the phone, carefully wipe it off or allow it to air dry before installing your new battery.
-
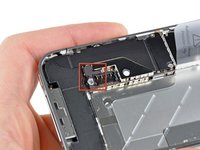
Before reconnecting the battery connector, be sure the contact clip (shown in red) is properly positioned next to the battery connector.
-
-
-
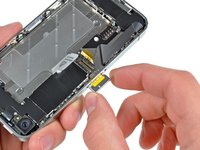
Use a SIM card eject tool or a paperclip to eject the SIM card and its holder.
-
Remove the SIM card and its holder.
-
-
-
Remove the following two screws:
-
One 1.2 mm Phillips
-
One 1.6 mm Phillips
-
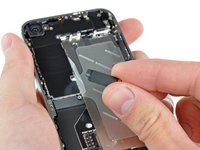
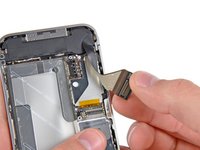
Remove the thin steel dock connector cable cover from the iPhone.
-
-
-
Use an iPod opening tool to gently pry the dock cable connector up off the logic board from both short ends of the connector.
-
-
-
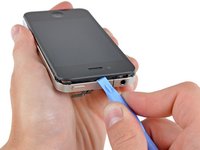
Carefully peel the dock ribbon cable off the logic board and the lower speaker enclosure.
-
-
-
Use a plastic opening tool to pry the lower antenna connector up off its socket on the logic board.
-
-
-
-
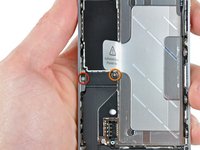
Remove the 1.9 mm Phillips screw securing the bottom of the logic board to the inner case.
-
-
-
Remove the following five screws securing the Wi-Fi antenna to the logic board:
-
One 2.3 mm Phillips
-
Two 1.6 mm Phillips
-
One 1.4 mm Phillips
-
One 4.8 mm Phillips
-
-
-
Use an iPod opening tool to slightly lift the top edge of the Wi-Fi antenna away from the logic board.
-
Use the tip of a spudger to pull the Wi-Fi retaining clips away from the inner frame.
-
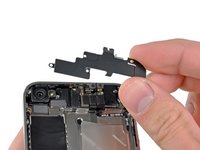
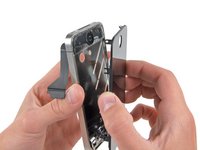
Remove the Wi-Fi antenna from the iPhone. Make sure you don't lose the metal clips on the top of the cover where the 4.8mm screw attaches or the 4.8mm screw. That's the primary reason for abnormal Wi-Fi performance after the reassembly.
-
-
-
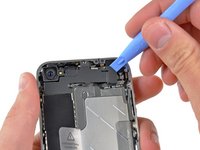
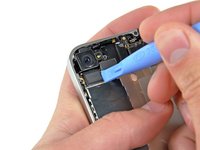
Use an iPod opening tool to carefully lift the rear camera connector up off its socket on the logic board.
-
Remove the rear camera.
-
-
-
Remove the small circular white sticker (warranty sticker and water indicator) covering the screw near the battery pull tab.
-
Remove the 2.4 mm Phillips screw that was hidden underneath the sticker.
-
-
-
Use the edge of a plastic opening tool to gently pry the following connectors up and out of their sockets on the logic board:
-
Digitizer cable (pry from bottom)
-
LCD cable (pry from bottom)
-
Headphone jack/volume button cable (pry from top)
-
Top Microphone/sleep button cable (pry from top)
-
Front camera cable (pry from top)
-
-
crwdns2935267:0crwdne2935267:0Standoff Screwdriver for iPhones$5.49
-
Remove the 4.8 mm standoff screw near the headphone jack.
-
Without this part, the motherboard could damage the ribbon cables around it.
-
-
-
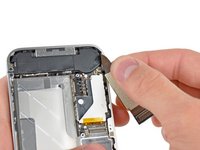
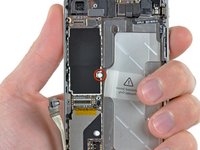
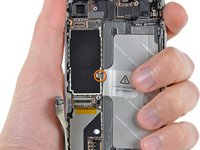
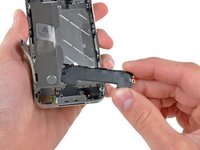
Carefully remove the logic board from the iPhone, minding any cables that may get caught.
-
-
-
Remove the single 2.4 mm Phillips screw securing the speaker enclosure to the side of the inner frame.
-
-
-
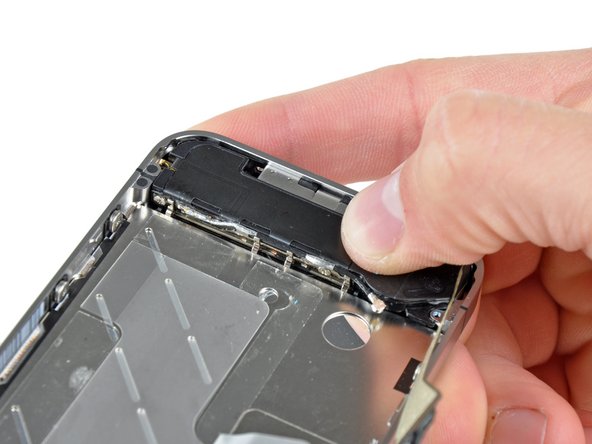
Remove the speaker enclosure from the iPhone.
-
-
-
Remove the following two screws securing the vibrator to the inner frame:
-
One 6 mm Phillips
-
One 1.4 mm Phillips
-
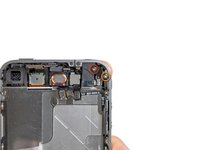
Remove the vibrator from the iPhone.
-
-
-
Remove the 1.5 mm Phillips screw securing the front panel near the headphone jack.
-
-
-
Remove the three large-headed 1.5 mm Phillips screws along the volume button side of the iPhone.
-
-
-
Remove the 1.5 mm Phillips screw near the lower microphone.
-
-
-
Remove the 1.5 mm Phillips screw near the dock connector ribbon cable.
-
-
-
Remove the three large-headed 1.5 mm Phillips screws along the SIM card side of the iPhone.
-
Remove the small-headed 1.5 mm Phillips screw near the rear camera (previously removed).
-
-
-
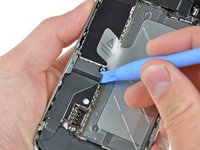
Carefully insert the edge of an iPod opening tool between the rubber bezel around the front glass panel and the steel inner frame.
-
Carefully pry the upper edge of the front panel assembly away from the steel inner frame.
-
-
-
Slowly and gently lift the top edge of the front panel assembly away from the steel inner frame.
-
Continue to rotate the front panel assembly away from the steel inner frame until it slowly begins to peel off the adhesive applied below the home button area.
-
It may be easiest to insert a spudger at the top and work it around the edges, spreading gently as you go.
-
Carefully pull the lower edge of the front panel assembly away from the steel inner frame.
-
-
-
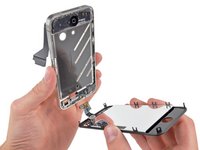
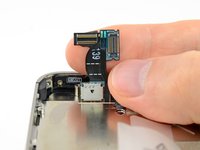
De-route the digitizer and LCD cables through the steel inner frame, and remove the display from the iPhone.
-
When the front panel has been correctly installed, both the LCD and digitizer cables should be immediately next to one another and should be the same length, as shown in the second photo.
-
During reassembly, do not touch the metallic area at the base of the LCD data cable, as this can cause problems with the LCD. If you do touch it accidentally, clean it gently with an alcohol wipe before continuing.
-
-
-
Your replacement display may come with colored plastic film on the back of the LCD. If so, use the pull tab near the home button to peel the plastic film from the LCD before installing the new display in your iPhone.
-
After reassembly, clean the touchscreen surface with an alcohol wipe prior to turning the iPhone back on. The alcohol helps dissipate any lingering static electricity, which can cause problems with the display.
-
After reassembly, protect your new display from any scratches by installing a new screen protector.
-


To reassemble your device, follow these instructions in reverse order.
crwdns2935221:0crwdne2935221:0
crwdns2935229:01713crwdne2935229:0
crwdns2935103:0crwdne2935103:0


crwdns2947412:081crwdne2947412:0
Done! Boy, it took me 1.5 but done. Anyway don't forget guys it's quality that counts so don't hurry up, take your time & get light (lots of light above you). Get a coke and it will work it. I reassembled everything, turned it on and home button working yeah. Ouch, my screen was no more sensitive. I killed the digitizer cable. Lucky me I had another broken iPhone which i took the LCD and put it on my phone. (about 1.5 again to reassemble everything back)
Tip 1: I did the whole thing with crwdns2937315:0IF145-047crwdne2937315:0 and I had everything I needed.
Tip 2: Print Home_Button_Screw_Template.pdf (you'll need it) Find a magnet pad to put under your A4 paper. This will help hold the screws.
Tip 3: Use a suction cup at step 28. It found it in my crwdns2937315:0IF145-047crwdne2937315:0
Tip 4: I killed my digitizer cable at step 29 & 30. So please pay double attention there.
Tip 5: Get yourself a beer when finished :)
Rapstorm - crwdns2934203:0crwdne2934203:0 crwdns2950251:0crwdne2950251:0
Only do tip 5 AND AGAIN ONLY do if your 21 or older
i did it success but the sensor dosnt work what the problem
abdallah hanoud - crwdns2934203:0crwdne2934203:0 crwdns2950251:0crwdne2950251:0
Great guide, but I can't seem to get the back panel on afterwords. All of the plastic tabs seem to line up correctly but it won't slide down into place. Any advise?
Ruben - crwdns2934203:0crwdne2934203:0 crwdns2950251:0crwdne2950251:0
I had the same problem.
Rear panel did not seem to slide back in to place.
After googling I found this tip:
Back panel will not slide back on?
If everything looks fine and aligned then you might just need to use a bit more force.
Worked for me :)