crwdns2915892:0crwdne2915892:0
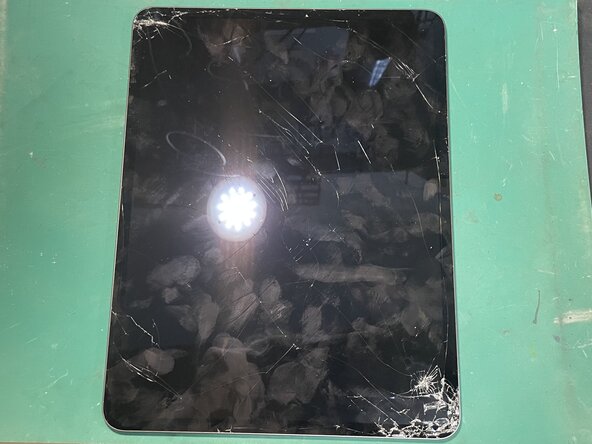
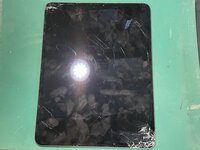
Guide to replace Screen on the new iPad Pro M4 13".
crwdns2942213:0crwdne2942213:0
-
-
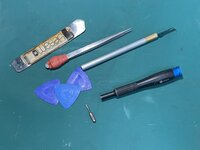
Tools Needed: - Heat mat or Heat Gun - Isopropyl Alcohol - Metal Pry Tool - Plastic opening picks - X-ACTO Knife - Tweezers - PH000 (Philips) + Handle - Adhesive - New OLED Screen Display (OLED + Glass)
-
It’s the first iPad to use OLED-based display modules (both the 11-inch and 13-inch M4 iPad Pros have a “tandem OLED” display).
-
The 13-inch M4 iPad Pro is Apple’s thinnest device ever, at 5.1 mm thick.
-
It’s the first iPad to use the Apple M4 chip.
-
*** Helpful Repair tip - Always look at your NEW part and assess how it's built, where cables are, and what may need to be transferred to your new part. (If you get accustomed to where cables lay on the new screen you can prevent cutting cables.)
-
-
-
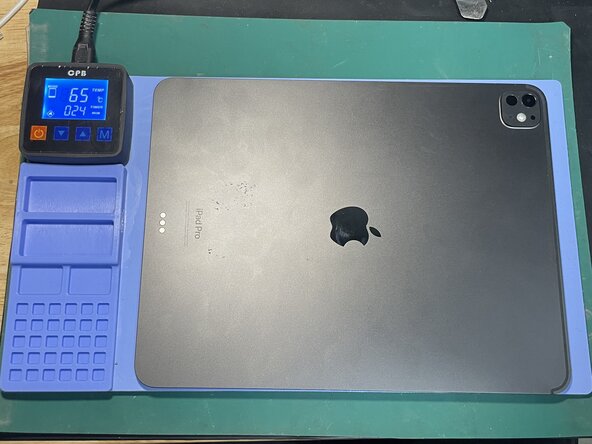
Place iPad on Heating Pad & allow iPad to heat up to around 75 Degrees Celsius to 80 Degrees Celsius (You mainly are aiming to increase the total temp of the iPad so that all the adhesive releases easier.)
-
*iPad may be hot to the touch. You can wear a long sleeve shirt or use a towel to cover your arm and hands when holding.
-
-
-
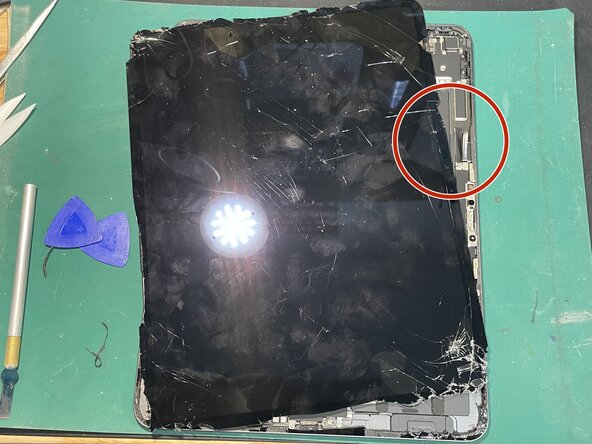
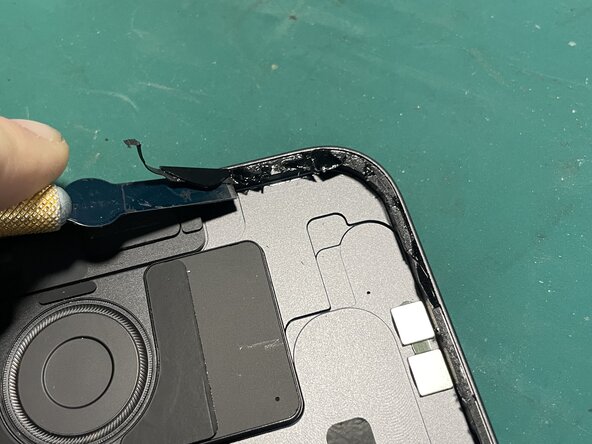
* Start by inserting your X-ACTO knife in between the glass and the metal frame in the TOP LEFT. (Do not to go too far, the picture I provided shows how far you should be putting your tools)
-
*Notice that I applied alcohol to the pic and glass. (Using alcohol is safe as long as you don't drowned the device.) - The adhesive on this iPad is really weak when alcohol is added.
-
As you slide your pick down the glass you may encounter cracks. You will want to slightly lift the glass with your pic and slide the X-ACTO under where the crack is and then continue sliding pic down (Shown in Picture 2)
-
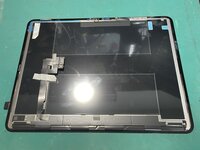
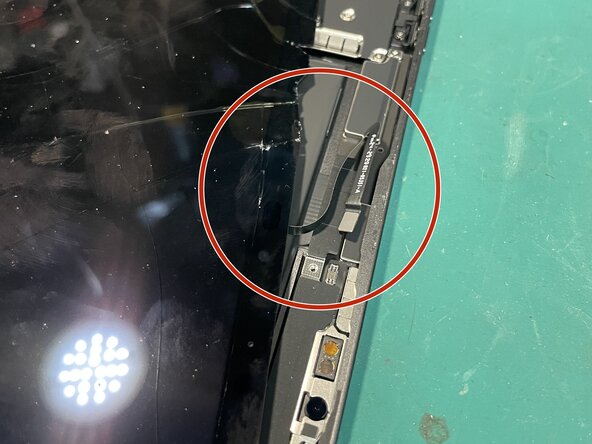
Picture 3 shows examples of cables you want to be cautious around. **Look at the back of your new part and get accustomed to it.**
-
-
-
-
Before you fully lift the screen, position the ipad as shown in the picture with charging port pointing toward you because you will need to unplug a cable
-
Once you unplug this cable, you can safely lift the screen up to the left like a book as shown in the 4th photo. (Be mindful of the cables not to damage them or the board by causing to much upward strain)
-
-
-
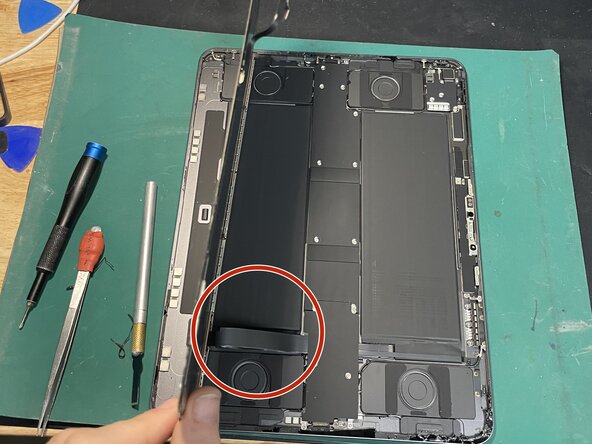
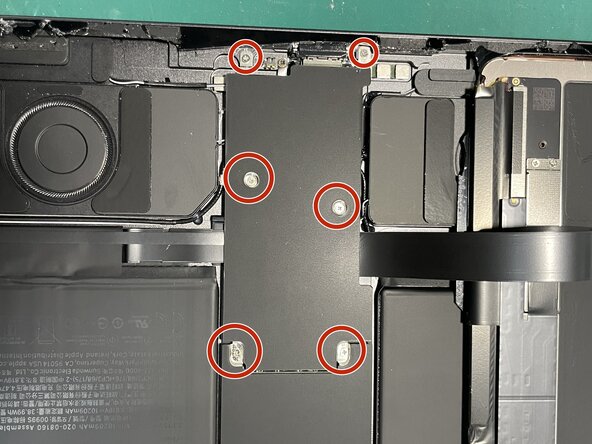
First you will remove all the screws for the plate covering the battery and screen connectors.
-
***ALWAYS UNPLUG BATTERY FIRST AND PLUG BACK IN LAST.** You want the battery to be unplugged first. During reassembly you will want to plug the battery in last.
-
After you remove the old screen, go ahead and clean the frame using alcohol and your X-ACTO knife. (Make sure when cleaning using your X-ACTO knife that you are make short and concise scrapes. You can either slip and damage internal parts or go too fast and damage parts that slightly go higher than the frame like the front camera.)
-
After you have cleaned the frame, go ahead and lay your adhesive down so that when you have the new screen attached you can just take the plastic off the adhesive.
-
-
-
Depending on if you are using an AFTERMARKET PART or an OEM Part you may need to transfer small parts from your old part.
-
**IF YOUR NEW PART HAS SMALL PARTS YOU CAN SKIP THIS STEP**
-
If you need to transfer small parts you will need to transfer: The two magnets, the front mic cable, and the two cables (Under the plate marked in the bottom left of the photo)
-
**Remember to keep the orientation of the magnets the same as the old screen. This is used for cases.**
-
Once you re-attached small parts to new screen you can move to the next step.
-
-
-
Now you will plug in your NEW SCREEN (With small parts) to the iPad.
-
Then plug in the Battery.
-
After you have tested your screen to make sure it is not defective, you can screw the plate that covers the OLED Connectors back down.
-
**Remember that when you are laying the screen back down you need to lay it down slightly crooked at first to plug in the front mic.
-
After you have plugged the front mic back in and screwed the plate back down, you can now remove the plastic from your adhesive and fully close the iPad.
-


To reassemble your device, follow these instructions in reverse order. (Last step should cover reverse order)
To reassemble your device, follow these instructions in reverse order. (Last step should cover reverse order)

crwdns2947410:01crwdne2947410:0
Hello, could you please share the price for the new original screen ??