crwdns2915892:0crwdne2915892:0
Couldn't find a guide to fix a customers iPad so here it is put alot of work into Providing something you can use a reference! Thanks comment please!
crwdns2942213:0crwdne2942213:0
-
-
Be Sure to turn off iPad by pressing and release the volume up button then volume down.
-
While Pressing and holding side button until screen turns off.
-
Just use the slider if you can.
-
-
-
Heating the entire screen will help make it easy to safely remove the screen.
-
-
-
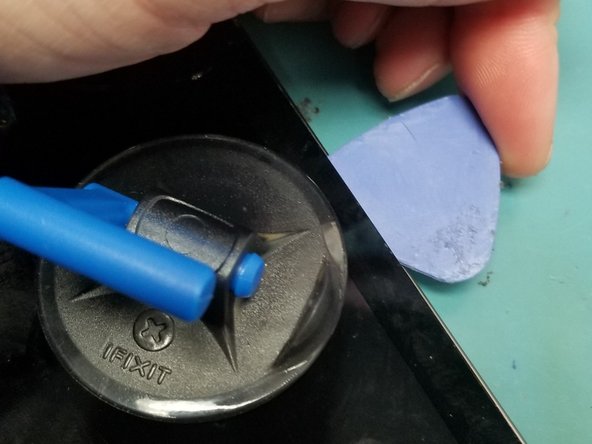
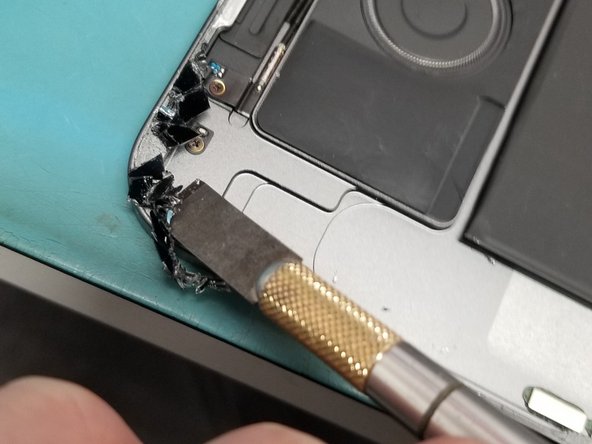
Use a metal pry tool near the least broken shattered side.
-
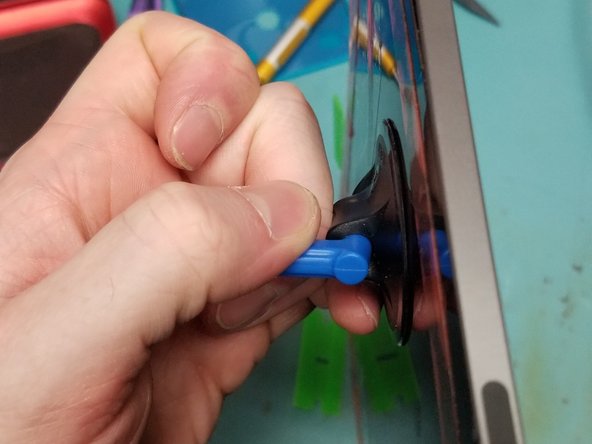
Use a ifixit suction cup to pull up screen for a plastic guitar pick.
-
-
-
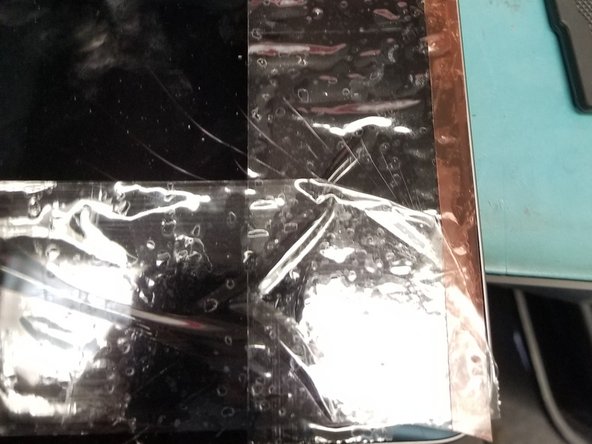
Apply tape or adhesive over broken glass!
-
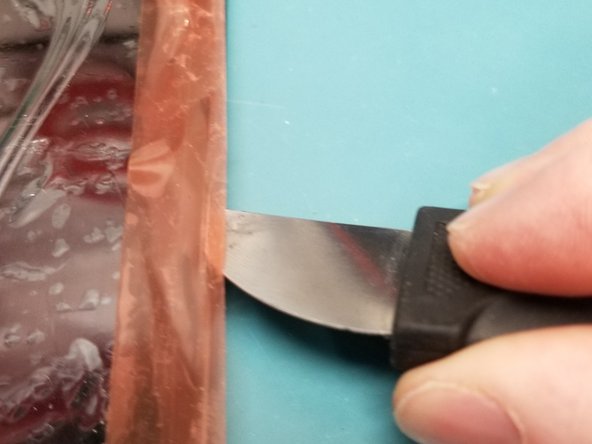
Bust out the metal pry tool lifting broken causing glass to stick to tape working your way around broken side.
-
Wiggle Jiggle the screen off the adhesive using multiple plastic guitar picks.
-
-
-
-
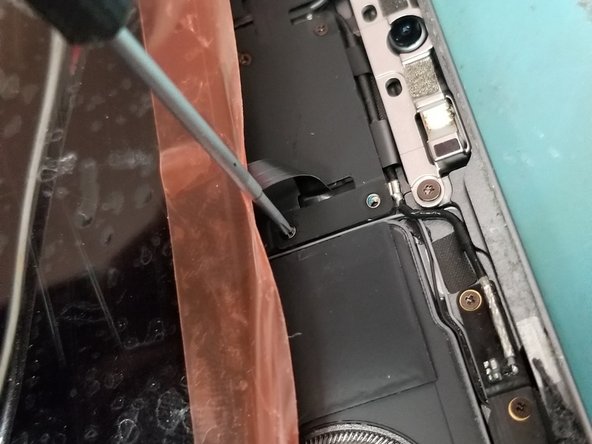
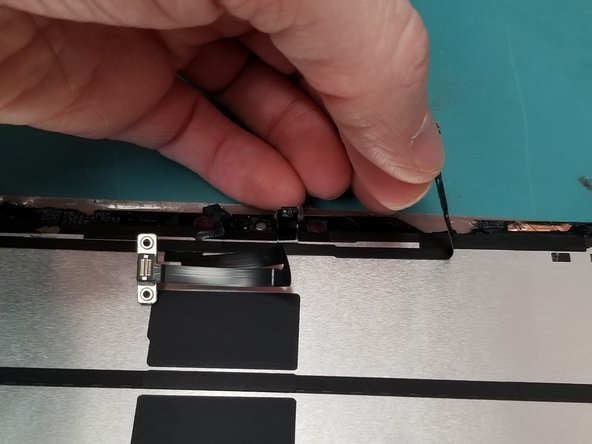
On the Top of the screen the proximity sensor front camera has to be disconnected 1st.
-
-
-
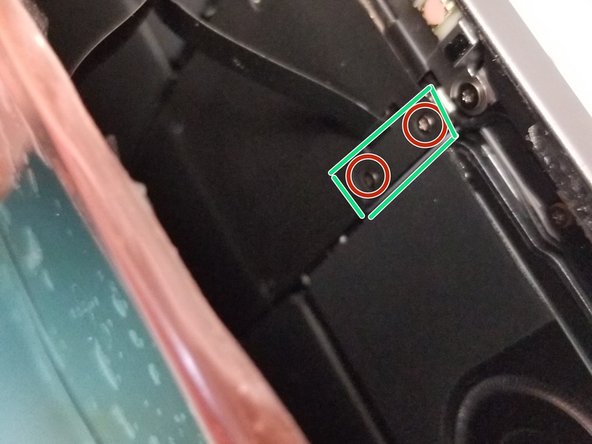
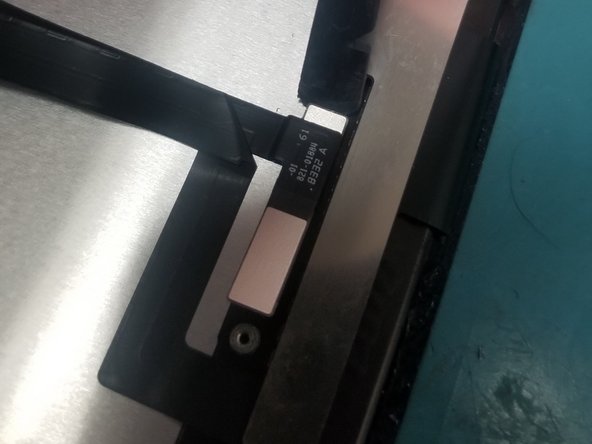
Lay screen flat pull it down just enough to use a PH000 Screw drive to remove the safety bracket
-
Use Flat Ended Spoudger remove the bracken and cable from the Logic board!
-
-
-
Perfect! Now Lift the screen folding it up to the left like so!
-
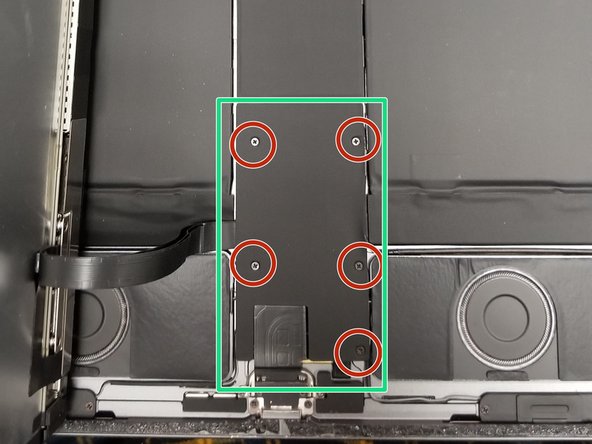
Remove 5 PH000 Screws protecting Power Connection and Display Cables
-
-
-
PH000 to Battery Connection
-
Move Small cable is taped around edges up so you can properly disconnect battery connection
-
Remove all 3 ribbon cables from logic board with flat headed spudger!
-
-
-
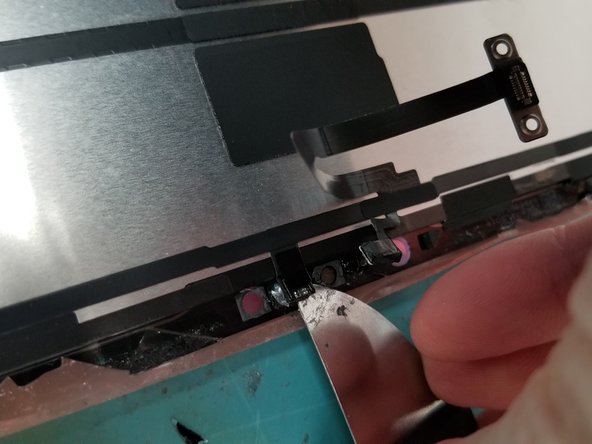
Just a touch of heat don't melt the thing off remove the face ID sensor from Old Screen.
-
Gently use a tool to get under glued down connection on glass frame of screen!
-
-
-
Remove Bracket off old screen you and move it to new screen
-
Transfer Cables and Bracket to new screen
-
-
-
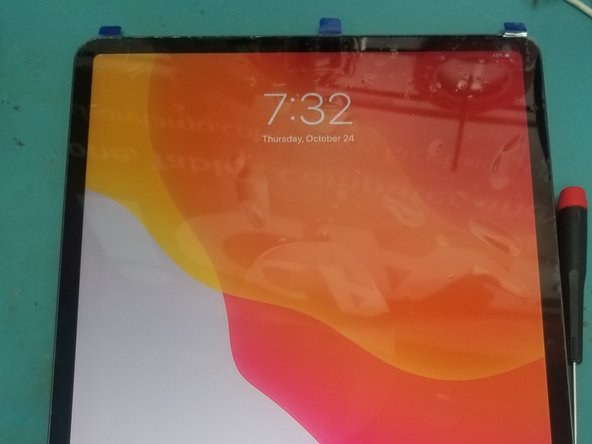
Place Screen without adhesive test your screen and face ID
-
After running test take
-
-
-
Do not clamp recommend to use flat and heavy object
-
Broken glass on the frame will crack your new screen
-


To reassemble your device, follow these instructions in reverse order.
To reassemble your device, follow these instructions in reverse order.
crwdns2935221:0crwdne2935221:0
crwdns2935229:049crwdne2935229:0

crwdns2947412:040crwdne2947412:0
My Face ID no longer works?
Most likely you may have damaged the flex of proximity sensor.
Check connector
Check placement with flash light make sure everything is aligned correctly
why not get a new flex cable from ebay or aliexpress
imab -
What adhesive do you use to reattach their screen?
What size of that tape do you need for this iPad? Thanks
What tool do you use to restore true tone ?
I do not think there is a way without OEM Screen or serial transferring such as with iPhone X MAX screen repairs you would use
I will have to look into it when I have time for you
I have the original screen. It’s still working, the glass is just completely shattered.
Is face id working
Yes, it’s working
Thanks couldnt find a guide for the 11 and the facial id threw me off
Was working on one for the 11 but I am to busy repairing lately. But they are identical pretty
Is the glass adhered to the LCD like the phones?
Yes it is just like phones only on the iPad Air 2&3 and the Pro Series
Mine didn’t start after screen replacement when using the power button. Was scared, but after connecting it to the charger it worked!
I forgot to turn off the power of the ipad and the LCD backlight went out. How can I fix it?
It would be a board level repair you can send out for microsoldering iPad rehab can do
Thanks for the great tutorial! I replaced my iPad Pro screen with no issues!
Thanks for the feed back
The cable that was supposed to be reused was damaged during the swap. Where can i get a replacement?
what glue do you use to attach the face id flex to the new screen?
Hi Mark,
I have lost two screws and I am wondering what are the dimensions of all the screws in my iPad pro 12.9 3rd Gen so I can replace them? I don't want to put the wrong ones in because I have heard that's bad!
@rebeccaperth I might have a recycled ipad pro at my work I can sell you the screws email me at info@icarefargo.com
Question, if I rip the digitizer flex cable to the LCD. (The one with two pins) can you solder the flex cable back together?
Quick question even though it might sound stupid but could the 2021 screen work with the 2018/2020 model?
The guide doesn't show the part regarding the face ID. And it's the most sensitive one. Good guide despite that though.
Thank you for making the guide. It really helped me replace a friend's iPad Pro 12.9 4th generation cracked screen. I did it yesterday, and it only took me a whole day! 😆
I broke the display cables when prying of a badly broken screen, is it possible to buy them seperately, the ones thad did not come with the new screen?
Hi there.
Yes, we sell them! Here's the link!
My 10 year old helped with step 1. He’s a pro at draining batteries in record time. 😆
The first step in the tutorial is, "Allow your iPad's battery to fully drain before starting this repair. A charged battery may catch fire if damaged during the repair."
Ok, but that's not so simple. Is there a guide to efficiently and quickly draining the battery? Something besides app-oriented drains (like watching 6 hours of videos, turning the brightness up, etc.).
Wow, this was nerve-wracking. The top 4 sensors, didn't realize they are all glued on, so pulling them off, thought I broke them. After doing my best to put it back together again (used a tiny bit of crazy glue), everything worked! Getting those tiny screws back in was difficult (mostly getting them to seat on the screwdriver). I bought the glass kit, and suggested tool kit, and clamp, but missed out on the tape (figured it was included). Also came with a sheet of outer tape, but the kit already had it assembled. So once I concluded that was the case, I just took a small strip of the new stuff and used it to "tape" down the 4 sensor array.
On the bottom left corner, I tore off a small piece of copper tape by accident. Not sure if it is functional in any way. There was another in the bottom center. Pretty much part of the black adhesive. Hopefully that doesn't create issues.
But the weirdest thing of all, my shipment literally included a single card: a king of spades. Why?!
Everything was fine, thanks for this good and detailed guide.
In der Anleitung fehlt lediglich, wie man die im "Repait Kit" mitgelieferten Klebestreifen anbringt - es ist zwar mehr oder weniger selbst erklärend, die Ergänzung dieser Beschreibung würde die Gesamtdokumentation perfekt abrunden.
Hinweis zur Hardware: bei meinem iPad 3rd Gen. (Wifi) fehlte der Klebestreifen (Steps 38,39, 43) - funktioniert auch ohne! :-)
Just got my replacement screen and was able to replace it with ease because of these step by step instructions. Thank you!!
Can I use the E6000 glue for the sensor cables during installation? I don't want to buy an entire roll of Tesa tape for that.
I would say so. I used a clear Pattex 100% gel and it worked nicely to glue sensors to screen. It is about 1mm diameter thick glue so you can easily place it from left and right side of sensor and hold it for a while with your fingers. Then I used it to glue flex cables to screen, it’s a bit flexible too.
Liibo -
Bought an iPad Pro 12.9 3rd Gen Cellular 1TB for only 200 bucks with a broken screen and thanks to your great guide and iFixit's awesome parts I got the whole iPad for just about 400 bucks with display. Thanks again, great guide!
I swapped the screen and now my iPad is bootlooping. Can somebody help pls?
Hi, just replaced broken screen on my iPad Pro 12.9 and both FaceID and Truetone are working, thank you ifixit for supplying the good components and this guide with quality pictures showing all detailed operations.
Also I ordered it on Friday morning, it was shipped the same day from Germany and in Czechia it was delivered on Monday, very cool for a free delivery:-)