crwdns2915892:0crwdne2915892:0
This guide will help you replace the SD board.
crwdns2942213:0crwdne2942213:0
-
crwdns2935267:0crwdne2935267:0Heavy-Duty Suction Cups (Pair)$14.95
-
Stick a heavy-duty suction cup near each of the two top corners of the glass panel.
-
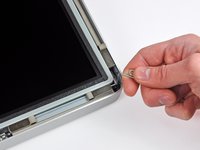
While lightly holding the suction cup against the glass, raise the movable handle until it is parallel with the other handle (as indicated by the third picture).
-
-
-
Gently lift the glass panel perpendicular to the face of the LCD, enough to clear the steel mounting pins attached along the underside of the top edge of the glass panel.
-
Pull the glass panel away from the lower edge of the iMac and carefully set it aside.
-
-
-
Remove the eight T10 Torx screws securing the LCD to the outer case.
-
-
crwdns2935267:0crwdne2935267:0Tweezers$3.99
-
Carefully lay the iMac stand-side down on a flat surface.
-
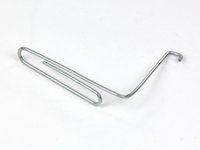
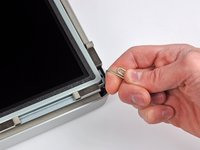
Use a thin hooked tool to lift one side of the top edge of the display by its steel outer frame.
-
Raise and hold the display high enough to access the cables.
-
-
-
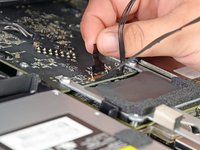
Disconnect the vertical sync cable in the upper left corner of the screen. Use the tip of a spudger to push on the connector's side tabs and gently walk it out of its socket.
-
-
-
-
Disconnect the LED backlight driver cable with your hand by pressing the tab down and sliding it towards the bottom of the display.
-
-
-
Pull the black tab straight up to disconnect the latch on the display data cable ZIF connector.
-
Continue to pull the black tab up toward the top of the device, to detach the display data cable.
-
-
-
Use the tip of a spudger to disconnect the display power cable next to the display data cable.
-
-
-
Carefully pull the display toward the top edge of your iMac and lift it out of the iMac case.
-
-
-
Lay the display face down on a flat, soft surface.
-
If there is a wire or cable underneath adhesive tape, always pull the tape off first. Do not pull on the cable directly.
-
If the cable is glued to the chassis, use a heated iOpener or a hair dryer to soften the adhesive first. You can then slide an opening pick underneath the cable to loosen it. Never pull on the delicate connectors.
-
Slide an opening pick underneath the foam cushion pieces to separate them from the display, and gently pull them off. You may need some double sided tape to re-attach them to the new display.
-
-
crwdns2935267:0crwdne2935267:0Tweezers$4.99
-
Grasp the SD board cable connector with a pair of tweezers and pull it straight away from its socket on the SD board.
-
-
-
Remove the single T8 Torx screw securing the SD board to the outer case.
-
-
-
Lift the free end of the SD board to clear the plastic optical drive fan body, then pull it away from the edge of the outer case case to clear the two mounting pins.
-


To reassemble your device, follow these instructions in reverse order.
To reassemble your device, follow these instructions in reverse order.
crwdns2935221:0crwdne2935221:0
crwdns2935229:010crwdne2935229:0
