crwdns2915892:0crwdne2915892:0
Your optical drive no longer works? Does it refuse to read CDs and DVDs? He grinds then ejects them all? All is not lost, all it takes is a little cleaning that won't cost you anything.
crwdns2942213:0crwdne2942213:0
-
crwdns2935267:0crwdne2935267:0Heavy-Duty Suction Cups (Pair)$14.95
-
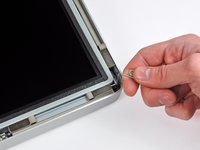
Stick a heavy-duty suction cup near each of the two top corners of the glass panel.
-
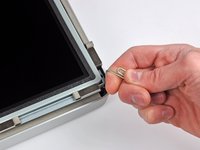
While lightly holding the suction cup against the glass, raise the movable handle until it is parallel with the other handle (as indicated by the third picture).
-
-
-
Gently lift the glass panel perpendicular to the face of the LCD, enough to clear the steel mounting pins attached along the underside of the top edge of the glass panel.
-
Pull the glass panel away from the lower edge of the iMac and carefully set it aside.
-
-
-
Remove the eight T10 Torx screws securing the LCD to the outer case.
-
-
-
Carefully lay the iMac stand-side down on a flat surface.
-
Use a thin hooked tool to lift one side of the top edge of the display by its steel outer frame.
-
-
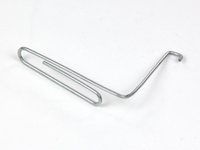
crwdns2935267:0crwdne2935267:0Tweezers$4.99
-
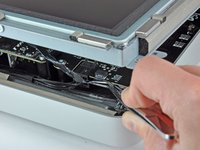
Use a pair of tweezers to pull the vertical sync ribbon cable out of its socket on the LED driver board near the top left corner of your iMac.
-
-
-
Rotate the display out of the outer case enough to disconnect the LED backlight power cable from the LED driver board.
-
-
-
-
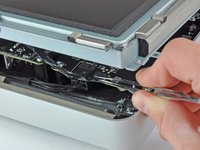
Squeeze the two display data cable connector arms together to unlock it from its socket on the logic board.
-
Pull the display data cable connector away from its socket on the logic board.
-
-
-
Lift the display for enough clearance to disconnect the LCD thermal sensor cable connector from its socket on the logic board.
-
-
-
Carefully pull the display toward the top edge of your iMac and lift it out of the outer case.
-
-
-
Remove the four T10 Torx screws securing the optical drive to the outer case.
-
-
-
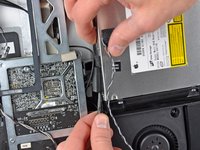
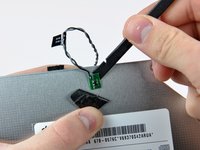
Pull the optical drive thermal sensor connector straight away from its socket on the logic board.
-
-
-
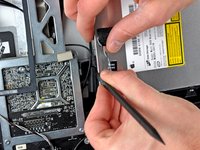
Insert a spudger between the optical drive connector and the optical drive.
-
Twist the spudger to slightly separate the optical drive connector from the optical drive, then use your fingers to pull the connector away from the drive.
-
-
-
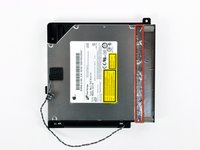
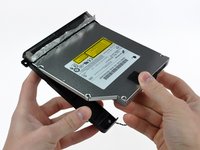
Lift the left edge of the optical drive slightly and pull it away from the right side of the outer case.
-
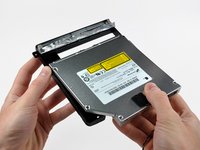
During reassembly, note that there are two holes in the optical drive face plate into which two stubby plastic posts must engage for proper positioning.
-
-
-
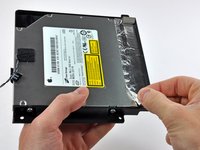
Peel back the portion of aluminum tape highlighted in red, leaving the rest attached to the black plastic optical drive bracket.
-
-
-
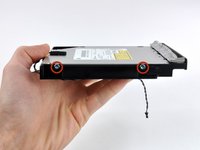
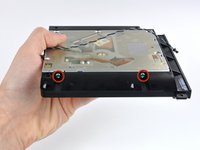
Remove the two T10 Torx screws from each side of the optical drive (four screws total).
-
-
-
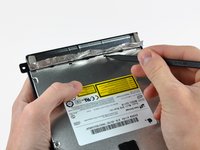
Use the tip of a spudger to press each of the optical drive bracket tabs out of their slots on the bottom of the optical drive.
-
Rotate the optical drive bracket slightly away from the optical drive.
-
Pull the optical drive bracket away from the open end of the optical drive, minding any tabs that may get caught.
-
-
-
Use the tip of a spudger to peel back the piece of foam tape covering the optical drive thermal sensor.
-
Use the flat end of a spudger to carefully pry the thermal sensor up off the adhesive securing it to the optical drive.
-
If you have a disc or anything else stuck inside your optical drive, we have a guide to fix it.
-
-
-
Follow all super drive replacement steps for disassembly. Step 8 is absolutely unnecessary for the repair. Do not peel off the sensor from the optical drive.
-
Once the reader has been disassembled, all you have to do is unscrew the 5 small screws from the reader cover (the side where there are the labels). Remove the cover once the screws have been removed;
-
Plug in your vacuum cleaner and gently vacuum the entire interior, including the lens (beware of vacuum cleaners that are too powerful).
-
With a cotton swab previously dipped in rubbing alcohol, gently clean the lens.
-
reassemble the cover with the screws and reassemble everything.
-
Once everything is reassembled, start and cross your fingers. Usually it's just a dust issue.
-
Enjoy!!!
-


To reassemble your device, follow the instructions in reverse order.
crwdns2934873:0crwdne2934873:0
100%

crwdns2934883:0HelloMacOScrwdne2934883:0 crwdns2934875:0crwdne2934875:0
crwdns2934877:0crwdne2934877:0 ›
