crwdns2915892:0crwdne2915892:0
Follow the steps in this guide to replace the front panel in a 21.5" Retina 4K 2017 iMac.
Some images in this guide use a 2015 iMac, which has minor visual differences. These differences do not affect the repair procedure.
This procedure involves removing the faulty/broken display, as well as transferring the display data cable and thermal sensor to a new display.
crwdns2942213:0crwdne2942213:0
-
crwdns2935267:0crwdne2935267:0iMac Intel 21.5" Cardboard Service Wedge$4.99
-
Before beginning any work on your iMac: Unplug the computer and press and hold the power button for ten seconds to discharge the power supply's capacitors.
-
-
-
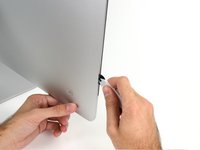
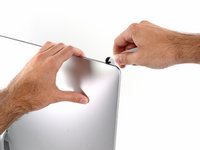
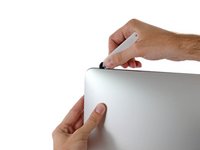
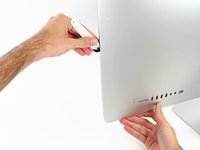
Starting on the left of the display, near the power button, insert the iMac Opening Tool into the gap between the glass panel and the rear enclosure.
-
-
-
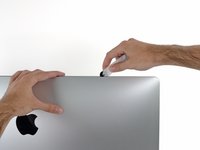
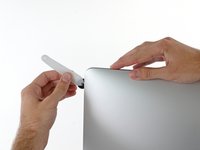
Use the tool like a pizza cutter—roll it along through the gap, and it will cut the foam adhesive through the center.
-
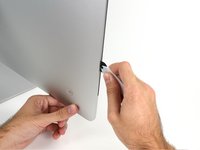
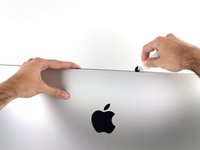
Run the tool up along the left side of the display.
-
-
-
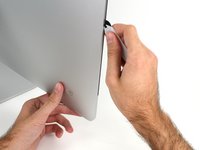
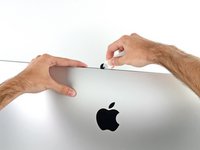
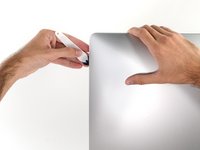
Continue running the tool up around the top left corner.
-
-
-
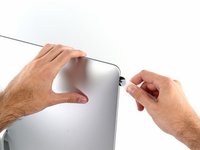
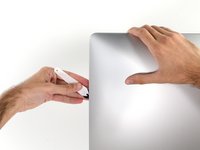
Cut the adhesive along the top left of the display.
-
-
-
Continue along the top of the display.
-
-
-
Push the tool around the top right corner of the display.
-
-
-
Wheel the tool down along the right side of the display.
-
-
-
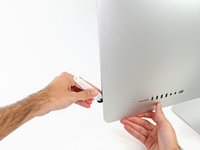
Finish pushing the opening tool to the bottom of the right side of the display.
-
-
crwdns2935267:0crwdne2935267:0Plastic Cards$2.99
-
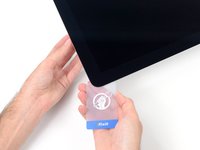
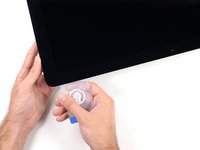
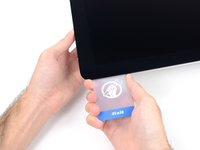
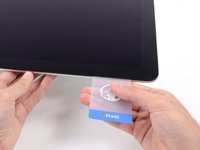
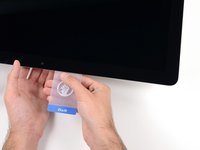
Starting from the top right corner of the iMac, wedge a plastic card between the display and frame.
-
-
-
-
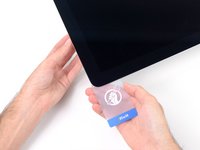
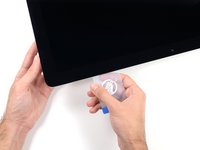
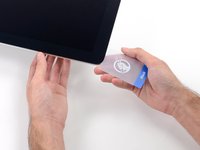
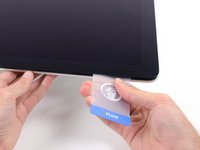
Gently twist the plastic card sideways to create a gap between the display and frame.
-
Move slowly and be careful not to stress the display glass too much—you only need to make a gap of about 1/4".
-
-
-
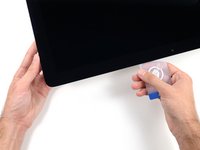
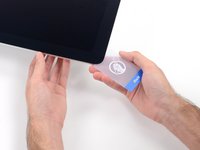
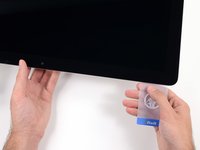
Slide the card toward the center of the display to cut any of the remaining adhesive along the top right corner of the iMac.
-
-
-
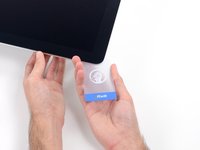
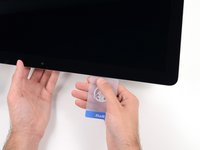
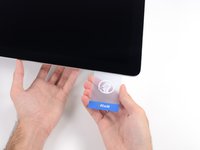
Wedge the plastic card into the top right corner once again, and leave it there to prevent the adhesive from resticking.
-
-
-
Insert a second plastic card into the gap between the display and frame near the top left corner of the iMac.
-
-
-
Gently twist the card upward, slightly increasing the space between the display and frame.
-
-
-
Slide the plastic card toward the center, again stopping just before the iSight camera.
-
-
-
Wedge the plastic card back into the top left corner.
-
-
-
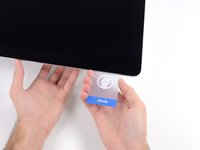
With both plastic cards inserted as shown near the corners, gently twist the cards sideways to increase the gap between display and case.
-
Begin to lift the top of the display up from the frame.
-
-
-
Hold the display with one hand while using your other hand to unplug the display power cable.
-
-
-
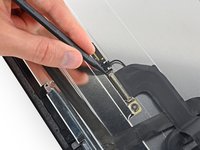
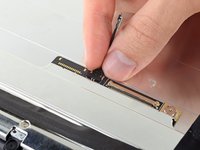
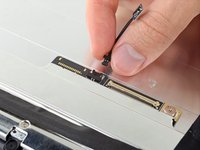
Continuing to support the display with one hand, flip up the metal retaining bracket on the display data cable.
-
Carefully pull the display data cable from its socket on the logic board.
-
-
-
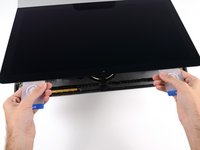
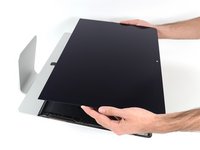
Lift the display up to a near-vertical position.
-
-
crwdns2935267:0crwdne2935267:0Plastic Cards$2.99
-
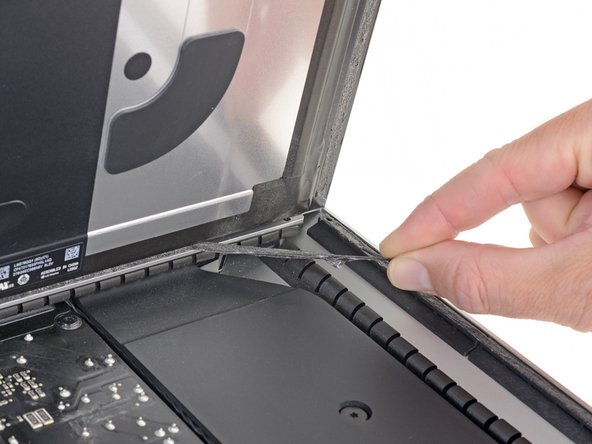
Grasp the small tab at the end of one of the bottom edge display adhesive strips and pull the adhesive toward the top of the iMac to remove it.
-
Repeat this step with the other adhesive strip and remove it.
-
-
-
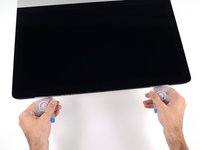
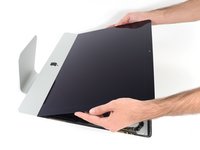
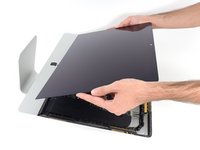
Lift the display up from the frame and remove it from the iMac.
-
It may be necessary to slowly lift from one side to peel against the remaining adhesive.
-
-
-
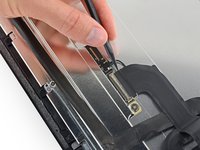
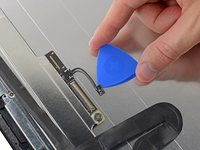
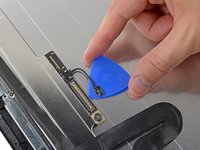
Use your fingernail or the pointed tip of a spudger to flip up the retaining flap on the display data connector.
-
-
-
Pull the display data cable connector straight out of its socket on the back of the display.
-
-
-
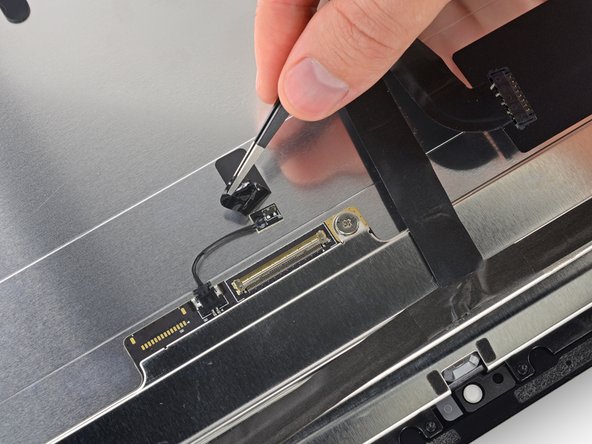
Use an iOpener near the top edge of the display assembly to heat and soften the adhesive on the piece of tape holding the thermal sensor in place.
-
-
-
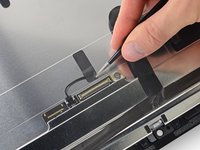
Peel up the piece of tape securing the thermal sensor to the back of the display assembly.
-
-
-
Use an opening pick to break up the adhesive holding the thermal sensor to the back of the iMac display.
-
-
-
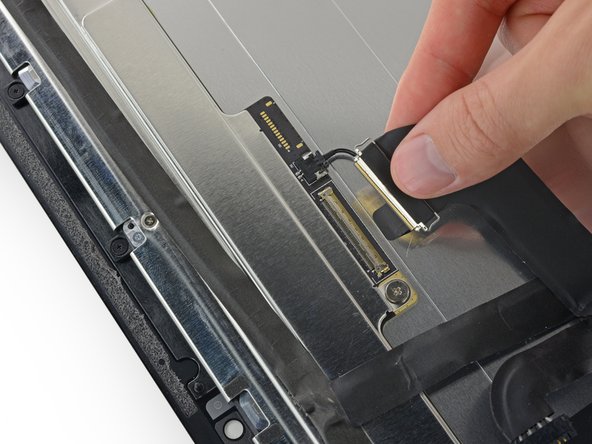
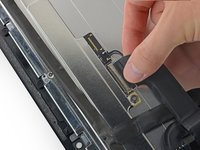
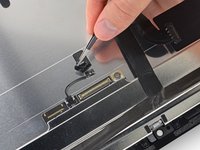
Disconnect the thermal sensor from its socket on the back of the display.
-
Remove the thermal sensor and transfer it to your new display assembly.
-


To reassemble your device, follow these instructions in reverse order.
crwdns2935221:0crwdne2935221:0
crwdns2935229:013crwdne2935229:0

crwdns2947412:07crwdne2947412:0
Great work, done in 35 min. Thanks :)
What is the part number for a replacement screen for an iMac Intel 21.5” Retina 4K Display (Apple Model No. A1418, EMC 3069)? Does ifixit carry them?
Hey there, I am in the same situation.
My screen has a crack in it, so I am ordering a replacement from Alibaba soon, but it seems like there are 2 part numbers associate with this iMac model:
LM215UH1-SDA1
LM215UH1-SDB1
Please let me know if you have found a solution.
Mr.Maker -
Mr. Maker, I ordered this one from ebay back in March: https://www.ebay.com/itm/323724320252
The part number was LM215UH1 (SD)(B1) and worked perfectly. Really easy repair. Good luck!
Hi, unfortunately I cracked the front glass of the 4k lcd, so I wonder if there is the possibility to replace only the glass instead of the whole lcd assembly.
Please le me know. thanks for support
Alessio