crwdns2915892:0crwdne2915892:0
Keep temperatures down and replace that broken fan!
crwdns2942213:0crwdne2942213:0
-
-
Lay the iMac display-side down on a flat surface (putting a cloth under the screen to protect it from bumps).
-
Loosen the three Phillips screws securing the rear panel to the iMac.
-
-
-
Lift the rear panel slightly near the bottom of the iMac.
-
Pull the rear panel toward yourself and remove it from the iMac.
-
-
-
Remove the following two screws:
-
One 11 mm T10 Torx.
-
One 10.6 mm T8 Torx.
-
-
-
-
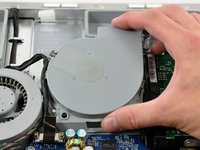
Lift the fan duct out of the chassis.
-
-
-
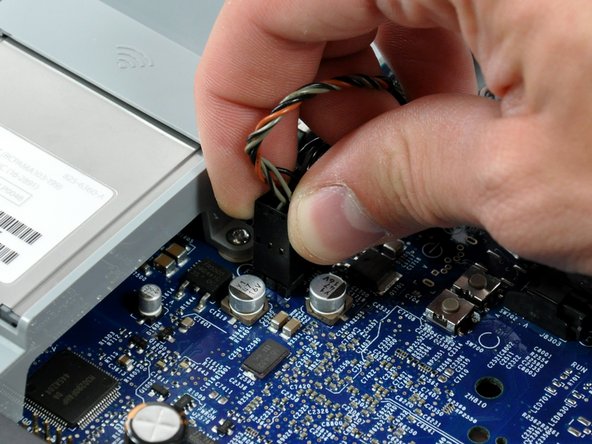
Disconnect the right fan from the logic board by pulling its connector straight up.
-
-
-
Remove the two 11.6 mm shouldered T8 Torx screws from the right fan.
-
-
-
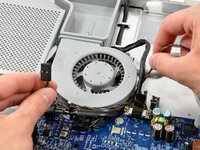
Lift the fan near its outlet and rotate it toward yourself until its lower bracket clears the edge of the logic board.
-
Lift the fan out of the chassis.
-


To reassemble your device, follow these instructions in reverse order.
To reassemble your device, follow these instructions in reverse order.
crwdns2935221:0crwdne2935221:0
crwdns2935229:07crwdne2935229:0
