crwdns2933423:0crwdne2933423:0
crwdns2947577:0crwdnd2947577:0crwdne2947577:0

iHome iH27B Power Connector Replacement

crwdns2942213:0crwdne2942213:0

    1. iHome iH27B Power Connector Replacement, Outer Case: crwdns2935265:01crwdnd2935265:01crwdnd2935265:01crwdne2935265:0
      • Remove any iPod or apple music device connected to the iHome and unplug from any power source.

      • Flip the iHome so the speakers are laying on a flat surface, and you have the concealed battery areas facing you.

      crwdns2952109:0crwdne2952109:0

      crwdns2917038:0crwdne2917038:0

    2. iHome iH27B Power Connector Replacement: crwdns2935265:02crwdnd2935265:01crwdnd2935265:03crwdne2935265:0 iHome iH27B Power Connector Replacement: crwdns2935265:02crwdnd2935265:02crwdnd2935265:03crwdne2935265:0 iHome iH27B Power Connector Replacement: crwdns2935265:02crwdnd2935265:03crwdnd2935265:03crwdne2935265:0
      • Using your fingers, press down firmly on the plastic slide and push in the direction of the arrows shown above the word "Open" on the plastic.

      • Remove the plastic slide from its location and set it aside.

      • These plastic slides are not interchangeable, so make sure each goes back to its original location in reassembly.

      • Remove all 4 AA batteries by placing your fingernail at one end of the battery and applying force upwards until the battery is freed from its holder.

      • Insert your fingernail or a prying tool under the notch of the plastic slide that is protecting the watch battery.

      • Set the plastic covering and the watch battery aside.

      crwdns2952109:0crwdne2952109:0

      crwdns2917038:0crwdne2917038:0

    3. iHome iH27B Power Connector Replacement: crwdns2935265:03crwdnd2935265:01crwdnd2935265:01crwdne2935265:0
      • Remove the following screws:

      • Eight 10 mm using the Phillips #0 on the bottom of your device.

      • Cataloging each screw by size in plastic bags or separate places on a flat surface will make them easier to find when reassembling.

      crwdns2952109:0crwdne2952109:0

      crwdns2917038:0crwdne2917038:0

    4. iHome iH27B Power Connector Replacement: crwdns2935265:04crwdnd2935265:01crwdnd2935265:01crwdne2935265:0
      • Use your fingers or a plastic opening tool to carefully pry apart the plastic connections still connecting the base to the top.

      • Be careful not to pry too hard. Cracking the plastic connections could make reassembly harder.

      crwdns2952109:0crwdne2952109:0

      crwdns2917038:0crwdne2917038:0

    5. iHome iH27B Power Connector Replacement: crwdns2935265:05crwdnd2935265:01crwdnd2935265:01crwdne2935265:0
      • Slowly lift the plastic base towards you and lay it on the flat surface. The base should still be connected to the rest of the iHome by a few wires.

      • You should have visible access to most of the components inside the iHome now.

      crwdns2952109:0crwdne2952109:0

      crwdns2917038:0crwdne2917038:0

    1. iHome iH27B Power Connector Replacement, Power Connector: crwdns2935265:06crwdnd2935265:01crwdnd2935265:02crwdne2935265:0 iHome iH27B Power Connector Replacement, Power Connector: crwdns2935265:06crwdnd2935265:02crwdnd2935265:02crwdne2935265:0
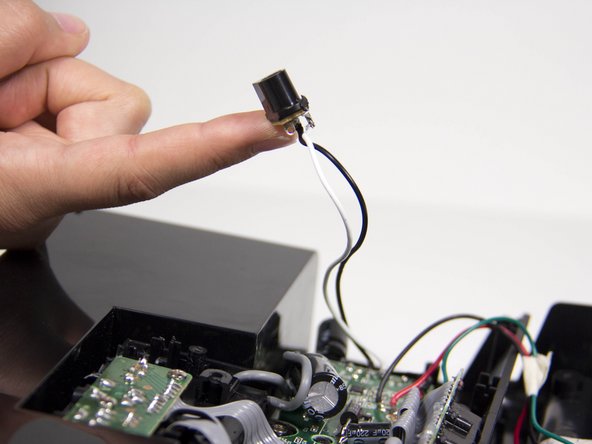
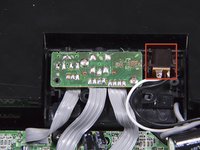
      • Firmly grasp the power connector, which is the plastic rectangular piece with the white and black wires connected to it.

      • Pull upwards and dislodge the connector.

      crwdns2952109:0crwdne2952109:0

      crwdns2917038:0crwdne2917038:0

    2. iHome iH27B Power Connector Replacement: crwdns2935265:07crwdnd2935265:01crwdnd2935265:01crwdne2935265:0
      • Using the scissors on your wire strippers, cut the connecting wires.

      • Using your wire strippers, remove about 1/4 " of the plastic tubing surrounding the end of your exposed wire, careful to not damage the wires.

      • Using a wire-nut or electrician's tape, connect the wires of the replacement power connector to your exposed wires. Connect white wire to white, and black to black.

      crwdns2952109:0crwdne2952109:0

      crwdns2917038:0crwdne2917038:0

crwdns2915888:0crwdne2915888:0

To reassemble your device, follow these instructions in reverse order.

crwdns2935221:0crwdne2935221:0

John Kraemer

crwdns2935283:010/09/12crwdne2935283:0

76 crwdns2915208:0crwdne2915208:0

crwdns2935297:09crwdne2935297:0

crwdns2935287:0crwdne2935287:0

Cal Poly, Team 3-21, Amido Fall 2012 crwdns2935289:0Cal Poly, Team 3-21, Amido Fall 2012crwdne2935289:0

CPSU-AMIDO-F12S3G21

crwdns2931471:04crwdne2931471:0

crwdns2935297:0108crwdne2935297:0

crwdns2947412:00crwdne2947412:0

crwdns2917038:0crwdne2917038:0

crwdns2936625:0crwdne2936625:0:

crwdns2936751:024crwdne2936751:0 2

crwdns2936753:07crwdne2936753:0 26

crwdns2936753:030crwdne2936753:0 86

crwdns2942667:0crwdne2942667:0 2,618