crwdns2915892:0crwdne2915892:0
You may need to repair your iHome iD95 plastic underside cover if it has cracks, water or heat damage, or if you need to restore internal functions. If you notice looseness, rattling, or a gap between the bottom and the main body, it indicates that your cover is damaged. After this fix, your iHome iD95 will look new, be protected from dust, moisture, and internal exposure, and stop rattling and vibrating during playback. For this procedure, you must fully disassemble and open the entire unit.
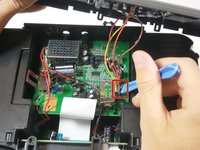
You must realign several wires and harnesses during reassembly, being careful not to pinch or tear them.
Note that iHome no longer sells official parts, meaning you will have to source most replacement parts from people who donate parts or third-party sellers.
crwdns2942213:0crwdne2942213:0
-
-
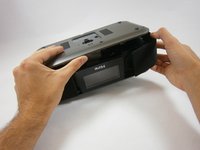
Before taking apart the iD95, disconnect the AC cord from the wall socket and AC adapter from the DC jack. Remove any iPods, iPhones, and iPads attached to the device.
-
Flip over the iD95 so the bottom cover is visible and the LCD screen is facing you.
-
-
-
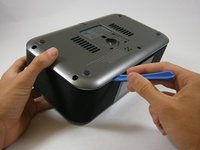
Remove the 10 mm-length, 5 mm-head screw using a Phillips #1 screwdriver.
-
-
-
Use a plastic opening tool to take out the backup battery.
-
-
-
Unscrew five 17 mm-length, 6 mm-head screws using a Phillips #1 screwdriver.
-
-
-
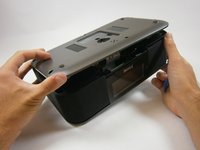
Insert a plastic opening tool between the edge of the bottom cover and the main body.
-
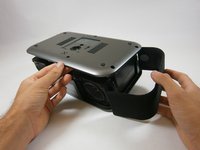
Gently pry the bottom cover from the body. Start anywhere along the front side of the iD95 and work your way around.
-
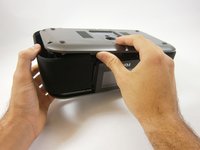
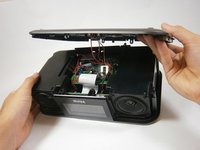
Grip the bottom portion of the device and gently lift the front part of the bottom cover a couple centimeters up.
-
-
-
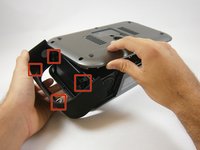
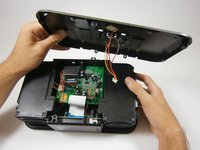
Lift up the bottom cover. Pull the side panel up first, out, and away from the device.
-
The side panels have plastic rings that will need to be lifted up and off the cylinders they are placed around.
-
-
-
Apply the same techniques from the previous step to remove the remaining side panel.
-
-
-
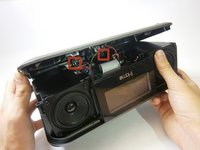
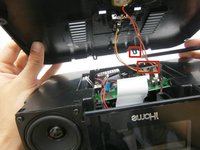
Locate the two plastic clips holding the bottom and back cover together.
-
Which clip you remove first is up to you. Rotate the device 90 degrees either left or right. Insert the flat end of a spudger horizontally between the back speaker and the back cover.
-
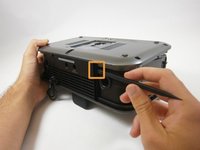
Place the flat end of the spudger behind one clip and pry it open. This may take repeated attempts.
-
-
-
Use the same steps to remove the remaining clip.
-
-
-
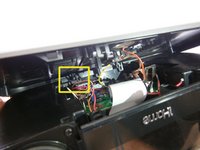
Use a plastic opening tool to pry off the white ZIF connector joining the wires to the motherboard.
-


To reassemble your device, follow these instructions in reverse order.
crwdns2935287:0crwdne2935287:0

Cal Poly, Team 12-37, Amido Spring 2013 crwdns2935289:0Cal Poly, Team 12-37, Amido Spring 2013crwdne2935289:0
CPSU-AMIDO-S13S12G37
crwdns2931471:04crwdne2931471:0
crwdns2935297:07crwdne2935297:0