crwdns2915892:0crwdne2915892:0
Use this guide to remove the AC power adapter. For help troubleshooting click the link to our troubleshooting page iHome IH11 Troubleshooting.
crwdns2942213:0crwdne2942213:0
-
-
Unscrew the two 9.0 mm screws with the Phillips #1.
-
Remove the translucent bottom plastic piece.
 crwdns2952109:0crwdne2952109:0
-
-
-
Remove the two 9.0mm screws on the back of the iHome with the Phillips #1 screwdriver.
-
Repeat the previous step for the two 9.0mm screws on the bottom.
-
-
-
-
Remove the aluminum bracket by loosening the two nuts and removing the 8.0mm bolts with your hand.
-
-
-
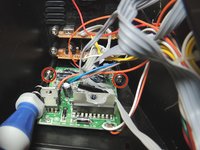
Remove the two 12.0mm screws that hold the motherboard with the Phillips #1 screwdriver.
-
Slide the motherboard gently out.
-
-
-
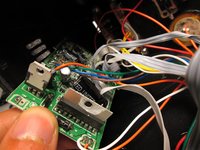
Remove the two 9.0 mm screws with the Phillips #1 screwdriver, then slide the circuit board for the AC adapter out.
-
Repeat the previous step by removing the two 9.0mm screws with the Phillips #1 screwdriver for the circuit board for the on/off switch.
-
-
-
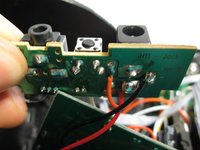
Unsolder the main connections holding the AC adapter to the circuit board.
-
Solder new adapter in same position with same connections.
-


To reassemble your device, follow these instructions in reverse order.
crwdns2935221:0crwdne2935221:0
crwdns2935229:02crwdne2935229:0

crwdns2935287:0crwdne2935287:0

Cal Poly, Team 14-9, Maness Spring 2013 crwdns2935289:0Cal Poly, Team 14-9, Maness Spring 2013crwdne2935289:0
CPSU-MANESS-S13S14G9
crwdns2931471:04crwdne2931471:0
crwdns2935297:05crwdne2935297:0