crwdns2915892:0crwdne2915892:0
If all else has failed, now is the time to replace your motherboard in a last attempt to save your laptop.
crwdns2942213:0crwdne2942213:0
-
-
Use a PH000 screwdriver to unscrew the eleven 4mm Phillip head screws located on the back panel.
-
-
-
Using the iFixit opening tool, pry open and remove the back cover of the laptop.
-
-
-
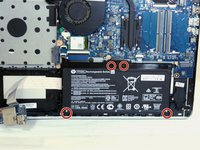
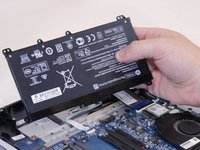
Use a PH000 screwdriver to unscrew the four 3.5mm Philips head screws located on the battery.
-
-
-
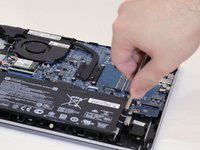
Disconnect the port connecting the battery and the motherboard and then remove.
-
-
-
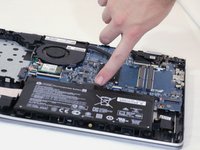
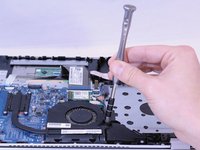
Use a spudger to lift the latch that holds the hard drive cable in place.
-
-
-
Use a plastic opening tool to pry the hard drive out.
-
-
-
-
Lift the plastic wedges up on both sides of the hard drive.
-
-
-
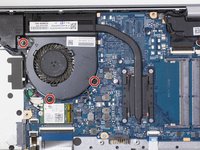
Use a PH0 screwdriver to unscrew the three 3 mm Phillips head screws located on the fan.
-
-
-
Use a PH1 screwdriver to unscrew the four 3mm Phillips head screws located on the processor cover.
-
Disconnect the cable.
-
-
-
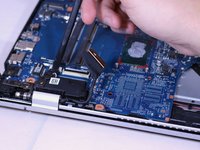
Disconnect the plastic arm attached to the processor and remove.
-
Disconnect the cable attaching the fan to the motherboard and remove.
-
-
-
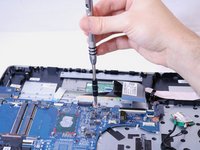
Use a PH1 screwdriver to unscrew one 3mm Phillips head screws on Wifi card.
-
Disconnect the Wifi card.
-
-
-
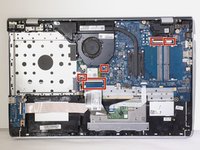
Disconnect the 5 cables to keyboard and speakers.
-
-
-
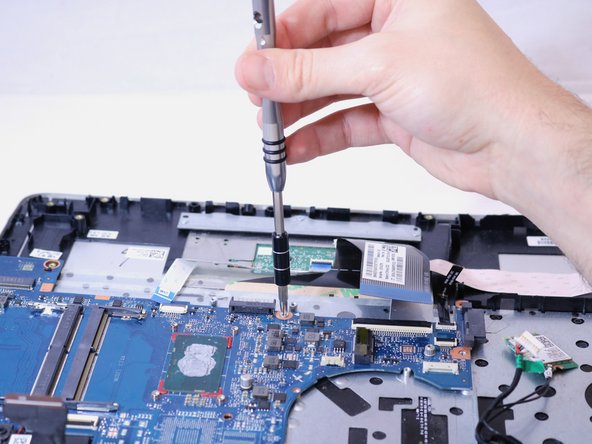
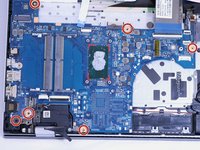
Use a PH1 screwdriver to unscrew six 3 mm Phillips head screws on the motherboard.
-
-
-
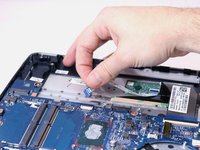
Use the iFixit opening tools to pry motherboard from back of laptop.
-


To reassemble your device, follow these instructions in reverse order.
crwdns2935221:0crwdne2935221:0
crwdns2935229:02crwdne2935229:0

crwdns2935287:0crwdne2935287:0

Eastern Washington University, Team S2-G6, Munoz Fall 2018 crwdns2935289:0Eastern Washington University, Team S2-G6, Munoz Fall 2018crwdne2935289:0
EWU-MUNOZ-F18S2G6
crwdns2931471:05crwdne2931471:0
crwdns2935297:05crwdne2935297:0
crwdns2947412:02crwdne2947412:0
Good job Stephany. I would’ve been lost without you…
your friend eternally,
Richey Dale
How can i get this model motherboard