crwdns2915892:0crwdne2915892:0
After performing all possible software troubleshooting, if you're headphone jack still doesn't work, you will have to replace the entire motherboard because the jack is permanently attached to the motherboard.
crwdns2942213:0crwdne2942213:0
-
-
Use a PH000 screwdriver to unscrew the eleven 4mm Phillip head screws located on the back panel.
-
-
-
Using the iFixit opening tool, pry open and remove the back cover of the laptop.
-
-
-
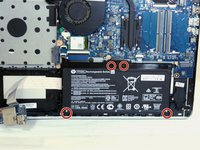
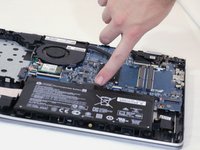
Use a PH000 screwdriver to unscrew the four 3.5mm Philips head screws located on the battery.
-
-
-
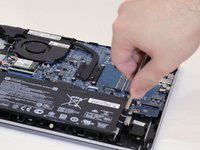
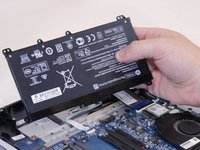
Disconnect the port connecting the battery and the motherboard and then remove.
-
-
-
Use a spudger to lift the latch that holds the hard drive cable in place.
-
-
-
Use a plastic opening tool to pry the hard drive out.
-
-
-
-
Lift the plastic wedges up on both sides of the hard drive.
-
-
-
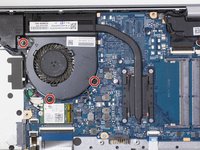
Use a PH0 screwdriver to unscrew the three 3 mm Phillips head screws located on the fan.
-
-
-
Use a PH1 screwdriver to unscrew the four 3mm Phillips head screws located on the processor cover.
-
Disconnect the cable.
-
-
-
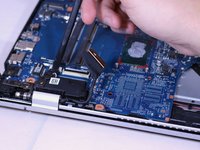
Disconnect the plastic arm attached to the processor and remove.
-
Disconnect the cable attaching the fan to the motherboard and remove.
-
-
-
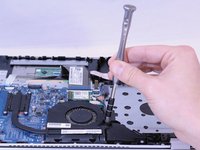
Use a PH1 screwdriver to unscrew one 3mm Phillips head screws on Wifi card.
-
Disconnect the Wifi card.
-
-
-
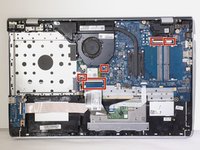
Disconnect the 5 cables to keyboard and speakers.
-
-
-
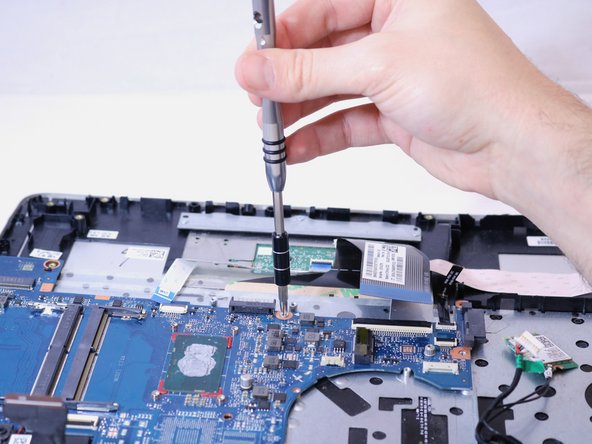
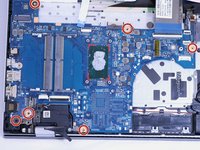
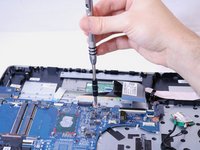
Use a PH1 screwdriver to unscrew six 3 mm Phillips head screws on the motherboard.
-
-
-
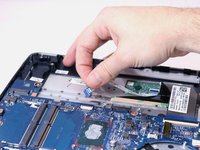
Use the iFixit opening tools to pry motherboard from back of laptop.
-


To reassemble your device, follow these instructions in reverse order.
crwdns2935221:0crwdne2935221:0
crwdns2935227:0crwdne2935227:0

crwdns2935287:0crwdne2935287:0

Eastern Washington University, Team S2-G6, Munoz Fall 2018 crwdns2935289:0Eastern Washington University, Team S2-G6, Munoz Fall 2018crwdne2935289:0
EWU-MUNOZ-F18S2G6
crwdns2931471:05crwdne2931471:0
crwdns2935297:05crwdne2935297:0