crwdns2933423:0crwdne2933423:0

eufy RoboVac 11 Front Cover and Motherboard Replacement

crwdns2942213:0crwdne2942213:0

  1. eufy RoboVac 11 Front Cover and Motherboard Replacement, Front Cover and Motherboard: crwdns2935265:01crwdnd2935265:01crwdnd2935265:02crwdne2935265:0 eufy RoboVac 11 Front Cover and Motherboard Replacement, Front Cover and Motherboard: crwdns2935265:01crwdnd2935265:02crwdnd2935265:02crwdne2935265:0
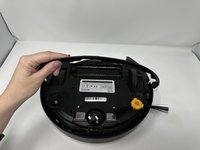
    • Remove the nine 10 mm screws with the Phillips #1 precision screwdriver.

    • Keep track of these screws. They are the same length as the interior screws but wider in diameter.

  2. eufy RoboVac 11 Front Cover and Motherboard Replacement: crwdns2935265:02crwdnd2935265:01crwdnd2935265:02crwdne2935265:0 eufy RoboVac 11 Front Cover and Motherboard Replacement: crwdns2935265:02crwdnd2935265:02crwdnd2935265:02crwdne2935265:0
    • Remove the six 7 mm screws on the bumper with the Phillips #1 screwdriver.

  3. eufy RoboVac 11 Front Cover and Motherboard Replacement: crwdns2935265:03crwdnd2935265:01crwdnd2935265:03crwdne2935265:0 eufy RoboVac 11 Front Cover and Motherboard Replacement: crwdns2935265:03crwdnd2935265:02crwdnd2935265:03crwdne2935265:0 eufy RoboVac 11 Front Cover and Motherboard Replacement: crwdns2935265:03crwdnd2935265:03crwdnd2935265:03crwdne2935265:0
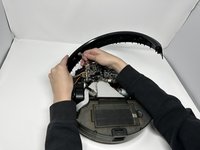
    • Remove the top plate from the body of the device.

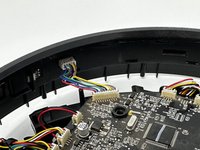
    • Unplug the bumper from the motherboard.

  4. eufy RoboVac 11 Front Cover and Motherboard Replacement: crwdns2935265:04crwdnd2935265:01crwdnd2935265:02crwdne2935265:0 eufy RoboVac 11 Front Cover and Motherboard Replacement: crwdns2935265:04crwdnd2935265:02crwdnd2935265:02crwdne2935265:0
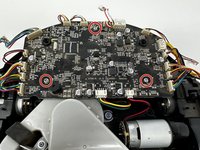
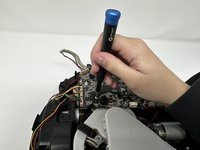
    • Remove the three 10 mm motherboard screws with a Phillips #1 screwdriver.

    • Cleaning the motherboard and inside of the device outdoors with a compressed air cleaner will help the robot last longer.

  5. eufy RoboVac 11 Front Cover and Motherboard Replacement: crwdns2935265:05crwdnd2935265:01crwdnd2935265:02crwdne2935265:0 eufy RoboVac 11 Front Cover and Motherboard Replacement: crwdns2935265:05crwdnd2935265:02crwdnd2935265:02crwdne2935265:0
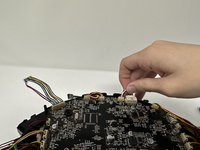
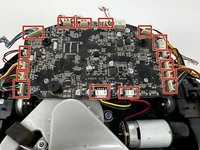
    • Unplug the cables from the motherboard.

crwdns2915888:0crwdne2915888:0

To reassemble your device, follow these instructions in reverse order.

crwdns2935229:02crwdne2935229:0

Kyleigh Hill

crwdns2935283:009/27/22crwdne2935283:0

259 crwdns2915208:0crwdne2915208:0

crwdns2935297:02crwdne2935297:0

crwdns2915084:0crwdne2915084:0

Utah Tech University, Team 1-3, McMurrin Fall 2022 crwdns2935289:0Utah Tech University, Team 1-3, McMurrin Fall 2022crwdne2935289:0

UTAHTECH-MCMURRIN-F22S1G3

crwdns2931471:03crwdne2931471:0

crwdns2935297:06crwdne2935297:0

crwdns2947412:00crwdne2947412:0

crwdns2917038:0crwdne2917038:0

crwdns2936625:0crwdne2936625:0:

crwdns2936751:024crwdne2936751:0 2

crwdns2936753:07crwdne2936753:0 3

crwdns2936753:030crwdne2936753:0 29

crwdns2942667:0crwdne2942667:0 1,172