crwdns2915892:0crwdne2915892:0
A replacement guide for the motherboard for the Eufy Clean Robovac G32 Pro.
The motherboard hosts all the electronics systems in the same space to allow them to communicate with one another. Without this, it would not be possible for the device to operate.
If the individual parts are functional, but there's a problem with the device, it could originate with a faulty connection between them and the motherboard.
crwdns2942213:0crwdne2942213:0
-
-
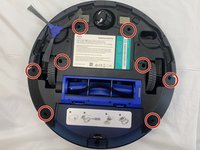
Make sure your device is turned off.
-
Flip the device upside down on a flat surface.
-
-
-
Remove two 10 mm screws using a Phillips #1 screwdriver.
-
-
-
Lift up the battery using the white straps on the side.
-
-
-
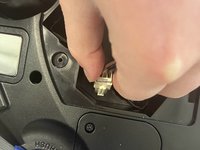
While holding the battery, pinch the clips on the side of the white connector.
-
Using a spudger, push the part of the connector inside of the Robovac away from the white connector on the battery.
-
Remove the battery from the device.
-
-
-
Make sure your device is turned off.
-
Flip the device upside down on a flat surface.
-
-
-
Press the clips at the bottom of the device that are indicated by the downward facing arrows.
-
Take off the rolling brush cover.
-
-
-
-
Pull the rolling brush up on the right side. Remove the rolling brush.
-
-
-
Make sure your device is turned off.
-
Flip the device upside down on a flat surface.
-
-
-
Remove four 10 mm screws using a Phillips #1 screwdriver.
-
-
-
Disconnect the spring from the wheel.
-
-
-
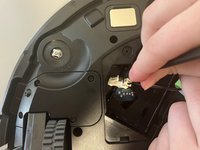
Remove the motherboard wiring from the wheel.
-
Pinch the white cable connecting the wheel to the wiring and pull.
-
Remove the wheel from the device.
-
-
-
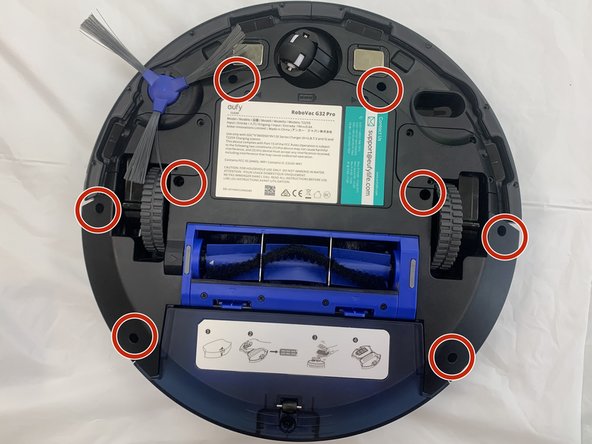
Orient the device so the underside is facing up.
-
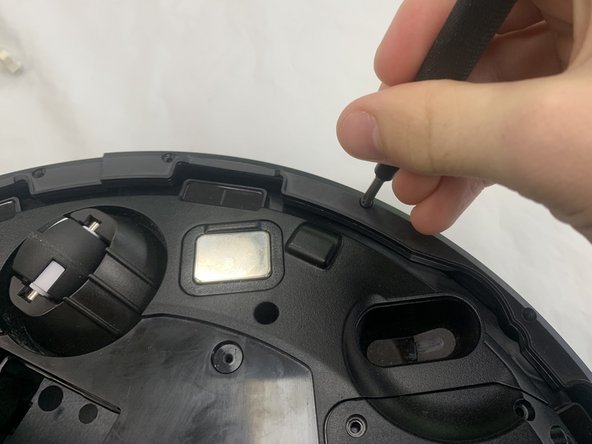
Remove the eight 9.3 mm screws securing the bumper brackets using a Phillips #1 screwdriver.
-
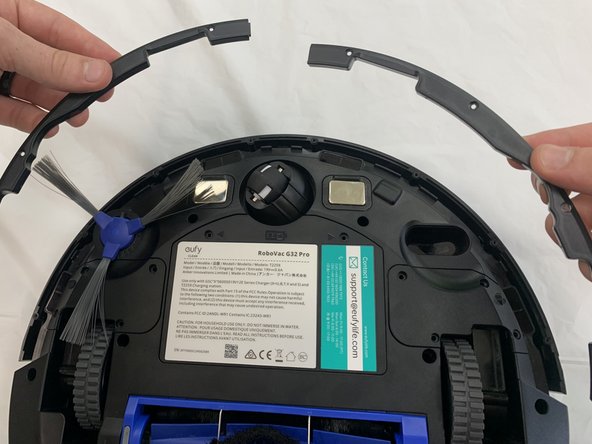
Remove the bumper brackets.
-
-
-
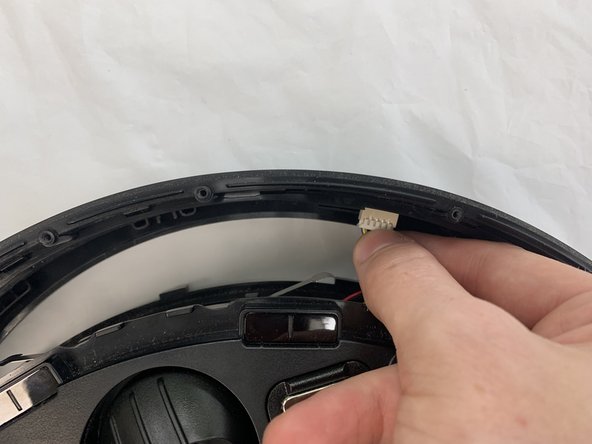
Lift the bumper off of the device gently.
-
Use your fingers to disconnect the 8 pin connector.
-
-
-
Remove the two 10 mm screws using a Philips #1 screwdriver.
-
-
-
Lift the bump sensor off using your fingers.
-
-
-
Remove the eight 14 mm screws with a Phillips #1 screwdriver.
-
-
-
Use your hands to separate the two halves by lifting the cover from the end that has the brush, as the cover is still connected.
-
-
-
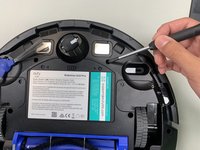
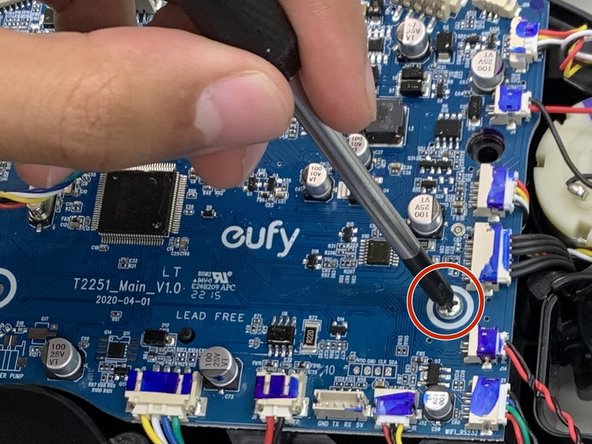
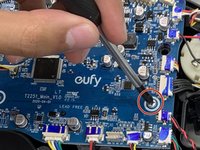
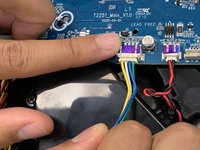
Remove the three 9.7 mm screws securing the motherboard with a Phillips #0 screwdriver.
-
-
-
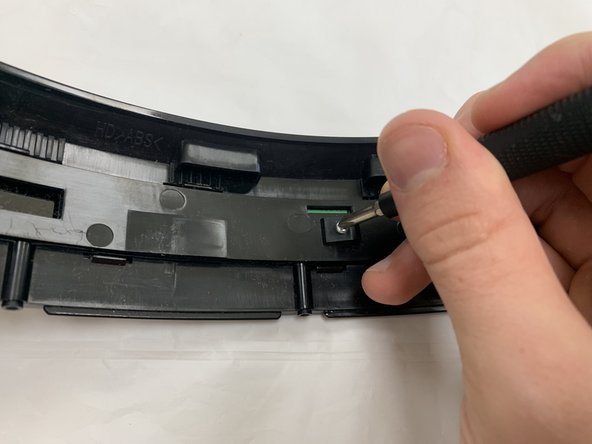
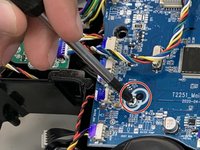
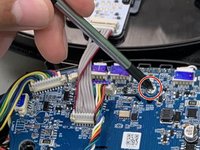
Disconnect all connectors attached to motherboard.
-
Using your fingers, pull the connectors away from their ports by the plastic bit of the wire.
-
Remove the motherboard.
-


To reassemble your device, follow these instructions in reverse order.

crwdns2935287:0crwdne2935287:0

University of North Texas, Team 2-5, Coppersmith Fall 2024 crwdns2935289:0University of North Texas, Team 2-5, Coppersmith Fall 2024crwdne2935289:0
UNT-COPPERSMITH-F24S2G5
crwdns2931471:04crwdne2931471:0
crwdns2935297:04crwdne2935297:0