crwdns2933423:0crwdne2933423:0

eMac Motherboard Assembly Replacement

crwdns2942213:0crwdne2942213:0

  1. eMac Motherboard Assembly Replacement, Door Removal: crwdns2935265:01crwdnd2935265:01crwdnd2935265:03crwdne2935265:0 eMac Motherboard Assembly Replacement, Door Removal: crwdns2935265:01crwdnd2935265:02crwdnd2935265:03crwdne2935265:0 eMac Motherboard Assembly Replacement, Door Removal: crwdns2935265:01crwdnd2935265:03crwdnd2935265:03crwdne2935265:0
    • It should be noted that these guides are written based on a late-model eMac (2005, 1.42GHz, DDR). They will differ slightly from the older model eMacs that use PC-133 RAM.

    • Lay the eMac screen-down on a flat surface. I've found it convenient to use a carpeted floor because the computer is so heavy.

    • Remove the single phillips #2 screw on the RAM door, and remove the door

    • The screw is captive in the door, so don't worry about losing it.

  2. eMac Motherboard Assembly Replacement, Bottom Screw Removal: crwdns2935265:02crwdnd2935265:01crwdnd2935265:01crwdne2935265:0
    • Before starting this process it's important to note that the eMac can have some seriously dangerous voltages inside of it, thanks to the CRT display. Before working on an eMac, you should unplug it, press the power button to clear any stored charge on the motherboard, and then let it sit for 24-hours (or more) to allow the CRT to discharge.

    • You can read more about CRT safety procedures here. If you aren't experienced with working on devices featuring a CRT, it's recommended that you don't proceed any further.

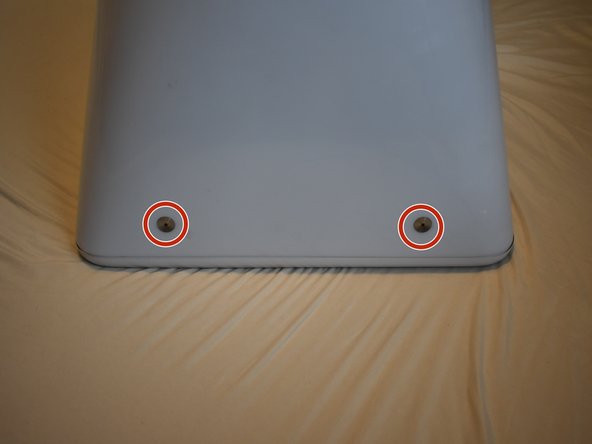
    • On the bottom side of the eMac, remove the following screws:

    • A single 2.5mm hex screw

    • Two #2 phillips screws

  3. eMac Motherboard Assembly Replacement, Top and Side Screws: crwdns2935265:03crwdnd2935265:01crwdnd2935265:03crwdne2935265:0 eMac Motherboard Assembly Replacement, Top and Side Screws: crwdns2935265:03crwdnd2935265:02crwdnd2935265:03crwdne2935265:0 eMac Motherboard Assembly Replacement, Top and Side Screws: crwdns2935265:03crwdnd2935265:03crwdnd2935265:03crwdne2935265:0
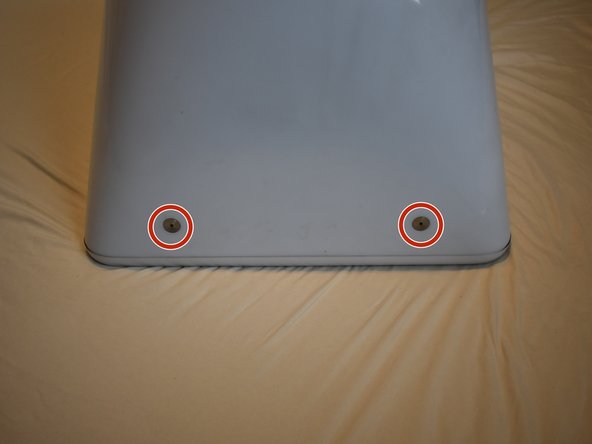
    • Remove two 2.5mm hex screws from each of the other sides of the computer.

  4. eMac Motherboard Assembly Replacement, Power Button Cable: crwdns2935265:04crwdnd2935265:01crwdnd2935265:02crwdne2935265:0 eMac Motherboard Assembly Replacement, Power Button Cable: crwdns2935265:04crwdnd2935265:02crwdnd2935265:02crwdne2935265:0
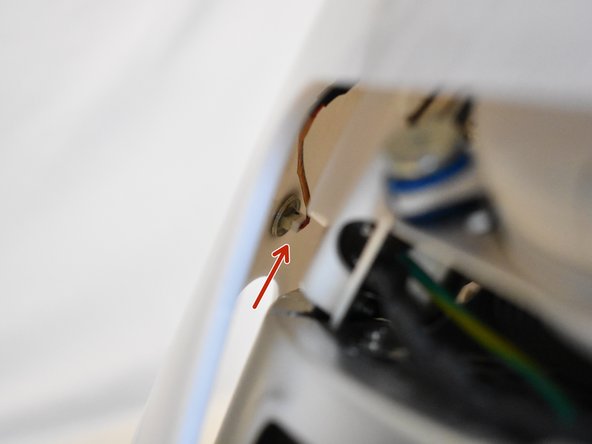
    • Now, the shell can almost be separated from the computer.

    • There is a cable that connects to the power button. This must be disconnected before removing the housing completely.

    • Lift the housing enough to allow you to fit your hand through the access door, and disconnect the cable at the power button.

  5. eMac Motherboard Assembly Replacement, Shell Removal: crwdns2935265:05crwdnd2935265:01crwdnd2935265:01crwdne2935265:0
    • Now the entire shell can be removed from the computer.

  6. eMac Motherboard Assembly Replacement, Panel Removal: crwdns2935265:06crwdnd2935265:01crwdnd2935265:03crwdne2935265:0 eMac Motherboard Assembly Replacement, Panel Removal: crwdns2935265:06crwdnd2935265:02crwdnd2935265:03crwdne2935265:0 eMac Motherboard Assembly Replacement, Panel Removal: crwdns2935265:06crwdnd2935265:03crwdnd2935265:03crwdne2935265:0
    • The motherboard access panel is held on by 4 phillips #2 screws.

    • Remove the screws, then use your fingers to pull on the top tabs to separate the panel from the computer frame.

  7. eMac Motherboard Assembly Replacement, Cables: crwdns2935265:07crwdnd2935265:01crwdnd2935265:03crwdne2935265:0 eMac Motherboard Assembly Replacement, Cables: crwdns2935265:07crwdnd2935265:02crwdnd2935265:03crwdne2935265:0 eMac Motherboard Assembly Replacement, Cables: crwdns2935265:07crwdnd2935265:03crwdnd2935265:03crwdne2935265:0
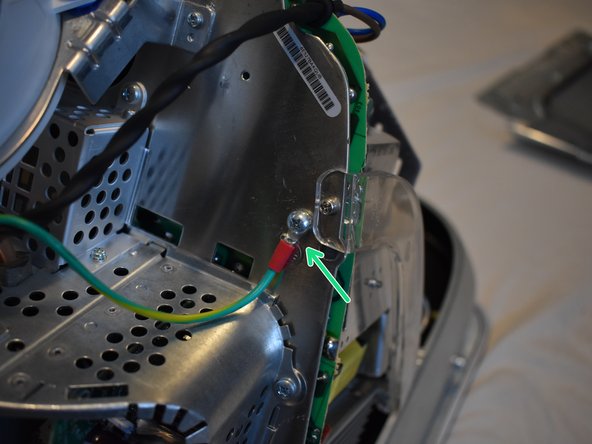
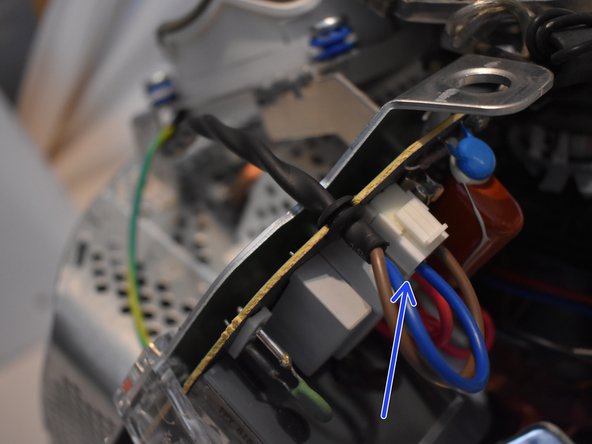
    • To remove the fan assembly, several cables must be disconnected first:

    • 3-pin fan cable

    • Ground wire, requires phillips #2 screwdriver

    • 2-pin AC cable to power supply

  8. eMac Motherboard Assembly Replacement, Screws: crwdns2935265:08crwdnd2935265:01crwdnd2935265:02crwdne2935265:0 eMac Motherboard Assembly Replacement, Screws: crwdns2935265:08crwdnd2935265:02crwdnd2935265:02crwdne2935265:0
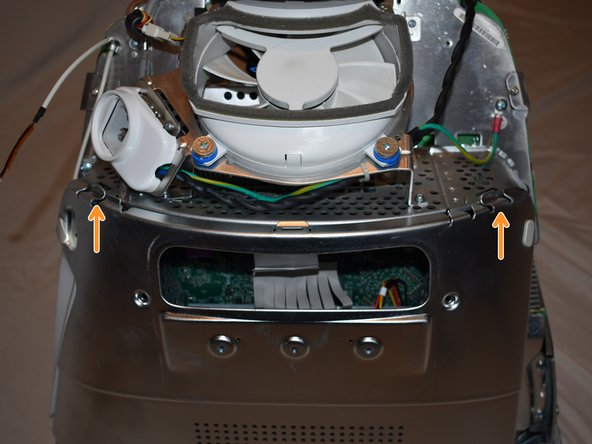
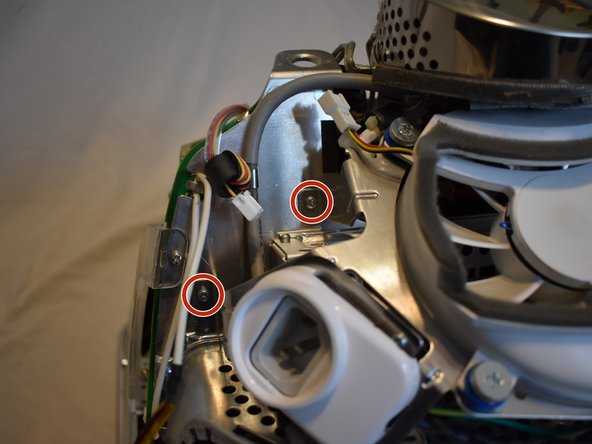
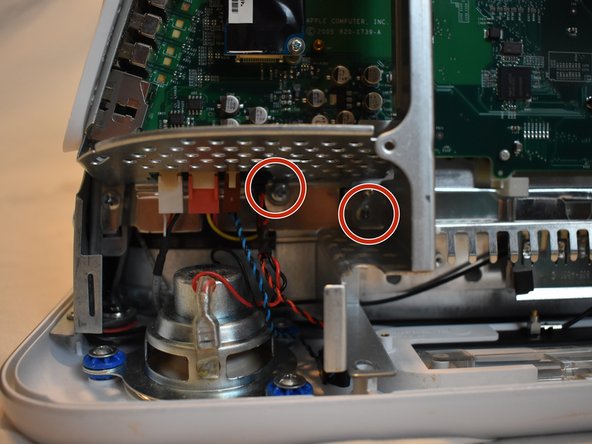
    • Now remove the following screws securing the fan assembly:

    • 3x coarse thread phillips #2

    • 1x machine thread phillips #2

  9. eMac Motherboard Assembly Replacement: crwdns2935265:09crwdnd2935265:01crwdnd2935265:01crwdne2935265:0
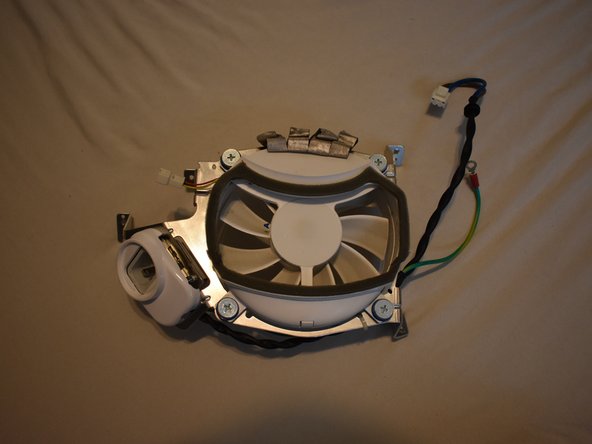
    • There may be a zip tie holding another cable to the fan assembly, cut it to remove the fan assembly.

  10. eMac Motherboard Assembly Replacement, Assembly Removal: crwdns2935265:010crwdnd2935265:01crwdnd2935265:02crwdne2935265:0 eMac Motherboard Assembly Replacement, Assembly Removal: crwdns2935265:010crwdnd2935265:02crwdnd2935265:02crwdne2935265:0
    • You should now be able to remove the fan assembly.

    • Doing this will expose more of the CRT neck, be careful not to touch this area because it can contain high voltages (and is fragile)

  11. eMac Motherboard Assembly Replacement, Bottom Connectors: crwdns2935265:011crwdnd2935265:01crwdnd2935265:01crwdne2935265:0
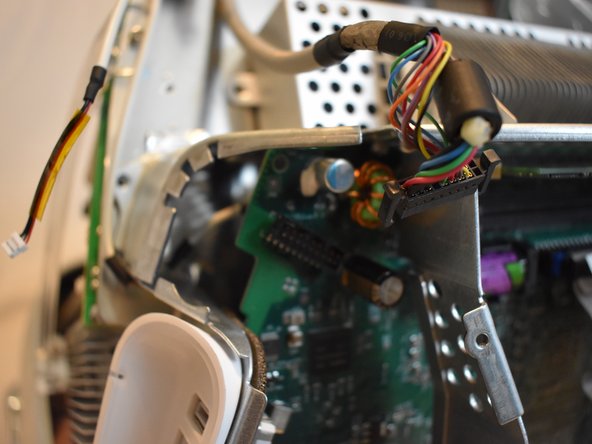
    • There are four connectors at the bottom of the motherboard that must be removed.

  12. eMac Motherboard Assembly Replacement, Display Connector: crwdns2935265:012crwdnd2935265:01crwdnd2935265:03crwdne2935265:0 eMac Motherboard Assembly Replacement, Display Connector: crwdns2935265:012crwdnd2935265:02crwdnd2935265:03crwdne2935265:0 eMac Motherboard Assembly Replacement, Display Connector: crwdns2935265:012crwdnd2935265:03crwdnd2935265:03crwdne2935265:0
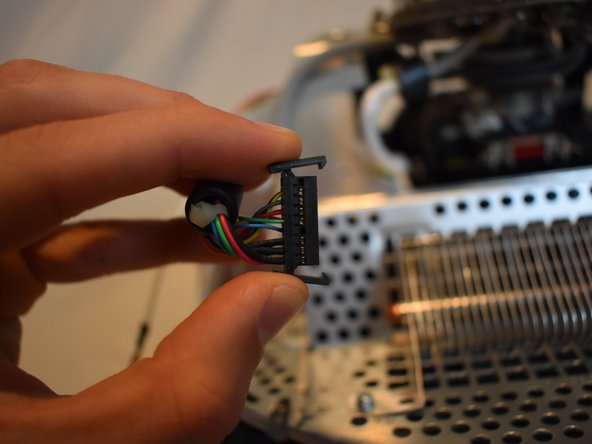
    • There is a large display connector that must be removed. This can be done by squeezing the tabs and pulling.

  13. eMac Motherboard Assembly Replacement, Power Button Cable: crwdns2935265:013crwdnd2935265:01crwdnd2935265:01crwdne2935265:0
    • The power button cable may be tucked in the casing, you will need to un-tuck it.

  14. eMac Motherboard Assembly Replacement, Screws: crwdns2935265:014crwdnd2935265:01crwdnd2935265:03crwdne2935265:0 eMac Motherboard Assembly Replacement, Screws: crwdns2935265:014crwdnd2935265:02crwdnd2935265:03crwdne2935265:0 eMac Motherboard Assembly Replacement, Screws: crwdns2935265:014crwdnd2935265:03crwdnd2935265:03crwdne2935265:0
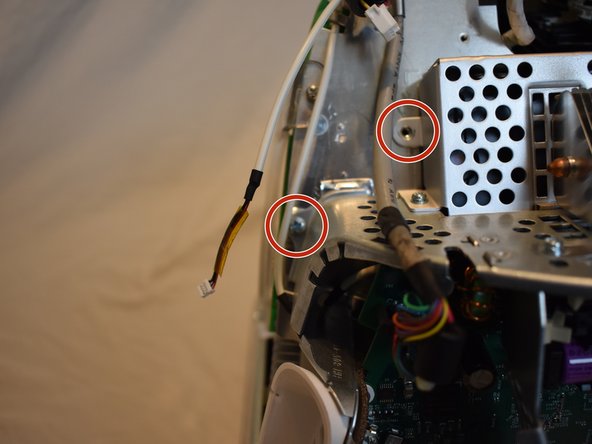
    • There are several phillips #2 screws that hold the eMac motherboard assembly to the rest of the computer. They will all need to be removed.

    • 2 large ones near the drive bay door.

    • 7 smaller ones scattered around

  15. eMac Motherboard Assembly Replacement, Screws (Continued): crwdns2935265:015crwdnd2935265:01crwdnd2935265:02crwdne2935265:0 eMac Motherboard Assembly Replacement, Screws (Continued): crwdns2935265:015crwdnd2935265:02crwdnd2935265:02crwdne2935265:0
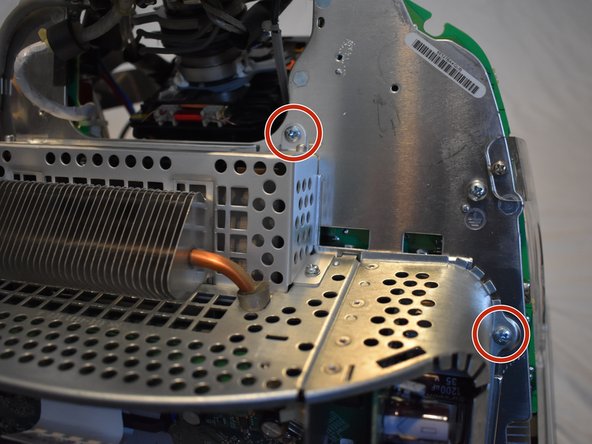
    • More of the screw locations from the previous step

  16. eMac Motherboard Assembly Replacement, Motherboard Assembly: crwdns2935265:016crwdnd2935265:01crwdnd2935265:01crwdne2935265:0
    • The motherboard assembly should now come free.

crwdns2915888:0crwdne2915888:0

To reassemble your device, follow these instructions in reverse order.

crwdns2935229:05crwdne2935229:0

Chris Green

crwdns2935283:010/11/09crwdne2935283:0

36.876 crwdns2915208:0crwdne2915208:0

crwdns2935297:049crwdne2935297:0

crwdns2915084:0crwdne2915084:0

Master Techs crwdns2935289:0Master Techscrwdne2935289:0

Community

crwdns2931471:0322crwdne2931471:0

crwdns2935297:02.506crwdne2935297:0

crwdns2944067:00crwdne2944067:0

crwdns2917038:0crwdne2917038:0

crwdns2936625:0crwdne2936625:0:

crwdns2936751:024crwdne2936751:0 0

crwdns2936753:07crwdne2936753:0 4

crwdns2936753:030crwdne2936753:0 42

crwdns2942667:0crwdne2942667:0 2,469