crwdns2933803:03crwdne2933803:0
crwdns2933797:0David Spaldingcrwdnd2933797:0crwdne2933797:0
crwdns2936043:0crwdne2936043:0 crwdns2933505:0crwdne2933505:0 David Spalding
- crwdns2933769:0crwdne2933769:0
- crwdns2933771:0crwdne2933771:0
- crwdns2933801:0crwdne2933801:0
crwdns2933807:0crwdne2933807:0
| + | [title] Understanding the parts |
|---|---|
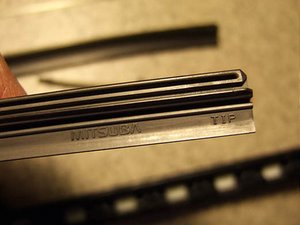
| + | [* black] Now you're ready to get to work. No doubt you've examined your NEW blades, and see that there are two ends marked, "TIP" and "LOCK." Note the difference. |
| + | [* black] The blades have a groove or slot running the length that will take the metal or plastic reinforcement splines. (It probably did not come with new splines. You'll reuse the ones in your current blades.) |
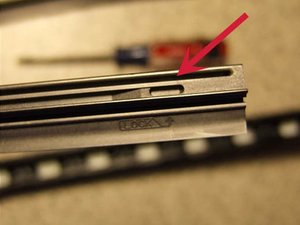
| + | [* black] Below this groove is another slot which runs all the way through on one end, and on the other has a little ramp leading to a separate pocket. This is the "lock" feature of the wiper blade. |
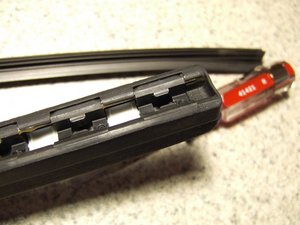
| + | [* icon_note] Since you haven't removed your old blade, you can't see what that second slot mates with. Along the interior length of the wiper assembly is a series of brackets which this slot slides through. The separate pocket on the "LOCK" end stops on the teeth of the last bracket on either end of the wiper assembly. |
crwdns2933777:01crwdne2933777:0
crwdns2933779:0crwdne2933779:0
crwdns2915182:0crwdne2915182:0
crwdns2933777:02crwdne2933777:0
crwdns2933779:0crwdne2933779:0
crwdns2915182:0crwdne2915182:0
crwdns2933777:03crwdne2933777:0
crwdns2933779:0crwdne2933779:0
crwdns2915182:0crwdne2915182:0