crwdns2933803:01crwdne2933803:0
crwdns2933797:0Brandon Dimayacrwdnd2933797:0crwdne2933797:0
crwdns2936043:0crwdne2936043:0 crwdns2933505:0crwdne2933505:0 Brandon Dimaya
- crwdns2933769:0crwdne2933769:0
- crwdns2933771:0crwdne2933771:0
- crwdns2933801:0crwdne2933801:0
crwdns2933807:0crwdne2933807:0
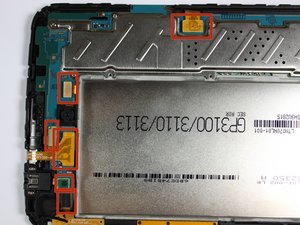
| + | [* black] Once you have finished all the steps in the prerequisite guide, begin replacement of the motherboard by releasing all connections holding down the motherboard, shown in the first picture. |
|---|---|
| + | [* black] To do this, use your spudger, or tweezers, or a plastic opening tool, gently lifting the connections up from their ports. |
| + | [* black] Once you separate all connections, the back of your device should look as it does in the third picture. |
crwdns2933777:01crwdne2933777:0
crwdns2933779:0crwdne2933779:0
crwdns2915182:0crwdne2915182:0
crwdns2933777:02crwdne2933777:0
crwdns2933779:0crwdne2933779:0

crwdns2915182:0crwdne2915182:0
crwdns2933777:03crwdne2933777:0
crwdns2933779:0crwdne2933779:0

crwdns2915182:0crwdne2915182:0