crwdns2933423:0crwdne2933423:0

crwdns2944351:0crwdnd2944351:0Nintendo Entertainment System Controller Maintenancecrwdnd2944351:0crwdne2944351:0

crwdns2933797:0Andrew Churchillcrwdnd2933797:0crwdne2933797:0

crwdns2936043:0crwdne2936043:0 crwdns2933505:0crwdne2933505:0 Andrew Churchill

crwdns2933769:0crwdne2933769:0
crwdns2933771:0crwdne2933771:0
crwdns2933801:0crwdne2933801:0
crwdns2866306:0crwdne2866306:0
NES-004 Controller
Type
repair
Thing
Repairing loose soldered contacts and dirty PCB contacts
Title
Repairing an NES-004 Controller
Introduction
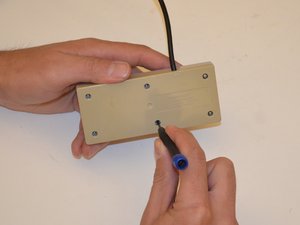
The NES-004 controller was part of the third generation of videogame systems. It evolved the concept of the videogame controller from a primarily analog or dial systems. The NES-004, introduced in America, a template that would set the stage for almost every successive controller. The NES-004 featured an all-digital input with directional controls placed on the left and action controls placed on the right. Although the NES is an older generation gaming system the games are still fun and hobbyists are still creating new 8-bit games. Designed to be simple and easy to produce, the NES controller is very durable with many still surviving to this day. While the outside of the controller seems simple, the real magic happens inside. Lying in-between the two outer gray plastic case pieces is the printed circuit board. Being made of a nonconductive material it is what the rest of the components in the controller are hooked to. Eight metal circles split in half by nonconductive material lie under the eight buttons from the face. Between this circle and the plastic buttons above is a rubber garment with a metallic piece. The metallic piece completes the broken circuit when the player presses the button. The input is sent down onto the five wires inside the cable to the console, at the solder points that connect the two. It is at the points of connections between the button to the controller and controller to the cable that issues most often arise. This guide will aim to address these common issues. Connecting the players input, with stories to play through, allows the player to immerse themselves in to a visual adventure. With the emergence of newer games created by hobbyists, and old classics, many gamers find a NES Controller in need of these simple repairs.
Time Required Min
crwdns2931287:045crwdne2931287:0
Time Required Max
crwdns2931293:01crwdne2931293:0
Imageid
crwdns2933769:0crwdne2933769:0
crwdns2933771:0crwdne2933771:0
Difficulty
Moderate
Conclusion
Thank you for using our step by step controller guide. Enjoy your NES games!
If the controller isn’t working after this guide, re-check the soldering points, and redo as necessary. If this still doesn’t fix the controller you may have to get a new wire.
Author
Public
crwdns2853046:0crwdne2853046:0

crwdns2943215:0crwdne2943215:0

  • Small Phillips Head Screwdriver x1 added.
  • Glue Gun x1 added.
  • Flathead 3/32" or 2.5 mm Screwdriver x1 added.
  • Soldering Gun / Iron and Solder x1 added.
  • Screw Holder x1 added.

crwdns2943213:0crwdne2943213:0

  • NES Controller x1 added.
  • Rubber Cement x1 added.
  • Cotton Swabs x1 added.
  • Lead-Free Solder x1 added.
  • Hot Glue Stick x1 added.
  • 99% Isopropyl Alcohol x1 added.

crwdns2935255:0crwdne2935255:0

  • Student In Progress added.

crwdns2933623:0crwdne2933623:0

crwdns2933815:01crwdne2933815:0
crwdns2933769:0crwdne2933769:0
crwdns2933771:0crwdne2933771:0
crwdns2933815:02crwdne2933815:0
crwdns2933769:0crwdne2933769:0
crwdns2933771:0crwdne2933771:0
crwdns2933815:03crwdne2933815:0
crwdns2933769:0crwdne2933769:0
crwdns2933771:0crwdne2933771:0
crwdns2933815:04crwdne2933815:0
crwdns2933769:0crwdne2933769:0
crwdns2933771:0crwdne2933771:0
crwdns2933815:05crwdne2933815:0
crwdns2933769:0crwdne2933769:0
crwdns2933771:0crwdne2933771:0
crwdns2933815:06crwdne2933815:0
crwdns2933769:0crwdne2933769:0
crwdns2933771:0crwdne2933771:0
crwdns2933815:07crwdne2933815:0
crwdns2933769:0crwdne2933769:0
crwdns2933771:0crwdne2933771:0
crwdns2933815:08crwdne2933815:0
crwdns2933769:0crwdne2933769:0
crwdns2933771:0crwdne2933771:0
crwdns2933815:09crwdne2933815:0
crwdns2933769:0crwdne2933769:0
crwdns2933771:0crwdne2933771:0
crwdns2933815:010crwdne2933815:0
crwdns2933769:0crwdne2933769:0
crwdns2933771:0crwdne2933771:0
crwdns2933815:011crwdne2933815:0
crwdns2933769:0crwdne2933769:0
crwdns2933771:0crwdne2933771:0
crwdns2933815:012crwdne2933815:0
crwdns2933769:0crwdne2933769:0
crwdns2933771:0crwdne2933771:0
crwdns2933815:013crwdne2933815:0
crwdns2933769:0crwdne2933769:0
crwdns2933771:0crwdne2933771:0
crwdns2933815:014crwdne2933815:0
crwdns2933769:0crwdne2933769:0
crwdns2933771:0crwdne2933771:0
crwdns2933815:015crwdne2933815:0
crwdns2933769:0crwdne2933769:0
crwdns2933771:0crwdne2933771:0