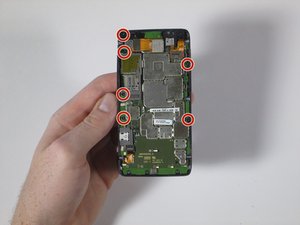
crwdns2944351:0crwdnd2944351:0Motorola Droid RAZR M Motherboard Replacementcrwdnd2944351:0crwdne2944351:0
crwdns2933797:0Ethan Lookcrwdnd2933797:0crwdne2933797:0
crwdns2936043:0crwdne2936043:0 crwdns2933505:0crwdne2933505:0 Ethan Look
- crwdns2933769:0crwdne2933769:0
- crwdns2933771:0crwdne2933771:0
- crwdns2933801:0crwdne2933801:0
| crwdns2866306:0crwdne2866306:0 |
|
|
| Type |
|
|
| Thing |
|
|
| Title |
|
|
| Introduction |
|
|
| Time Required Min |
crwdns2931287:015crwdne2931287:0
|
|
| Time Required Max |
crwdns2931287:020crwdne2931287:0
|
|
| Imageid |
crwdns2933769:0crwdne2933769:0


crwdns2933771:0crwdne2933771:0


|
|
| Difficulty |
Moderate
|
|
| Conclusion |
|
|
| Author | ||
| Public |
crwdns2853046:0crwdne2853046:0
|
crwdns2933809:0crwdne2933809:0
- crwdns2933811:01crwdnd2933811:0emptycrwdnd2933811:0Motorola Droid RAZR M Front Assembly Replacementcrwdne2933811:0
crwdns2943215:0crwdne2943215:0
- iFixit Opening Tool x1 added.
- T3 Torx Screwdriver x1 added.
- T4 Torx Screwdriver x1 added.
- T5 Torx Screwdriver x1 added.
crwdns2935255:0crwdne2935255:0
- In Progress added.
- Student In Progress added.


