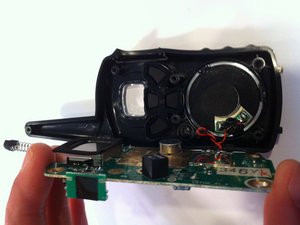
crwdns2944351:0crwdnd2944351:0Disassembling Midland X-tra Talk Radio LXT118 Speakercrwdnd2944351:0crwdne2944351:0
crwdns2933797:0James Tucker Dunncrwdnd2933797:0crwdne2933797:0
crwdns2936043:0crwdne2936043:0 crwdns2933505:0crwdne2933505:0 James Tucker Dunn
- crwdns2933769:0crwdne2933769:0
- crwdns2933771:0crwdne2933771:0
- crwdns2933801:0crwdne2933801:0
| crwdns2866306:0crwdne2866306:0 |
|
|
| Type |
|
|
| Thing |
|
|
| Title |
|
|
| Introduction |
|
|
| Time Required Min |
crwdns2931287:05crwdne2931287:0
|
|
| Time Required Max |
crwdns2931287:05crwdne2931287:0
|
|
| Imageid |
crwdns2933769:0crwdne2933769:0


crwdns2933771:0crwdne2933771:0


|
|
| Difficulty |
Easy
|
|
| Conclusion |
|
|
| Author | ||
| Public |
crwdns2853046:0crwdne2853046:0
|
crwdns2933809:0crwdne2933809:0
- crwdns2947963:01crwdnd2947963:0Disassembling Midland X-tra Talk Radio LXT118 Batteriescrwdne2947963:0
- crwdns2947963:02crwdnd2947963:0Disassembling Midland X-tra Talk Radio LXT118 Casecrwdne2947963:0
crwdns2943215:0crwdne2943215:0
- crwdns2933785:0Phillips #0 Screwdriver x1crwdne2933785:0
- crwdns2933785:0Flathead 3/32" or 2.5 mm Screwdriver x1crwdne2933785:0
- crwdns2933785:0Flush Cutter x1crwdne2933785:0
crwdns2943213:0crwdne2943213:0
- crwdns2933785:0Midland Speaker x1crwdne2933785:0
crwdns2935255:0crwdne2935255:0
- crwdns2933785:0In Progresscrwdne2933785:0
- crwdns2933785:0Community-Contributed Guidecrwdne2933785:0
- crwdns2933785:0Student In Progresscrwdne2933785:0


