crwdns2933423:0crwdne2933423:0

bObi Robotic Vacuum Power Switch Replacement

crwdns2942213:0crwdne2942213:0

  1. bObi Robotic Vacuum Power Switch Replacement, Top Cover: crwdns2935265:01crwdnd2935265:01crwdnd2935265:02crwdne2935265:0 bObi Robotic Vacuum Power Switch Replacement, Top Cover: crwdns2935265:01crwdnd2935265:02crwdnd2935265:02crwdne2935265:0
    • Remove bObi’s front wheel to access one of the screws holding bObi together.

    • Make sure the wheel is turned closer to bObi's front touch sensors. Use your screwdriver for leverage, and the wheel will pop up and out.

    • Uninstall the larger screw that sits deeper in the wheel compartment.

  2. bObi Robotic Vacuum Power Switch Replacement: crwdns2935265:02crwdnd2935265:01crwdnd2935265:03crwdne2935265:0 bObi Robotic Vacuum Power Switch Replacement: crwdns2935265:02crwdnd2935265:02crwdnd2935265:03crwdne2935265:0 bObi Robotic Vacuum Power Switch Replacement: crwdns2935265:02crwdnd2935265:03crwdnd2935265:03crwdne2935265:0
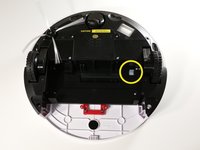
    • Remove bObi's dustbin.

    • Uninstall the 2 screws close to the bin and 2 smaller screws above her main brushes.

  3. bObi Robotic Vacuum Power Switch Replacement: crwdns2935265:03crwdnd2935265:01crwdnd2935265:03crwdne2935265:0 bObi Robotic Vacuum Power Switch Replacement: crwdns2935265:03crwdnd2935265:02crwdnd2935265:03crwdne2935265:0 bObi Robotic Vacuum Power Switch Replacement: crwdns2935265:03crwdnd2935265:03crwdnd2935265:03crwdne2935265:0
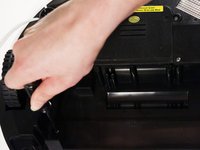
    • Lift the brush holder. To detach completely, unplug it from bObi.

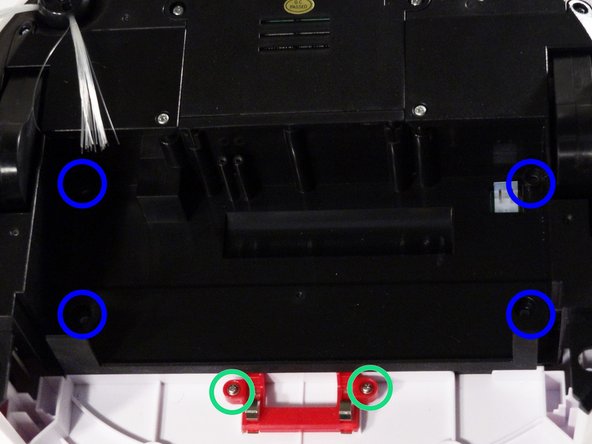
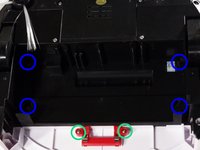
    • Remove the two screws on the dustbin contact point holder inside bObi.

    • There are 4 screws beneath the main brushes. Uninstall these, and open bObi up to expose her main circuit board.

  4. bObi Robotic Vacuum Power Switch Replacement: crwdns2935265:04crwdnd2935265:01crwdnd2935265:03crwdne2935265:0 bObi Robotic Vacuum Power Switch Replacement: crwdns2935265:04crwdnd2935265:02crwdnd2935265:03crwdne2935265:0 bObi Robotic Vacuum Power Switch Replacement: crwdns2935265:04crwdnd2935265:03crwdnd2935265:03crwdne2935265:0
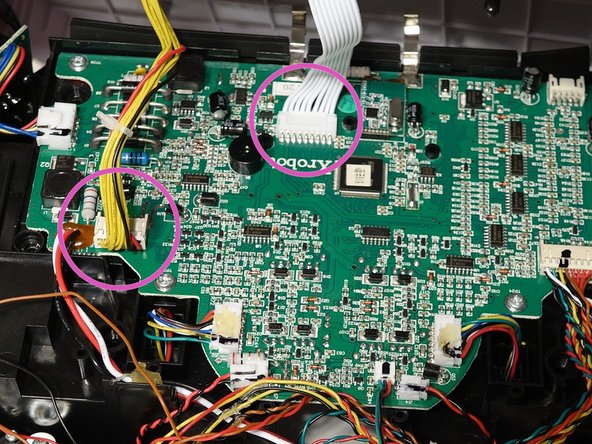
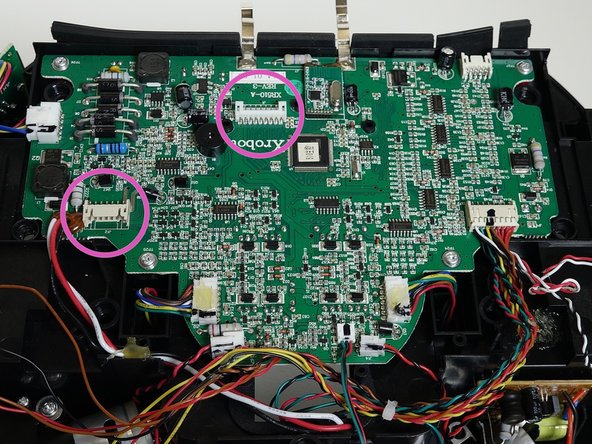
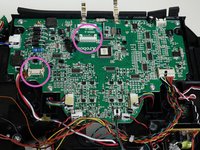
    • Detach the two circuit plugs connecting bObi's cover to the main board and the cover will be completely removed.

  5. bObi Robotic Vacuum Power Switch Replacement, Power Switch: crwdns2935265:05crwdnd2935265:01crwdnd2935265:03crwdne2935265:0 bObi Robotic Vacuum Power Switch Replacement, Power Switch: crwdns2935265:05crwdnd2935265:02crwdnd2935265:03crwdne2935265:0 bObi Robotic Vacuum Power Switch Replacement, Power Switch: crwdns2935265:05crwdnd2935265:03crwdnd2935265:03crwdne2935265:0
    • Slide the power switch up and out of its holder.

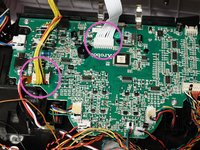
    • Unplug its wires from the main board.

  6. bObi Robotic Vacuum Power Switch Replacement: crwdns2935265:06crwdnd2935265:01crwdnd2935265:03crwdne2935265:0 bObi Robotic Vacuum Power Switch Replacement: crwdns2935265:06crwdnd2935265:02crwdnd2935265:03crwdne2935265:0 bObi Robotic Vacuum Power Switch Replacement: crwdns2935265:06crwdnd2935265:03crwdnd2935265:03crwdne2935265:0
    • Slide the new power switch into the holders on bObi.

    • Plug it in to the main board and begin closing bObi up. For steps on how to close bObi, see Closing bObi's Cover Post-Repair

crwdns2915888:0crwdne2915888:0

To reassemble your device, follow the guide on closing bObi Closing bObi's Cover Post-Repair

Chelsea

crwdns2935283:009/24/14crwdne2935283:0

2.278 crwdns2915208:0crwdne2915208:0

crwdns2935297:031crwdne2935297:0

crwdns2944067:00crwdne2944067:0

crwdns2917038:0crwdne2917038:0

crwdns2936625:0crwdne2936625:0:

crwdns2936751:024crwdne2936751:0 0

crwdns2936753:07crwdne2936753:0 0

crwdns2936753:030crwdne2936753:0 8

crwdns2942667:0crwdne2942667:0 291