crwdns2915892:0crwdne2915892:0
This camera replacement guide should only be done once the prerequisite steps have been fully completed. Skipping any steps can lead to damage to your device.
crwdns2942213:0crwdne2942213:0
-
-
Remove the two screws on the bottom using a Phillips #00 screwdriver.
-
-
-
Using a spudger, start prying the case apart by working around the edge slowly.
-
-
-
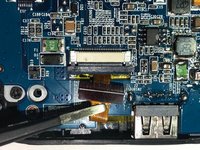
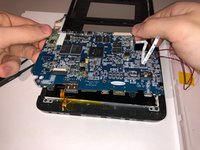
Peel back the touch interface chip (which is on the top right of the motherboard, covered in yellow tape.)
-
-
-
Flip up the small gate and unplug the ribbon cable shown.
-
-
-
-
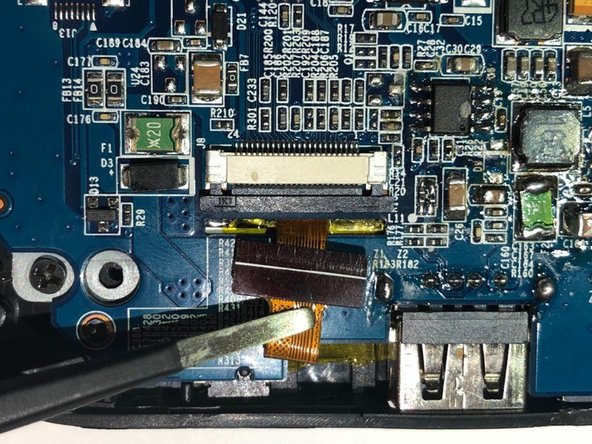
Using a Phillips #00 screwdriver, remove the screws highlighted with the orange rings as shown in the picture.
-
-
crwdns2935267:0crwdne2935267:0Tweezers$4.99
-
Slide back the plastic latch for the main display cable.
-
Carefully unplug the cable with tweezers.
-
-
-
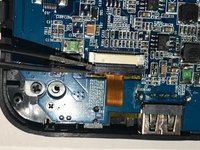
Slide back the plastic latch for the camera cable.
-
Carefully unplug the cable with tweezers.
-
-
-
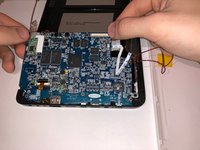
Lift up the motherboard assembly, starting by lifting up the top.
-
-
-
Peel back the adhesive tape holding the camera in place.
-
Remove the camera from the device.
-


To reassemble your device, follow these instructions in reverse order.
To reassemble your device, follow these instructions in reverse order.
crwdns2935221:0crwdne2935221:0
crwdns2935227:0crwdne2935227:0
crwdns2915084:0crwdne2915084:0

University of North Texas, Team S6-G1, Thompson Fall 2018 crwdns2935289:0University of North Texas, Team S6-G1, Thompson Fall 2018crwdne2935289:0
UNT-THOMPSON-F18S6G1
crwdns2931471:03crwdne2931471:0
crwdns2935297:05crwdne2935297:0